Loading ...
Loading ...
Loading ...
AXIS M5014 PTZ Dome Network Camera
PTZ (Pan Tilt Zoom)
PTZ (Pan Tilt Zoom)
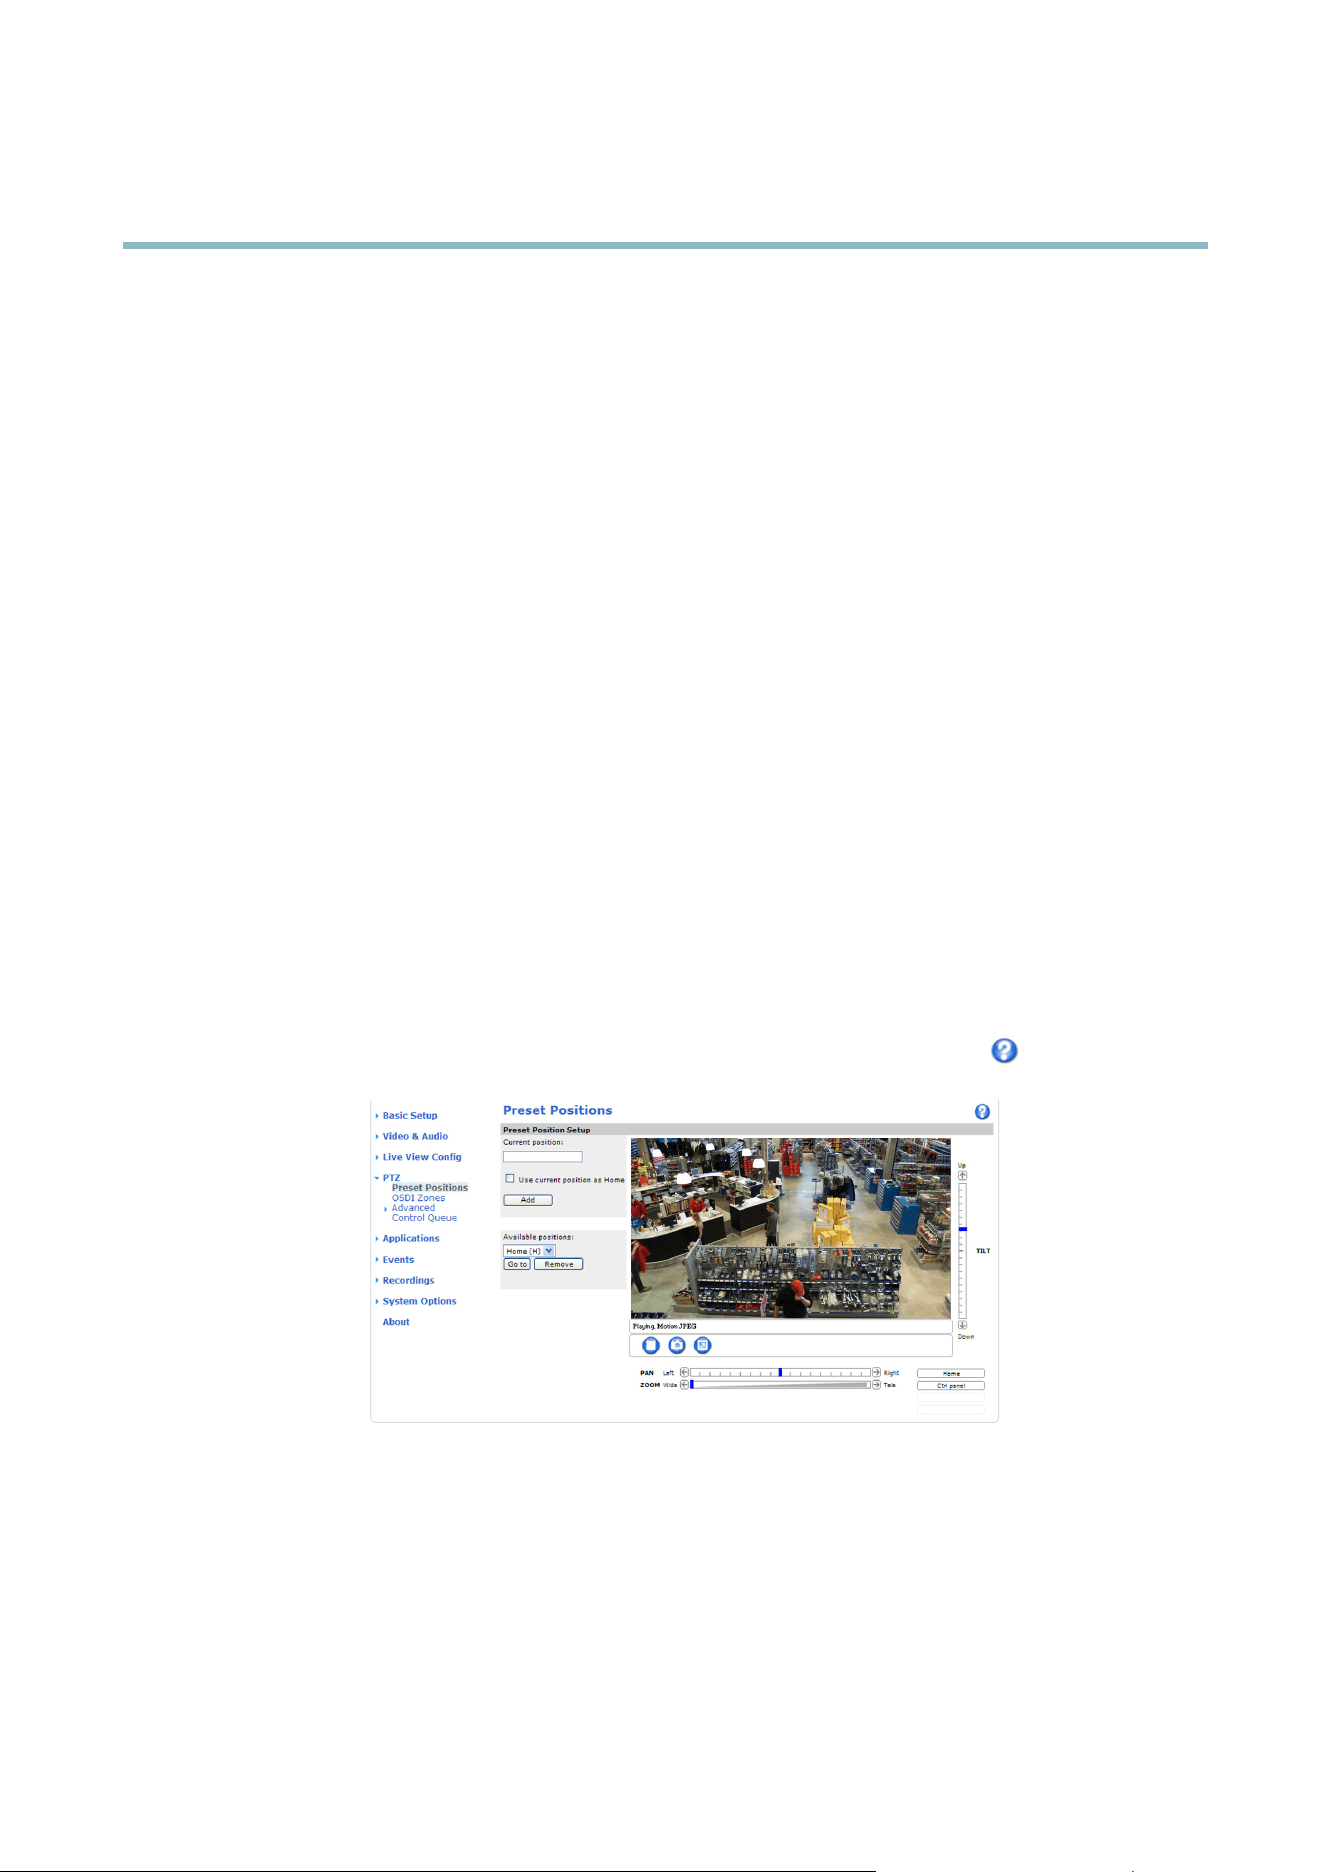
Preset positions
A preset position is a predefined view that can b e used to quickly steer the camera to a specific location. Preset positions can
be accessed in several w ays:
• By selecting the preset from the Preset positions d rop-down list in the Live View Page.
• When setting up Events.
To add a preset position:
1. Go to PTZ > Preset Positions.
2. Use the pan, tilt and zoom controls to steer the camera view to the desired position.
3. Enter a descriptive name in the Current position field.
4. If required, select Use current position as Home.
5. Click Add. The camera’s position and focus settings are saved as a preset position.
The Hom e position is readily accessible by clicking the Home button on the Live View page and in the Preset Positions setup window.
To set a cust omize d home position, select Use current position as Home when adding a preset position. The user-defined
home
position will have (H) added, for example, Entrance (H). The default H ome position, called “Home”, w ill still be availa ble.
The product can be configured to return to the Home position when it has been inactive for a specified length of time. Enter
thelengthoftimeintheReturn to home when inactive field and click Save. Set the time to ze ro to prevent the product from
automatically returning to the Home position.
To include the preset position name in the overlay text
,gotoVideo & Audio,selectInclude overlay text and enter the modifier #P in
the field. For more information about modifiers, see
File Naming & Date/Time Formats
in the online help .
OSDI Zones
On-Screen Direction Indicator (OSDI) zones can be included in the overlay text (see
Overlay, on page 16
)toaidtheusertonavigate
the Axis product. Each OSDI zone is set up with coordinates and a descriptive name.
OSDI zones are set up under PTZ > OSDI Zones. The Axis product uses the coordinates of the center of the view to set the lower
left and upper right zone areas. First navigate to where you would like the lowermost left point of the OSDI zone to be located.
Click Get to set the coordinates. Proceed to where the upper right point of zone should be located and click Get. Give the zone a
descriptive name and click OK.
19
Loading ...
Loading ...
Loading ...