Loading ...
Loading ...
Loading ...

Acoustic Imager
File Transfer
17
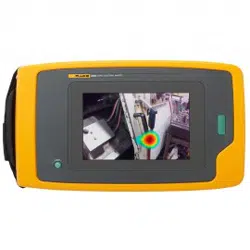
7. When the area of interest clearly shows, push the Capture
button. The Imager saves the image to memory.
Tip: Sound signals reflect, particularly on smooth and flat
surfaces. In certain conditions, the Imager shows a steady spot on
the source of noise and one or more steady spots from the
reflections. Move the Imager around to help discriminate the sound
source from the reflections. The sound source remains in the
same location, while reflections will move.
Use folders to organize your files. New file captures save to the
folder name that shows on the display. You have the option to
review files by folder name or timestamp.
To select a folder or create a new folder name:
1. Tap on the folder name that shows at the bottom of the
display.
A list of folder names pops up with the option, Create Folder.
2. When you select Create Folder, use the keyboard to input a
new file name.
For more information about how to view the images in memory,
see Memory.
File Transfer
To transfer saved files from the Imager to a PC:
1. Use the provided USB cable to connect the Imager to the PC.
A USB drive is added to the list of drives on your PC.
2. Open the added USB drive to view the saved images or video
files.
3. Copy the files you want to the local PC drive.
4. When transfer is complete, remove the USB drive from your
PC.
The Fluke Connect Desktop application is another method you can
use to download images or video files. See Import Saved Images
or Video Files with Fluke Connect Desktop.
Import Saved Images or Video Files with Fluke
Connect Desktop
Fluke Connect Desktop is an application installed on a local PC.
To import saved images or video files:
1. Start the Fluke Connect Destop application on your PC.
2. Turn off the Imager.
3. Connect the Imager to the PC with a USB/USB-C cable.
4. Turn on the Imager.
5. Open Fluke Connect Desktop on the PC.
The Fluke ii900 Series shows in the TOOLS tab.
6. Select DOWNLOAD.
7. Use DOWNLOAD ALL or SELECT FILES to transfer all or a
selection of files to Fluke Connect Desktop.
8. Select the destination folder and select OK.
9. Confirm deletion of downloaded files from the Imager or select
CANCEL to proceed and keep the files in the Imager.
Downloaded files are now available in the MEASUREMENTS
tab.
1.888.610.7664 sales@GlobalTestSupply.com
Fluke-Direct
.com
Loading ...
Loading ...