
Loading ...
Loading ...
Loading ...
Operating the Meter from the Front Panel
Power-Up Configuration 3
3-25
• Range mode on primary display (manual or autorange)
• Measurement rate (slow, medium, fast)
• Dual display status (active or inactive)
• Any combination of selected function modifiers
• Touch Hold level (1, 2, 3, 4)
• Last recorded minimum and maximum values for MINMAX modifier
• Last recorded relative base
• Relative base shown in secondary display (enabled or disabled)
• Last HI-LO settings in compare mode
• Trigger mode (1, 2, 3, 4, 5)
• Echo setting (on or off)
• dB and dB reference
• RS-232 settings
• PRINT mode
• Data format (with or without UNIT) sending through the RS-232
Power-Up Configuration
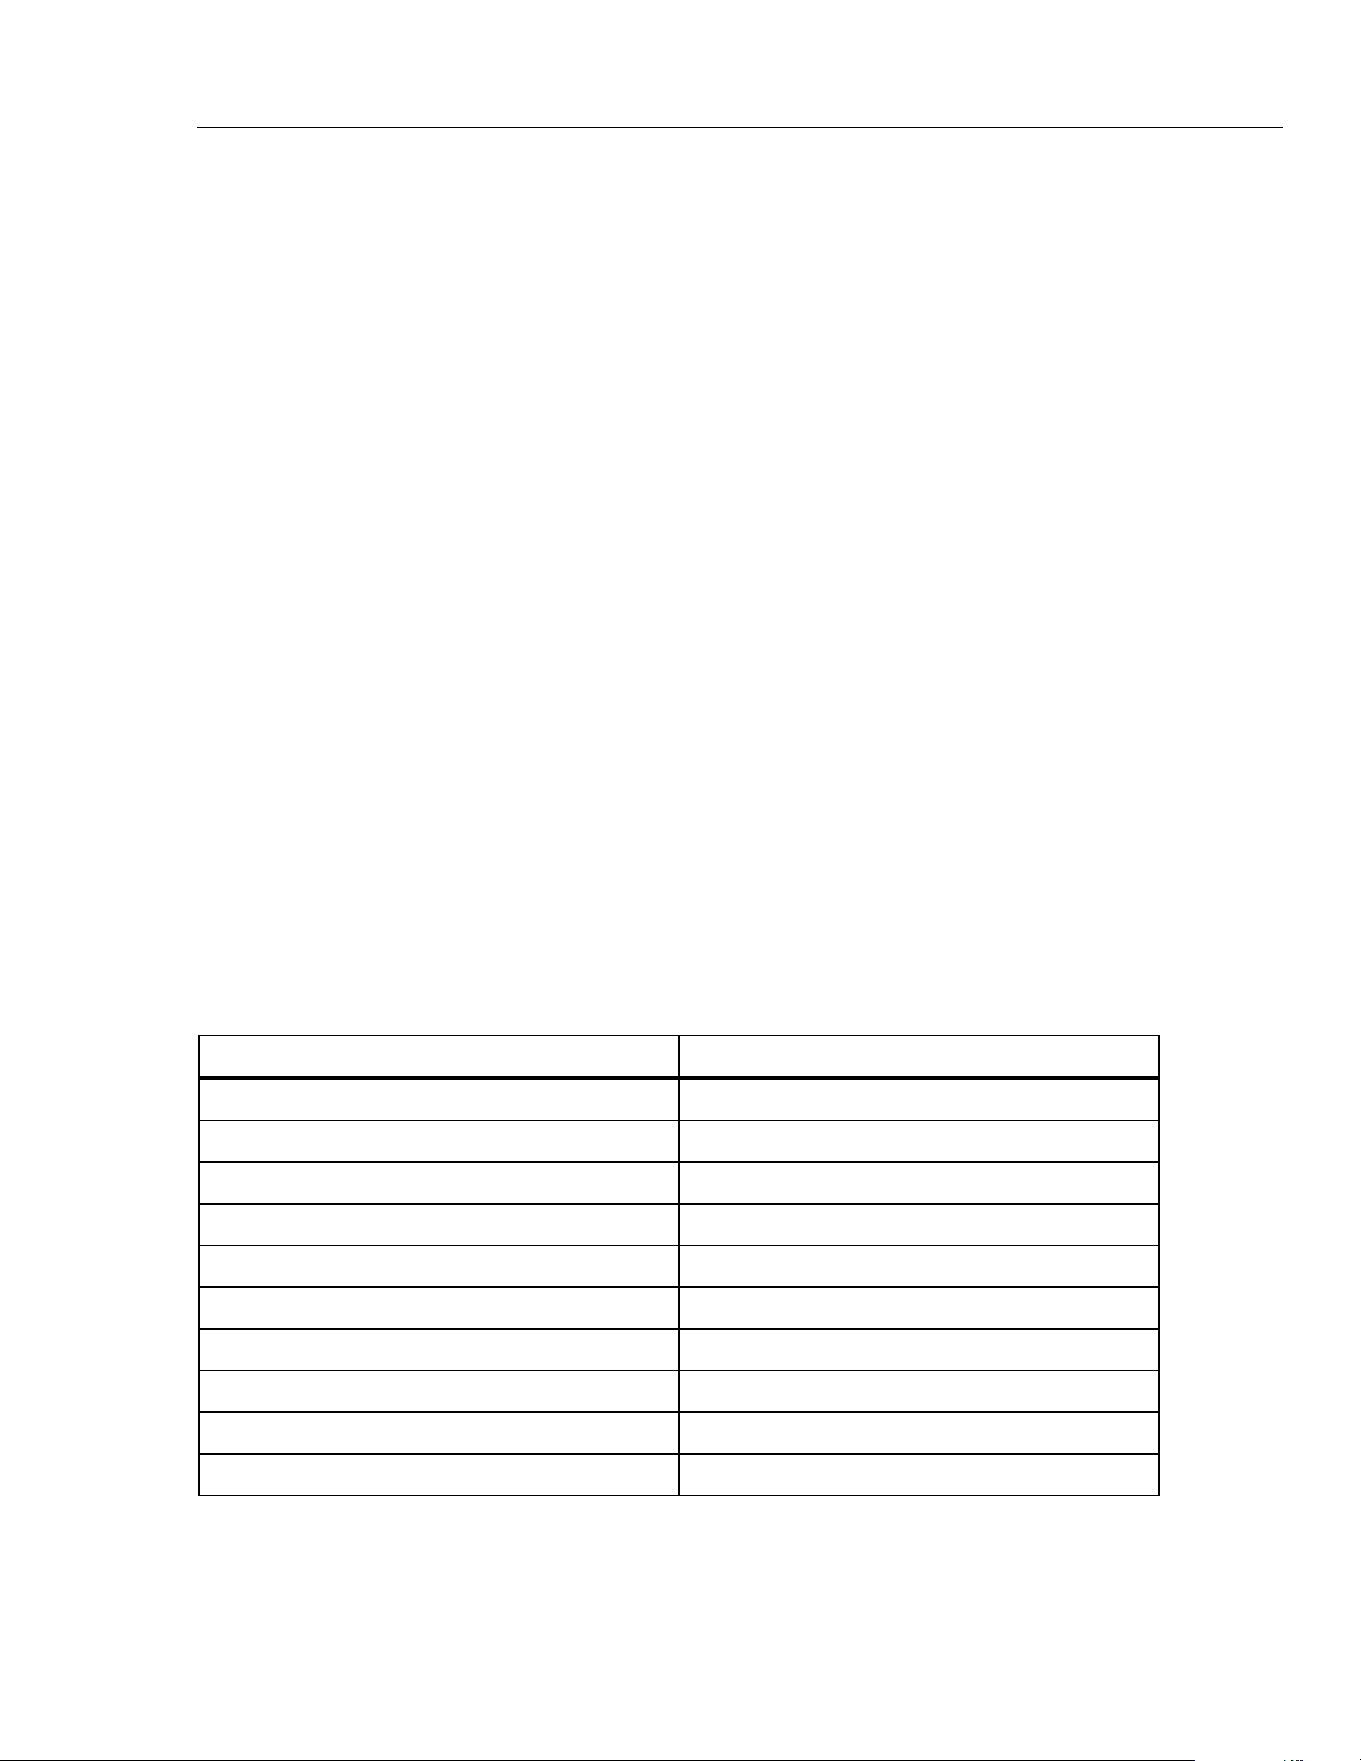
When the Meter is turned on and the power-up sequence is complete, the Meter defaults
to the power-up configuration listed in Table 3-9.
The RS-232 baud rate, parity, and echo mode are not changed when power is cycled off
and on. These parameters remain as set until changed by the user.
Table 3-9. Factory Power-Up Configuration
Parameter Configuration
Function setting DC volts
Range mode Autorange
Reading rate Slow (2.5 readings/second)
Touch Hold sensitivity level 1 (5 % of reading)
High/low values for Compare mode (COMP) 0
Minimum and maximum values in MIN MAX modifier 0
Relative base 0
Relative base in secondary display Disabled
Trigger type 1 (Internal)
Trigger type 0
Calibration
Refer to the 8808A Calibration Manual for instructions on calibrating the Meter.
1.888.610.7664 sales@GlobalTestSupply.com
Fluke-Direct.com
Loading ...
Loading ...
Loading ...