
USER MANUAL
VAC-CL-09E

RKW Quality Assurance, United Kingdom
WARRANTY
This product is guaranteed for 12 months from the date of original purchase. If any defect arises due
to faulty materials of workmanship, the faulty products must be returned to the place of purchase.
Refund or replacement is at the discretion of the retailer.
The following conditions apply:
•
•
The product must be returned to the retailer with proof of purchase.
The product must be installed and used in accordance with the instructions contained in this
instruction guide.
•
•
•
•
It must be used only for domestic purposes.
It does not cover wear and tear, damage, misuse or consumable parts.
RKW has limited liability for incidental or consequential loss or damage.
This guarantee is only Valid in the UK and Eire Only.
An extended warranty is available for this appliance.
See back page for details.
2
TECHNICAL DATA
Description:
Model:
Handheld Vacuum Cleaner
P009E
Battery Charger
Input:
100-240V ~50/60Hz 0.2A
Output: DC 26V 0.4A
Battery: 22.2V 2000mAh
150W
Product Rating:
DOCUMENTATION
We declare that this product conforms to the following product legislation in accordance with the
following directive(s):
2014/30/EU
2014/35/EU
2011/65/EU
Electromagnetic Compatibility Directive.
Low Voltage Directive.
Restriction of Hazardous Substances Directive.

PRODUCT SAFETY
When using any electrical appliance, basic safety precautions should
always be followed including the following:
• Check that the voltage of the
main circuit corresponds with
the rating of the appliance
before operating.
• Children should not play with the
appliance.
• This appliance can be used
by children aged from 8 years
and above and persons with
reduced physical, sensory or
mental capabilities or lack of
experience and knowledge
if they have been given
• If the supply cord or appliance
is damaged, stop using the
appliance immediately and seek
advice from the manufacturer,
its service agent or a similarly
qualified person.
supervision or instruction
concerning use of the appliance
in a safe way and understand
the hazards involved.
• Do not let the cord hang over
the edge of a table or counter or
let it come into contact with any
hot surfaces.
• Cleaning and user maintenance
should not be undertaken by
children without supervision.
• Do not carry the appliance by
the power cord.
• Take care when any appliance is
used near pets.
• Do not use any extension cord
with this appliance.
• Do not use this product for
anything other than its intended
use.
• Do not pull the plug out by the
cord as this may damage the
plug and/or the cable.
• Do not immerse cords, plugs
or any part of the appliance in
water or any other liquid.
• Switch off at the wall socket
then remove the plug from
the socket when not in use or
before cleaning.
• This appliance is for household
use only.
• Switch off and unplug before
fitting or removing tools/
attachments, after use and
before cleaning.
• Do not use the appliance
outdoors.
• Use extra care when cleaning on
stairs.• Close supervision is necessary
when any appliance is used by
or near children.
• Do not immerse cord, plug or
machine in water or any other
liquid.
3

• Use only original accessories.
• Do not vacuum liquids, sharp
objects like nails or drawing
pins.
• In the unlikely event the
appliance develops a fault,
stop using it immediately and
seek advice from the service
department.
HIGH VOLTAGE ROTATING PARTS
4
• Keep hair, loose clothing,
fingers, feet and all parts of body
away from moving parts.
• Do not close doors on the cord
or move the vacuum by pulling
the cord around sharp edges or
corners.
• Unplug cleaner when not in use.
• Turn all controls off before
unplugging from mains.
WHAT’S IN THE BOX
Instruction Manual
Rechargeable battery
Charging Station
Charging Adaptor
1.
2.
3.
4.
5.
6.
7.
8
9
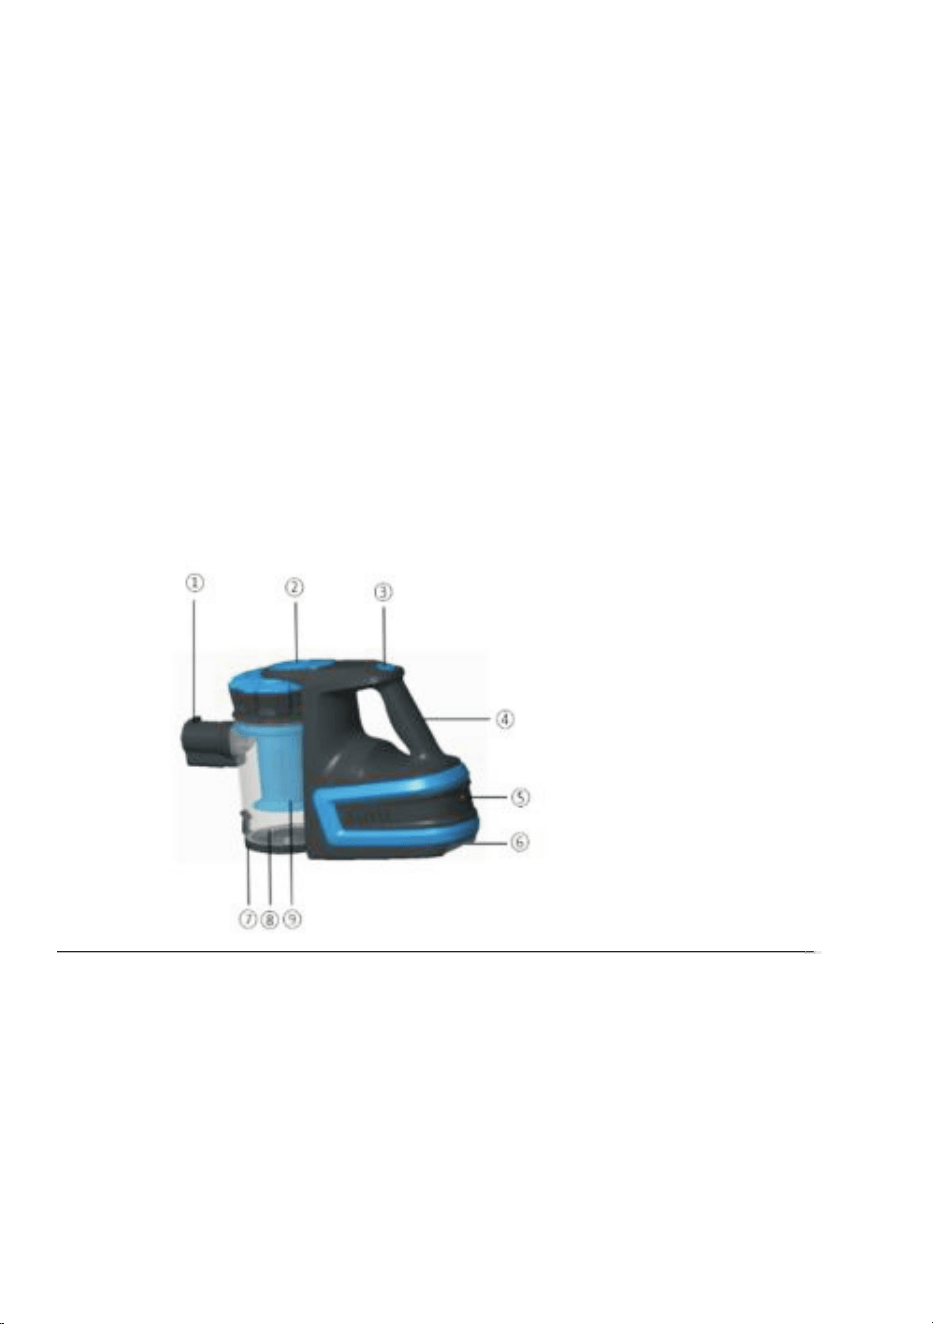
Suction Pipe
Release Button
Power Button
Handle
Charging Socket
Rechargeable Battery
Dust Cup Cover
BEFORE YOUR FIRST USE:
1.
2.
3.
Remove the product from the box.
Remove any packaging from the product.
Please retain all packaging until you have checked and counted all the parts and the contents
against the parts list.
4. Charge the rechargeable battery.
Dispose of the packaging in a responsible manner.
5
Dust Cup
Filter System
USING YOUR APPLIANCE
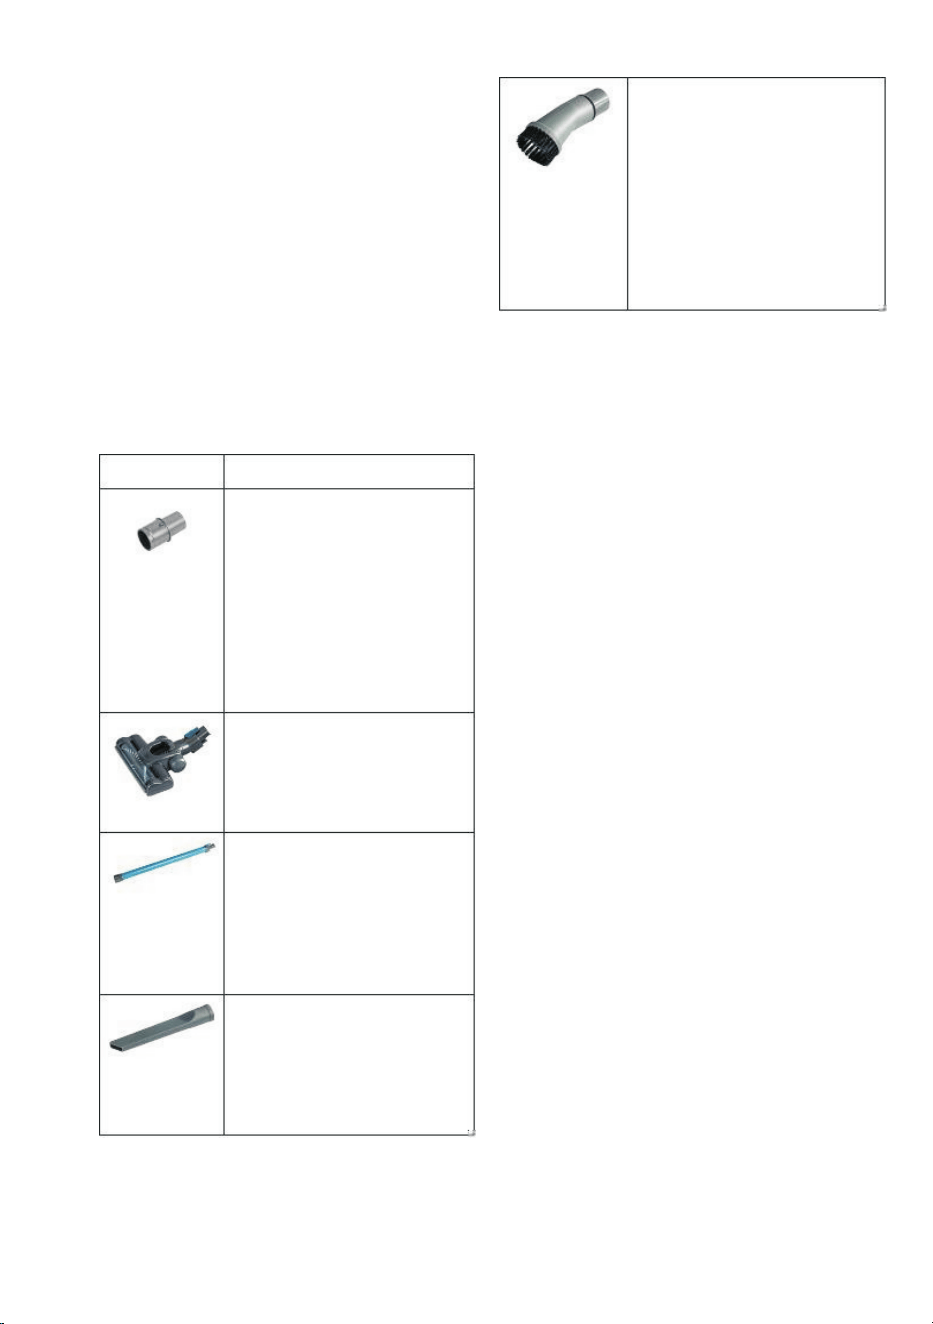
Accessories
The Rechargeable Handy
Vacuum comes with a
dusting brush. The dusting
brush can be attached to
the main connector of the
extension pipe, and used
to clean window blinds,
lampshades, mirrors and
other areas that require
delicate cleaning.
1.
2.
Assemble the nozzle and tube.
Pull out the mains cable to its full length
and plug into the mains supply.
3.
4.
Switch on by pressing the On/Off switch
button.
Your appliance is now ready for normal
use.
CHARGING
A full charge takes approximately 4.5 hours.
Accessories
Accessory
1.
2.
To charge the vacuum, remove the
rechargeable battery from the bottom of
the vacuum.
Use
To remove the battery, push the battery
lock button in, and pull.
Main
Connector
3.
4.
Fit the battery onto the charging station.
Connect the charging adaptor cable to
the charging station, and then plug in at
the mains.
The floor brush can be
attached to either the
extension pipe or the main
connector, and can be used
to clean carpets and floors.
5.
6.
When the charger is plugged in, both
indicator lights on the charging station will
illuminate.
Floor Brush
There is one extension pipe
included. The floor glider
can directly attach to the
extension pipe. To attach the
other accessories, first attach
the main connector to the
extension pipe.
When the battery is fully charged, the red
indicator light will go out.
Extension
Pipe
The crevice tool can be
connected to the extension
pipe or the main connector,
and can be used to clean in
tight areas, such as corners
and under units.
Crevice Tool
6
Dusting
brush
Put the thicker end of the
main connector into the silver
suction pipe.
If the connector feels loose,
you may need to insert the
other end.
The main connector is all
you need to connect to the
extension pipe or any other
accessories.
1.
2.
3.
Once the required accessories have been Re-assemble when completely dry.
attached, the vacuum is ready for use.
The power button is located on the
bottom of the handle.
Push and hold the power button to use.
WARNING:
DO NOT IMMERSE ANY PART OF THE
APPLIANCE IN WATER
7
7.
8.
Switch off at the mains and unplug.
Remove the charging adaptor from the
charging station, and then remove the
battery.
CLEANING AND CARE
CLEANING THE DUST CUP & FILTERS
In order to achieve the best performance,
empty the dust cup container and clean the
dust cup filter after each use.
Attach the battery to the bottom of the
vacuum,
1. Turn off the vacuum cleaner and remove
the charging cable.
ATTACHING THE TOOLS TO THE MAIN
BODY
2. Hold the vacuum over the bin or bin bag.
With one hand holding the handle, unclip
the dust cup cover to open.
1. Push the main connector into the suction
pipe opening or connect the extension
pipe.
3.
4.
5.
The dust cup cover will pop open and the
dust and debris will empty into the bin.
2.
3.
Push the required tool into the other end
of the main connector.
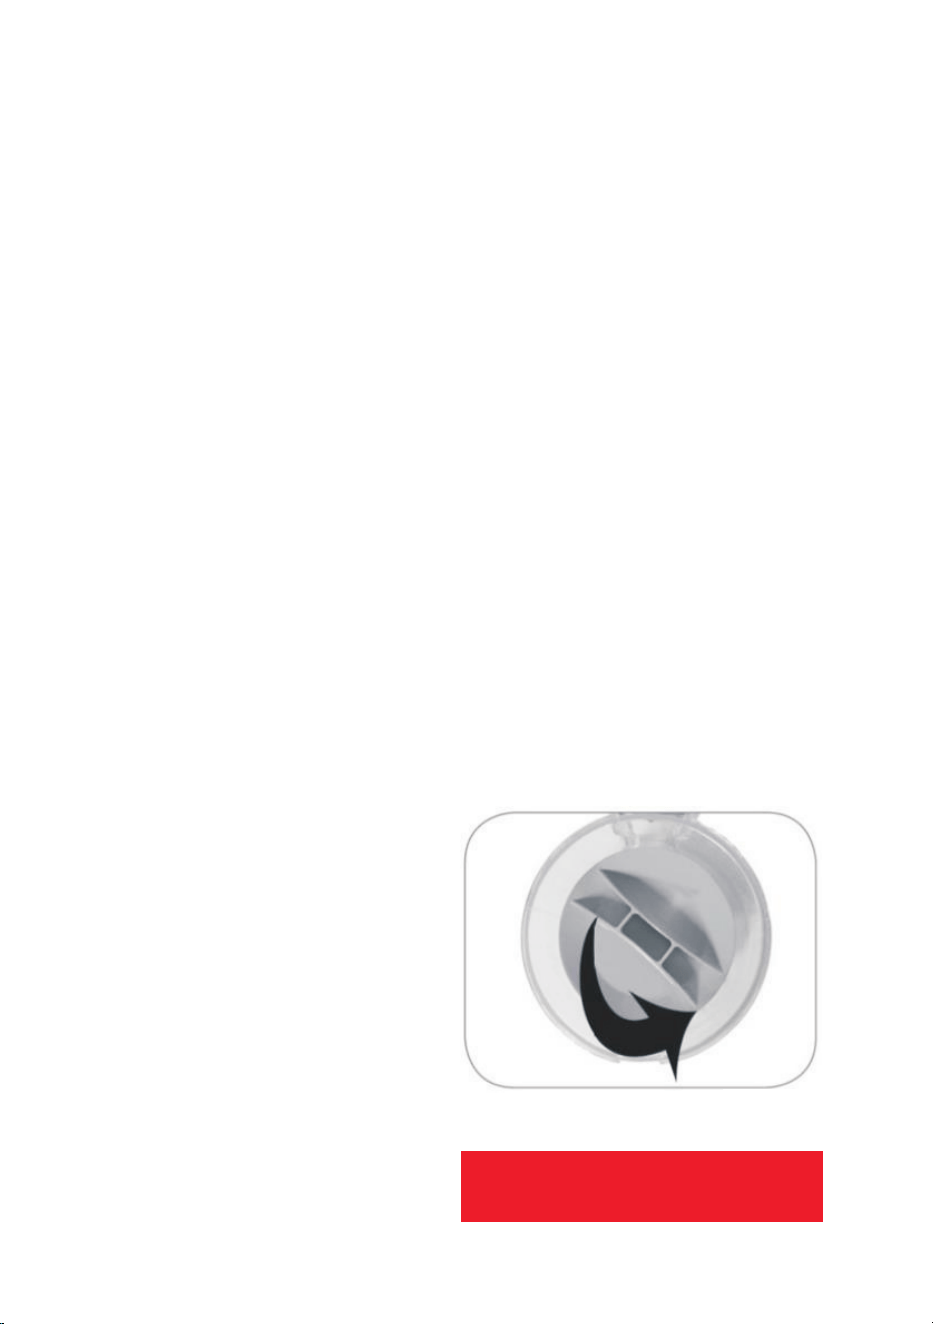
To remove the filters, turn the filter handle
anti-clockwise.
When using the extension pipe ensure the
end attachment is
fi
tted securely. When
connecting the extension pipe to the
suction pipe, or the floor brush, ensure all
tabs are aligned.
Remove the inner filter from the outer filer
and rinse both in warm water and then let
air dry for 24 hours before re-assembling.
6.
7.
Ensure you remove all dust and debris
from both filters. A soft bristled brush can
be used to remove any blocked dirt from
the outer
fi
lter.
POWER BUTTON

TROUBLESHOOTING
Problem Possible Solution
Vacuum will
not work
The vacuum may have run out of charge. Charge fully.
Vacuum will
not pick-up or
suction power
is weak
The dust cup container may be full, or the filters may require cleaning.
Empty the dust cup container and clean the filters.
Dust is
escaping from
the vacuum
The filter may not be installed correctly, or the dust cup container may
be full. Empty the dust cup container and reassemble the filter system.
8
