Loading ...
Loading ...
Loading ...
PGX
™
COMMERCIAL CHARGING 1600W HUB — PGX1600H/PGX1600H-FC 23
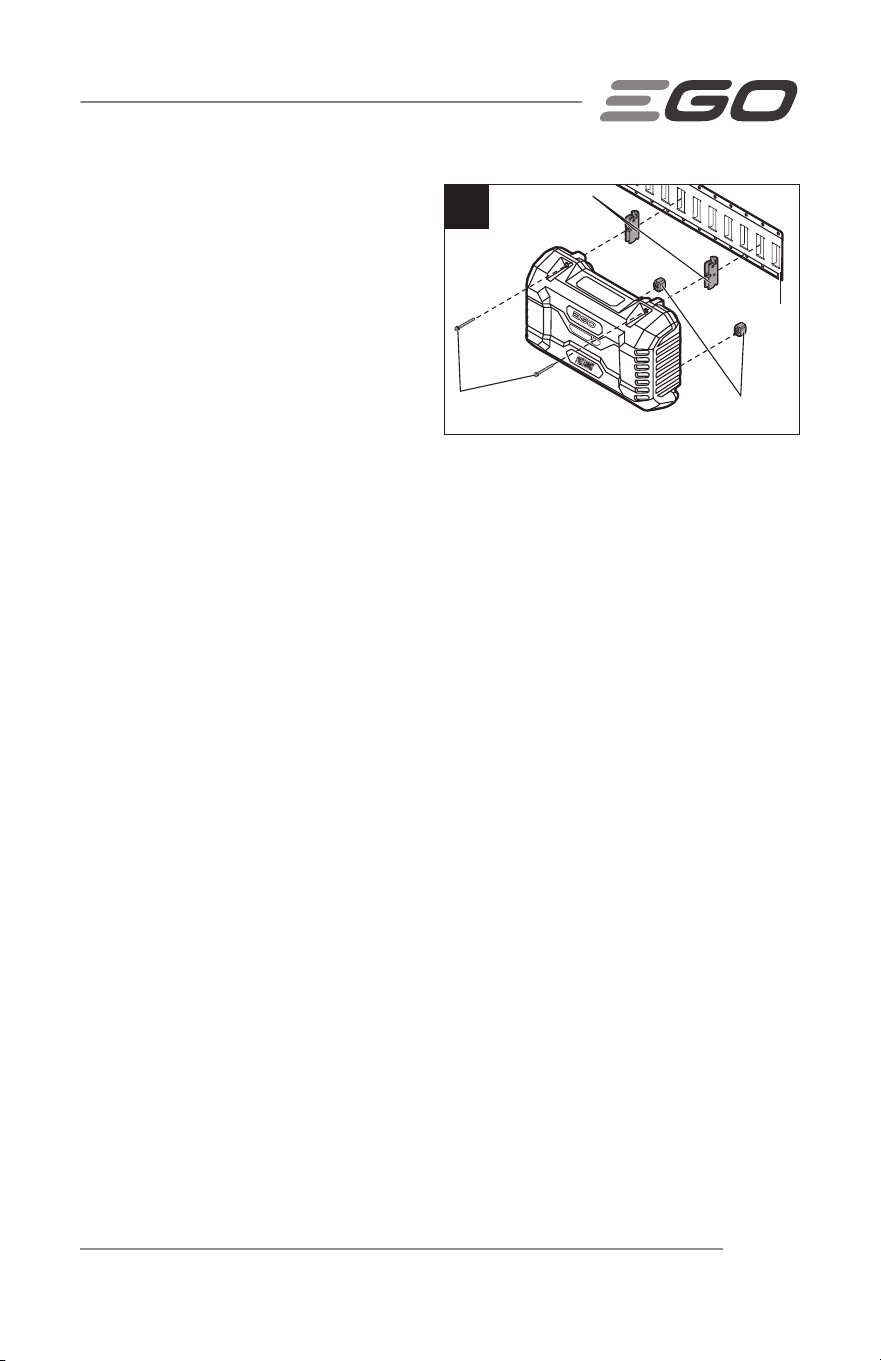
Mounting onto E-track Rail
(Fig. 5)
EGO E-track mounting kit AEK1000 (sold
separately) is required to mount the hub
onto an E-track rail.
1. Disconnect the hub from power
outlet.
2. Remove the two rubber blocks
shown in Fig. 4a.
3. Use the assembly tool (included in the kit) to install the E-track clips (included in
the kit) into the recessed areas vacated by the rubber blocks as shown in Fig. 5.
4. Use the assembly tool to secure each E-track clip to the hub using M5 bolt and
washer sets (included in the kit) .
5. Insert two rubber bumpers (included in the kit) into the outer lower slots on the
back of the hub.
6. Snap the hub to the E-track rail using the E-track clips as shown and make sure
the hub is secured to the rail.
7. To remove the hub from the E-track rail press the release levers on the E-track
clips and pull the hub away.
NOTE:
The hole in the E-track clip can function as an anti-theft device using a padlock
(not included). The shackle diameter range is 13/64” – 9/32" (5 – 7 mm).
BLUETOOTH
®
/WI-FI WIRELESS TECHNOLOGY
Products with built-in Bluetooth
®
/WI-FI wireless technology can connect to mobile
devices.
Please visit www.egopowerplus.com/commercial for instructions on how to use the
Bluetooth
®
/WI-FI function.
The Bluetooth
®
/WI-FI indicator will light up when the hub is connected to your mobile
device.
NOTE: The Bluetooth
®
word mark and logos are registered trademarks owned by
Bluetooth SIG, inc. and any use of such marks by EGO is under license.
5
Bolt and washer set (2)
E-track Clip(2)
Rubber Bumper
(2)
E-track Rail
Loading ...
Loading ...
Loading ...