Loading ...
Loading ...
Loading ...
8
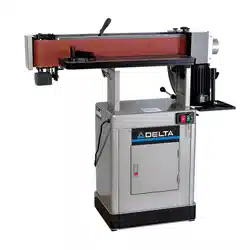
FIGURE 2
CABINET ASSEMBLY
TOOLS REQUIRED
• 12mm wrench
• Phillips head screw driver
PARTS
• Rubber Feet (4)
• Side Cabinet Panels (2)
• Front Cabinet Panel with
Door (1)
• Rear Cabinet Panel (1)
• Cabinet Shelf (1)
HARDWARE NEEDED
• 5/16 inch x 5/8 inch screws (4)
• 5/16 inch flat washers (20)
• 5/16 inch hex nuts (12)
• 5/16 inch x 5/8 inch hex cap bolts (8)
• 5/16 inch lock washers (8)
• M5x10 pan head screws (2)
• M5 flat washers (2)
• M5 lock washers (2)
Before beginning assembly, clean all rust protected
surfaces with a mild solvent. Do not use paint or lacquer
thinner, gasoline, or mineral spirits; as these will damage
painted surfaces.
NOTE: To ensure the top cabinet surface, where you will
mount the tool, is level and flush, assemble the cabinet
upside down on a flat surface.
1. Referring to Figure 2, attach the four rubber pads (A) to
the bottoms of the side panels (B) with four each 5/16
inch x 5/8 inch screws, 5/16 inch flat washers and 5/16
inch hex nuts.
2. Use four 5/16 inch x 5/8 inch hex cap screws, eight 5/16
inch flat washers, four 5/16 inch lock washers, and four
5/16 inch hex nuts to attach the side panels (B) to the
front panel (C). Hand tighten only.
3. Attach the rear cabinet panel (D) to the side panels using
four 5/16 inch x 5/8 inch hex cap screws, eight 5/16 inch
flat washers, four 5/16 inch lock washers, and four 5/16
inch hex nuts.
4. Turn cabinet right side up on a level surface and ensure
the top edges of all panels are flush.
5. Install the cabinet shelf (E) to the inside of the cabinet
using two M5x10 pan head screws, two M5 flat washers
and two M5 lock washers.
6. Tighten all hardware.
MOUNTING THE TABLE ASSEMBLY TO THE CABINET
TOOLS REQUIRED
• 12mm wrench
PARTS
• Table Assembly
HARDWARE NEEDED
• 5/16 inch x 1 1/4 inch hex cap screws (2)
• 5/16 inch lock washers (2) 5/16 inch flat washers (2)
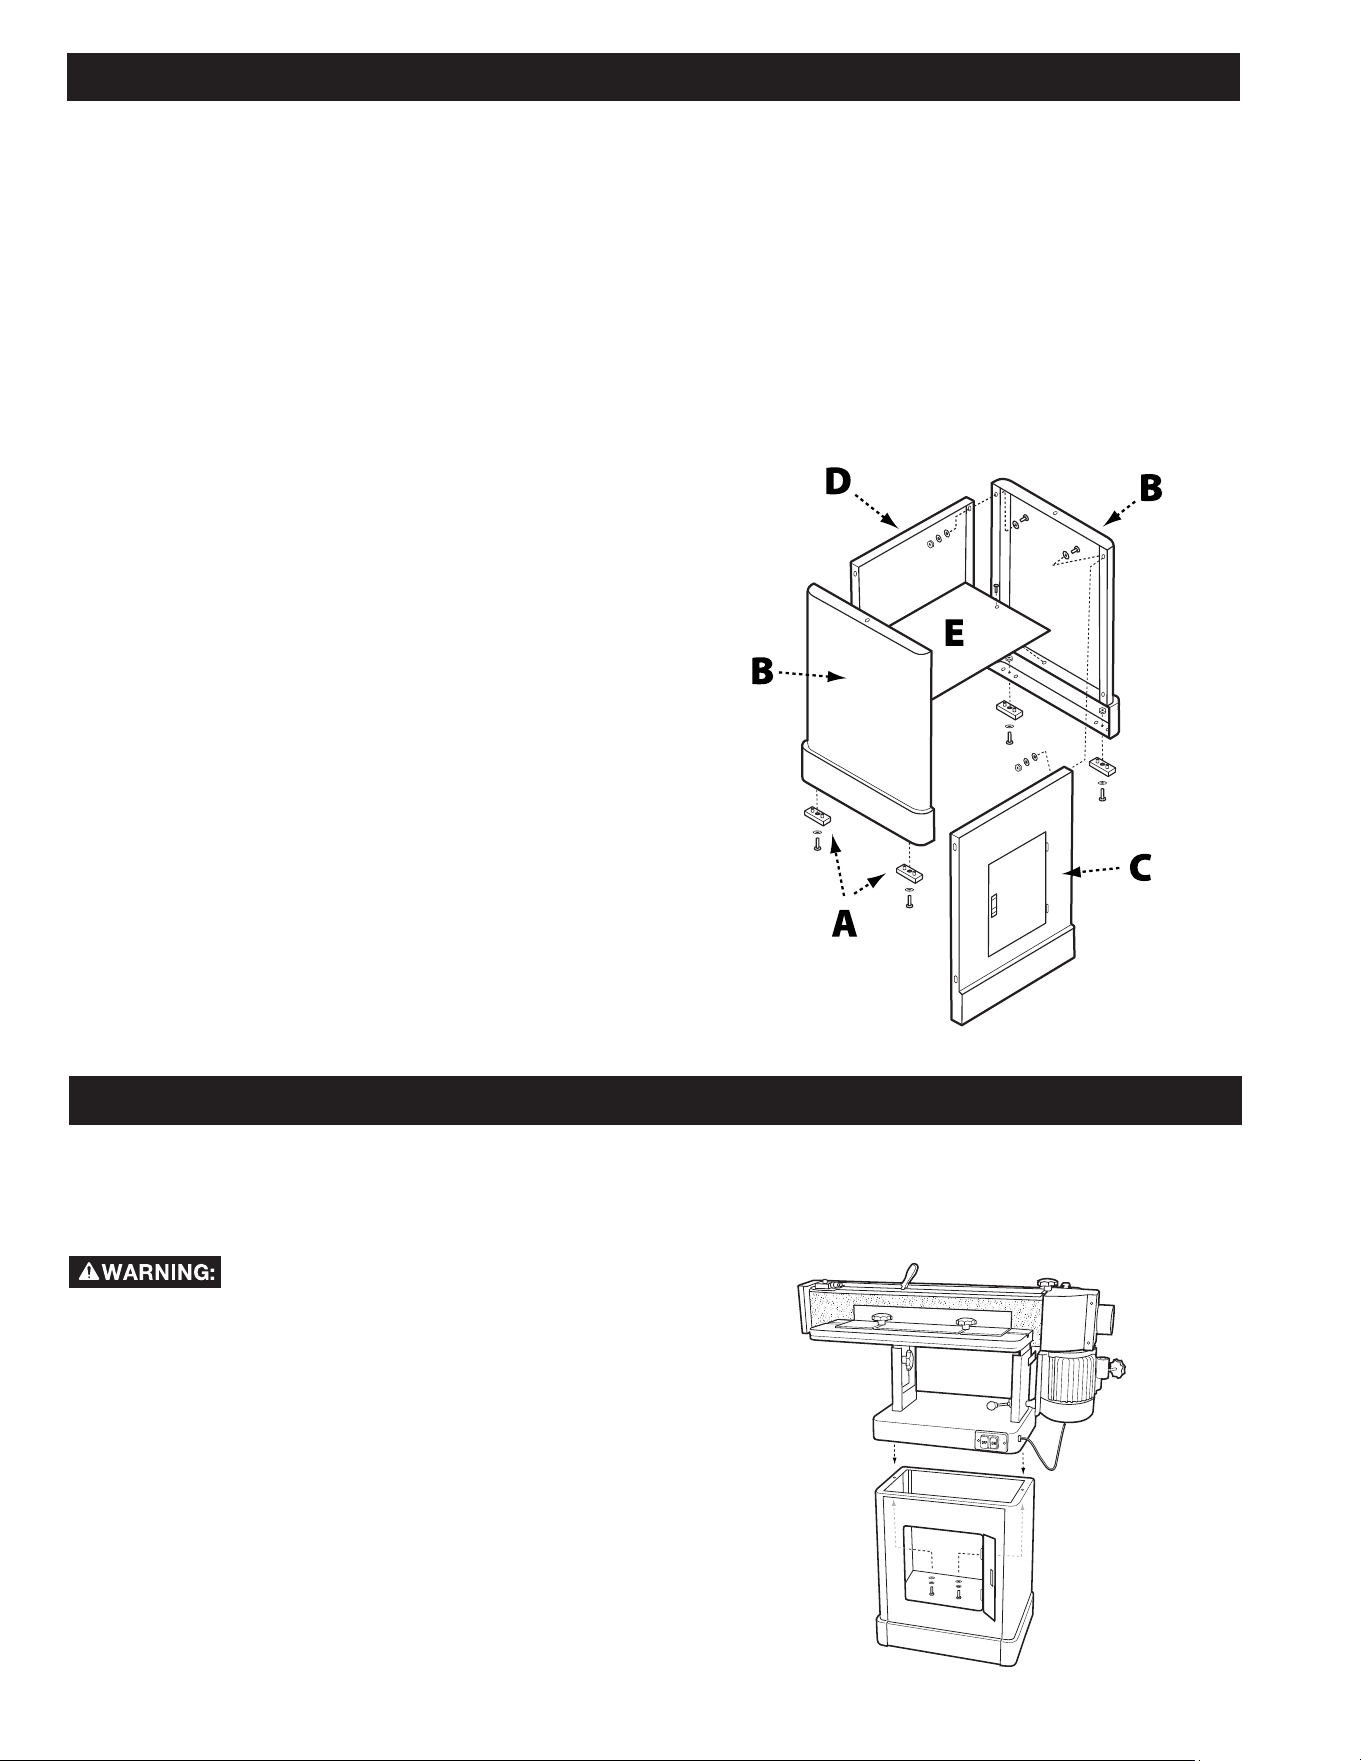
This step requires two adults. The table
assembly is heavy, be careful when
lifting it onto the stand! Failure to comply may cause
serious injury and/or damage to the sander and/or
property!
1. With the aid of another person, carefully lift the table
assembly onto the cabinet and position it so that the
two holes in the base of the table assembly align with
the holes located on either end of the cabinet. See
Figure 3.
2. Open the cabinet door and, from inside the cabinet,
feed a 5/16 inch x 1 1/4 inch hex cap screw up through
both holes and secure using a 5/16 inch lock washer
and 5/16 inch flat washer. See Figure 5.
3. Tighten hardware using a 12mm socket wrench.
FIGURE 3
Loading ...
Loading ...
Loading ...