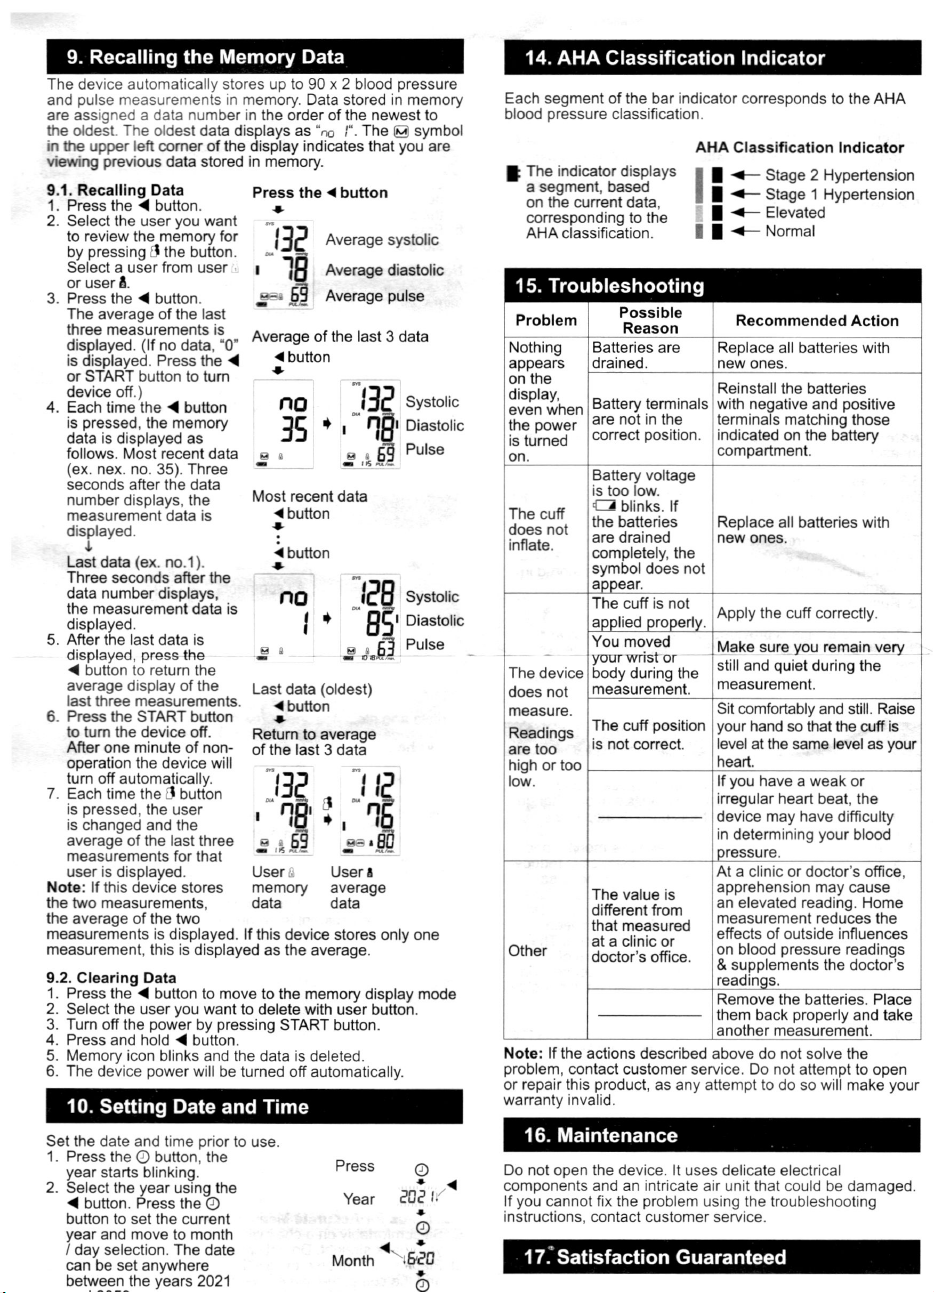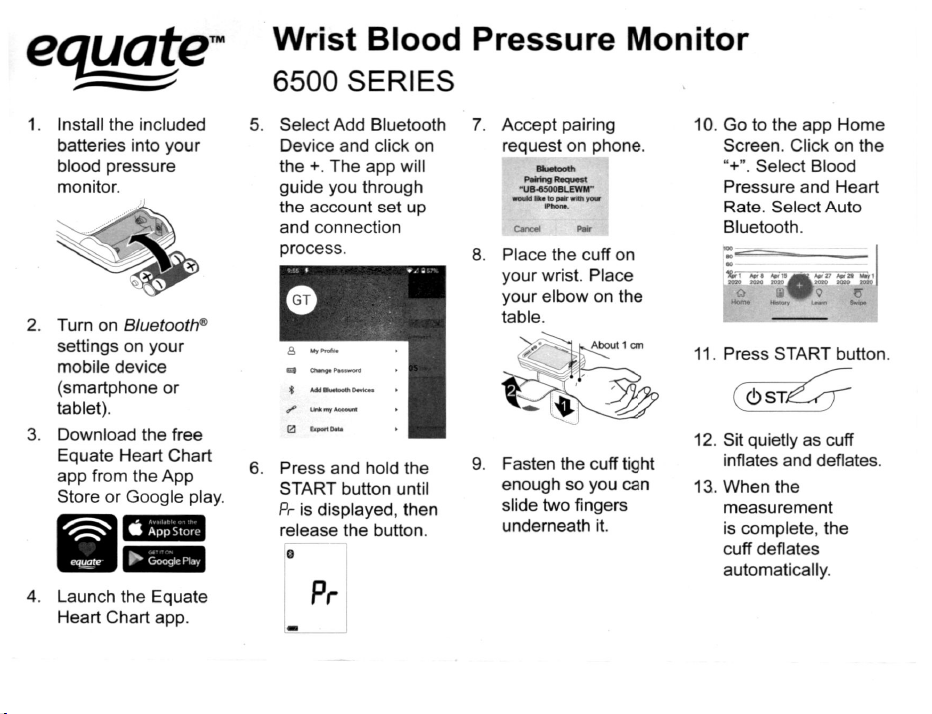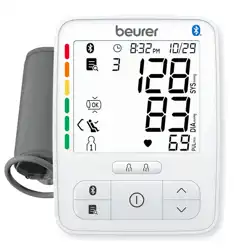

6.1_Bluetooth" Transmission
0 Bluetooth·
Bluetooth
devices carry the Bluetooth" logo mark.
To connect with your mobile device - download and install
Equate Heart Cha app.
�ca;s
•;a
Follow the instructions in the app to connect.
6.2 Cautions for Pairing
0 Only one device can be paired with this monitor at one
time. If the mobile device cannot receive measurement
data, try pairing again.
O In case a 5th mobile device is registered, the monitor will
delete the oldest mobile device.
6.3 Pairing Procedure
1. Turn on Bluetooth
settings on your mobile device
2. Press and hold the START button until "Pr" is displayed,
and then release the button. The monitor will be in a state
that can be found by the mobile device for about one
minute.
Blinking
Pr
3. If "E 10" is displayed or pairing is failed, remove the
batteries and try steps 1-3 again.
4.
Accept the pairing request on the Equate Heart Chart
app.
-
-
·u
�
"""·
-
6.4 Transmitting Temporarily Stored Data
In cases when the mobile device cannot receive
measurement data, the measurement data is temporarily
stored in the monitor memory. The data stored in the
memory is transmitted the next time a connection is
successfully made to the mobile device. A total of 90 sets
of measurement data can be stored per user. When the
amount of data exceeds 90, the oldest data is deleted and
the new data is stored.
6.5 Time
This monitor has a built-in clock. The date and time that a
measurement was taken is included in the measurement
data. The built-in clock is automatically adjusted by syncing
the clock of a moblie device. Sync of the time is done in the
timing Bluetooth" symbol lights up, in the pairing process.
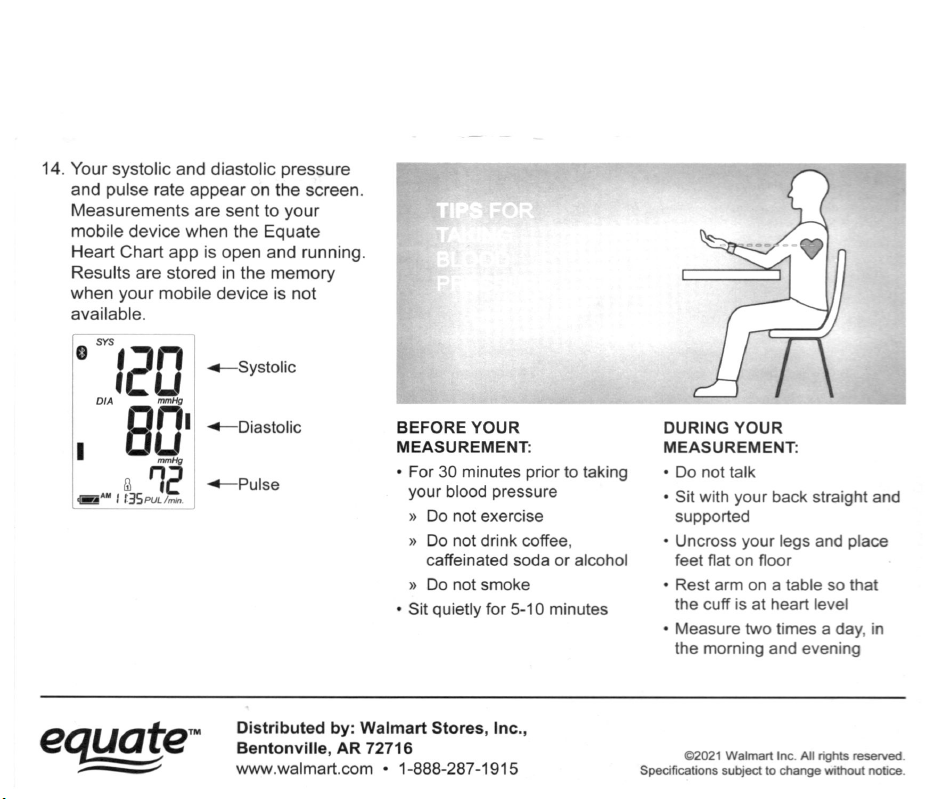
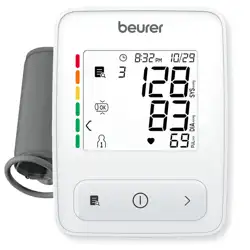
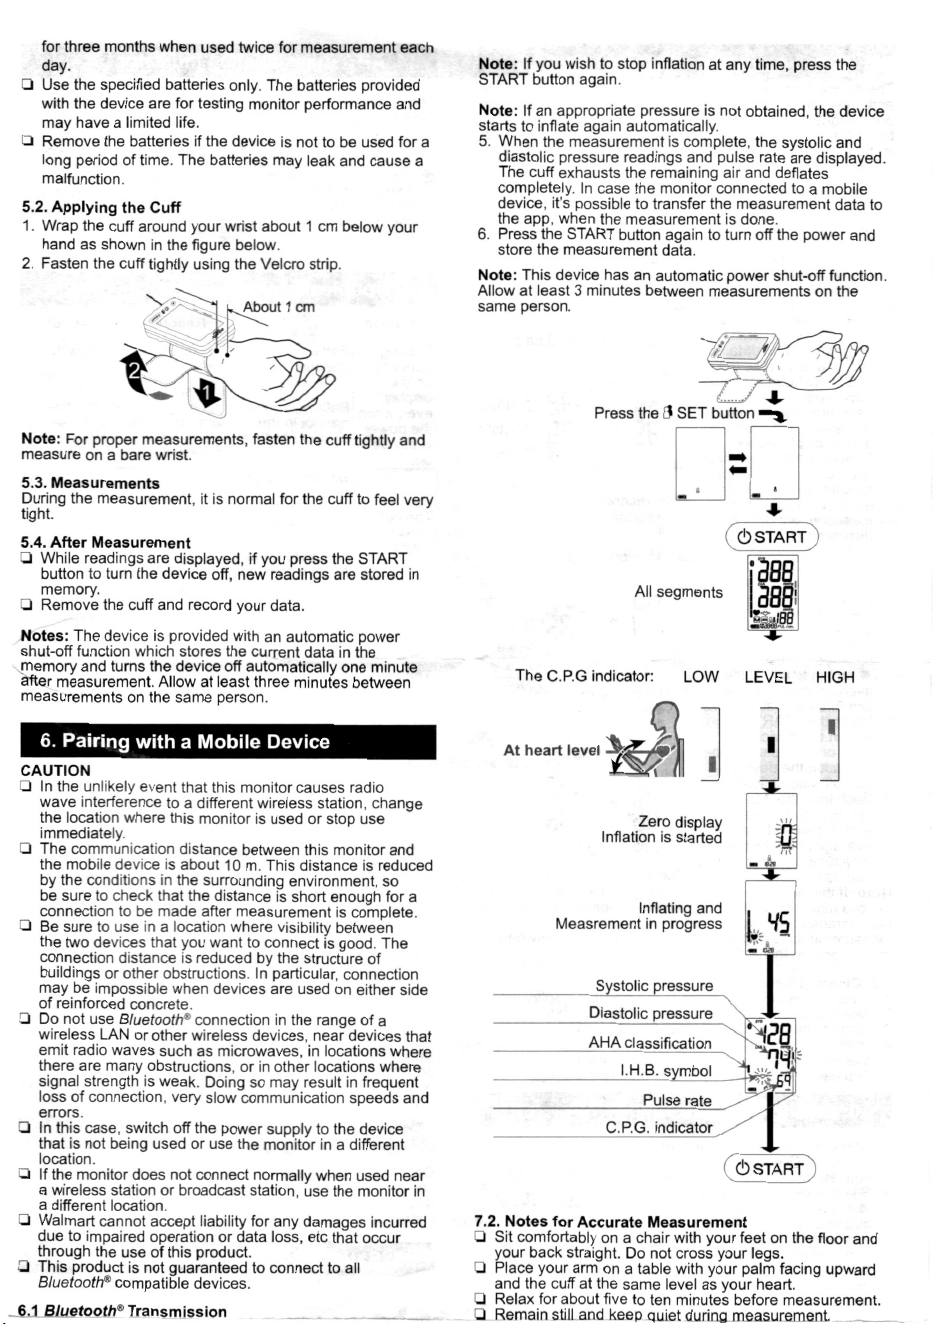
7. Measurements
7.1. Normal Measurement
1. Wrap the cu around your wrist. Sit comfoably with the
cu at the same level as your hea and relax.
2. Press the O SET button. Select a user from user , and
user A.
3. Adjust and keep the height of the cu to the same level
as your heart using the C.P.G. indicator.
4. Press the START button. All of the display segments
are displayed. Zero is displayed blinking briey. Then
the display changes, as indicated in the figure below, as
the measurement begins. The cu starts to inflate. It is
normal for the cu to feel ve tight. The measurement
starts automatically when ination starts, and the•
{heart mark) blinks.
0 Relax for about �e to ten· min Lites ·before measurement.
0 Remain still a keeR uiet during measurement.
0 Do not smoke, exercise, or consume anything for at least
30 minutes beforehand.
0 This device bases its measurements on the heartbeat. If
you have a ve weak or irregular heartbeat, the device
may have difficulty determining your blood pressure.
0 Should the device detect a condition that is abnormal, it
will stop the measurement and display an error symbol.
Refer to the section "4 Symbols" for the description of
the symbols.
0 Try to measure your blood pressure at the same time
every day.
0 The automatic blood pressure monitor's performance
may be affected by excessive temperature or humidity,
or altitude.
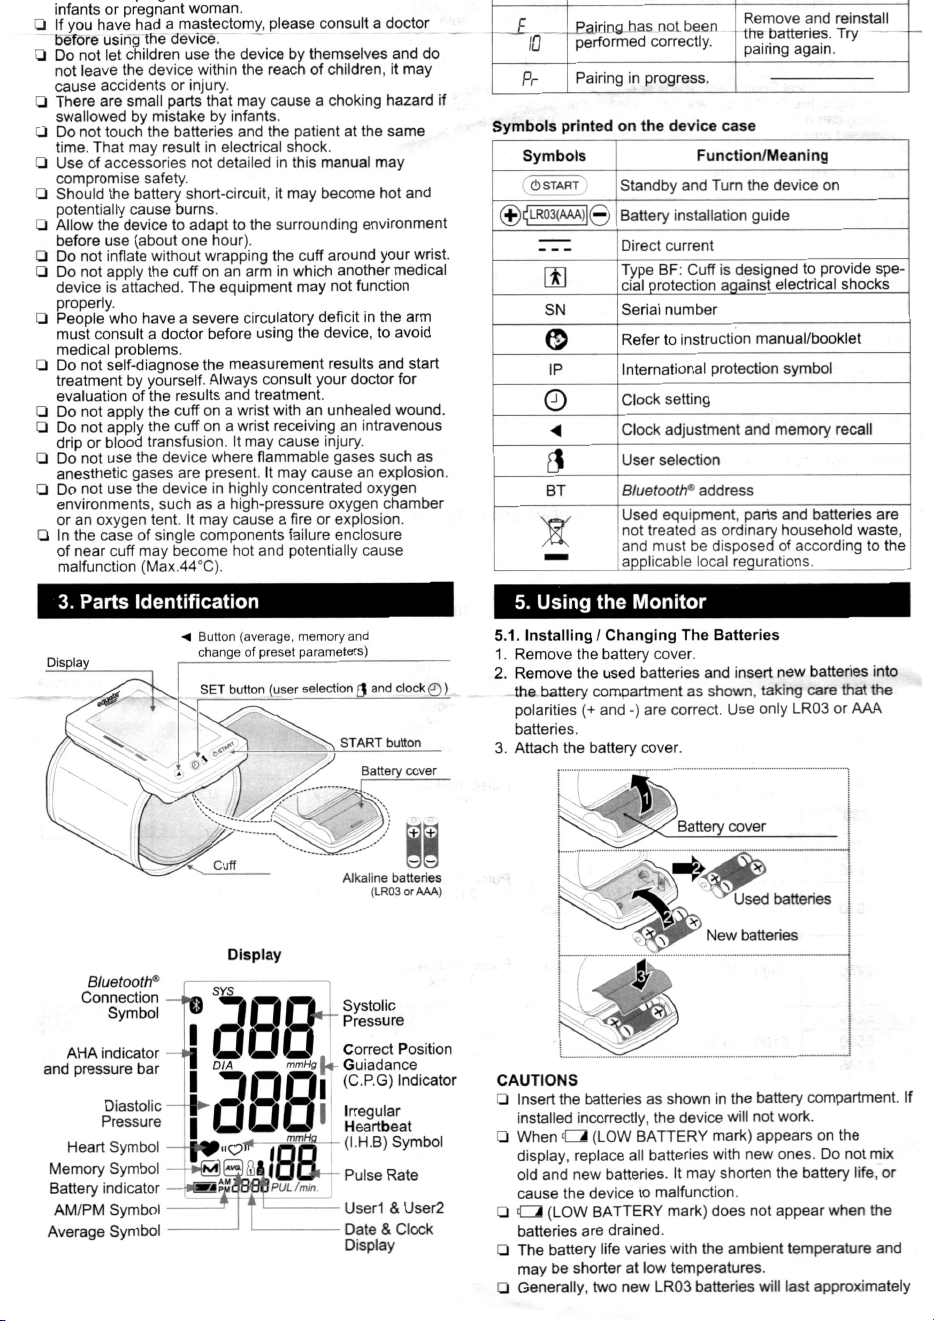
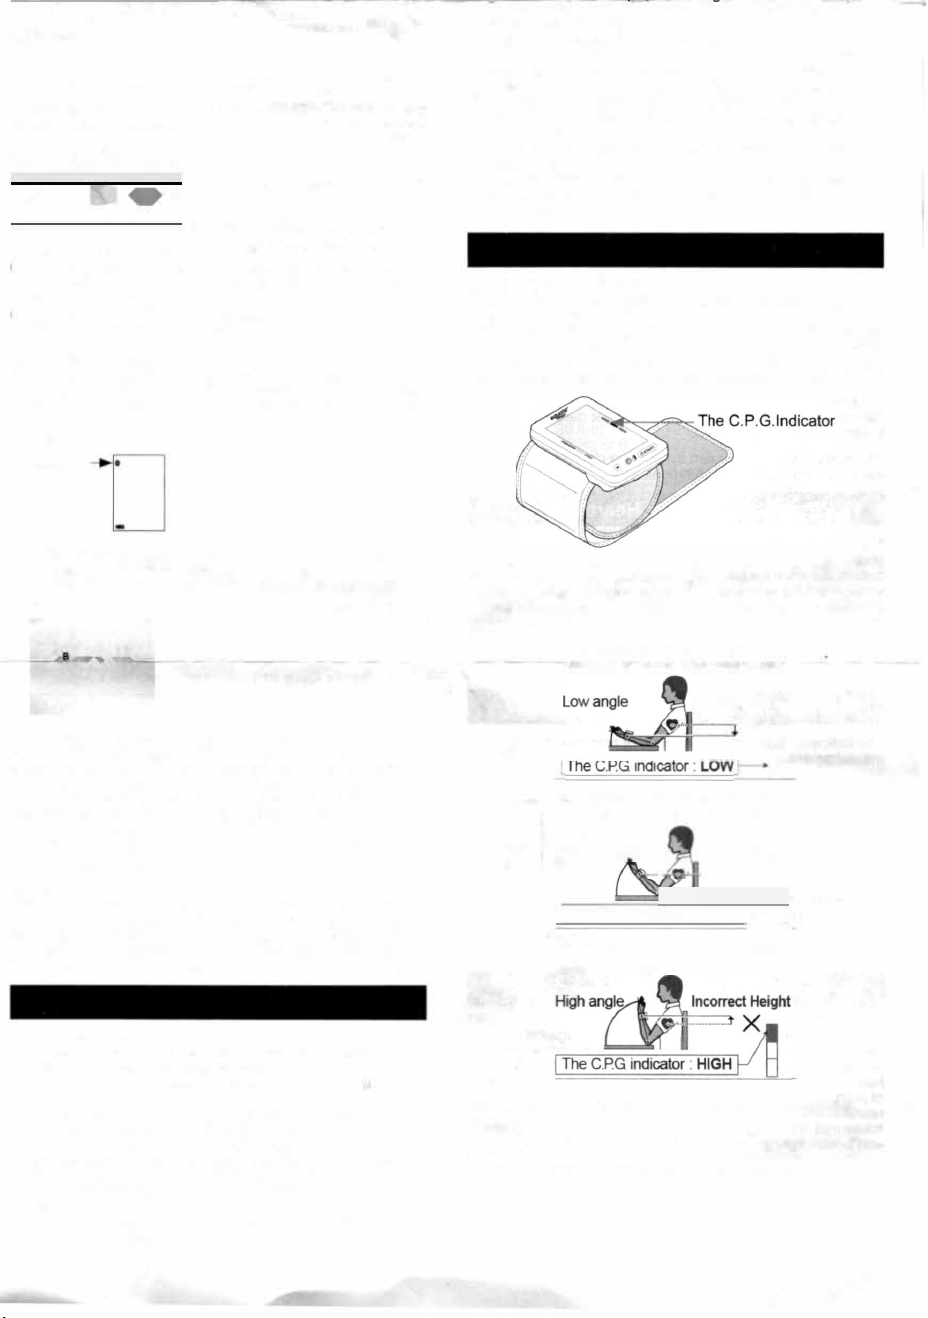
8. The C.P.G.lndicator
8.1 The C.P.G. Indicator
The C.P.G. (Correct Position Guidance) indicator is the
function to inform a difference between the height (wrist
angle) of the blood pressure monitor and your cardiac height
in the correct posture (Example: sitting posture, height of
table and chair, etc.) during the measurement. The indicator
can be used to get more stable measurement condition.
The position of the device is checked before measurement.
If the check shows a correct measurement posion, e
C.P.G inditor is lit Coect LEVEL(Blue). For L or High
measurement position, the inditor will be lit Low or High
LEVEL(Orange)
The height of the bl pressure
monitor is lower than your hea.
Inco Height
�
�
x
�
The height of the bl pressure
monitor is the same level as your
hea.
Pror angle
Ct Height
- --·--to�
I The C.PG inditor : LEVEL
e height of the blood pressure
nor is higher than your hea.
8.2 The Indicator During Measurement And Recalling
Memory
The C.P.G. indicator can be displayed at the beginning of
measurement and is included in data stored in the memo.
Adjust and keep the angle during measurement.