Loading ...
Loading ...
Loading ...
13
Assembly Instructions
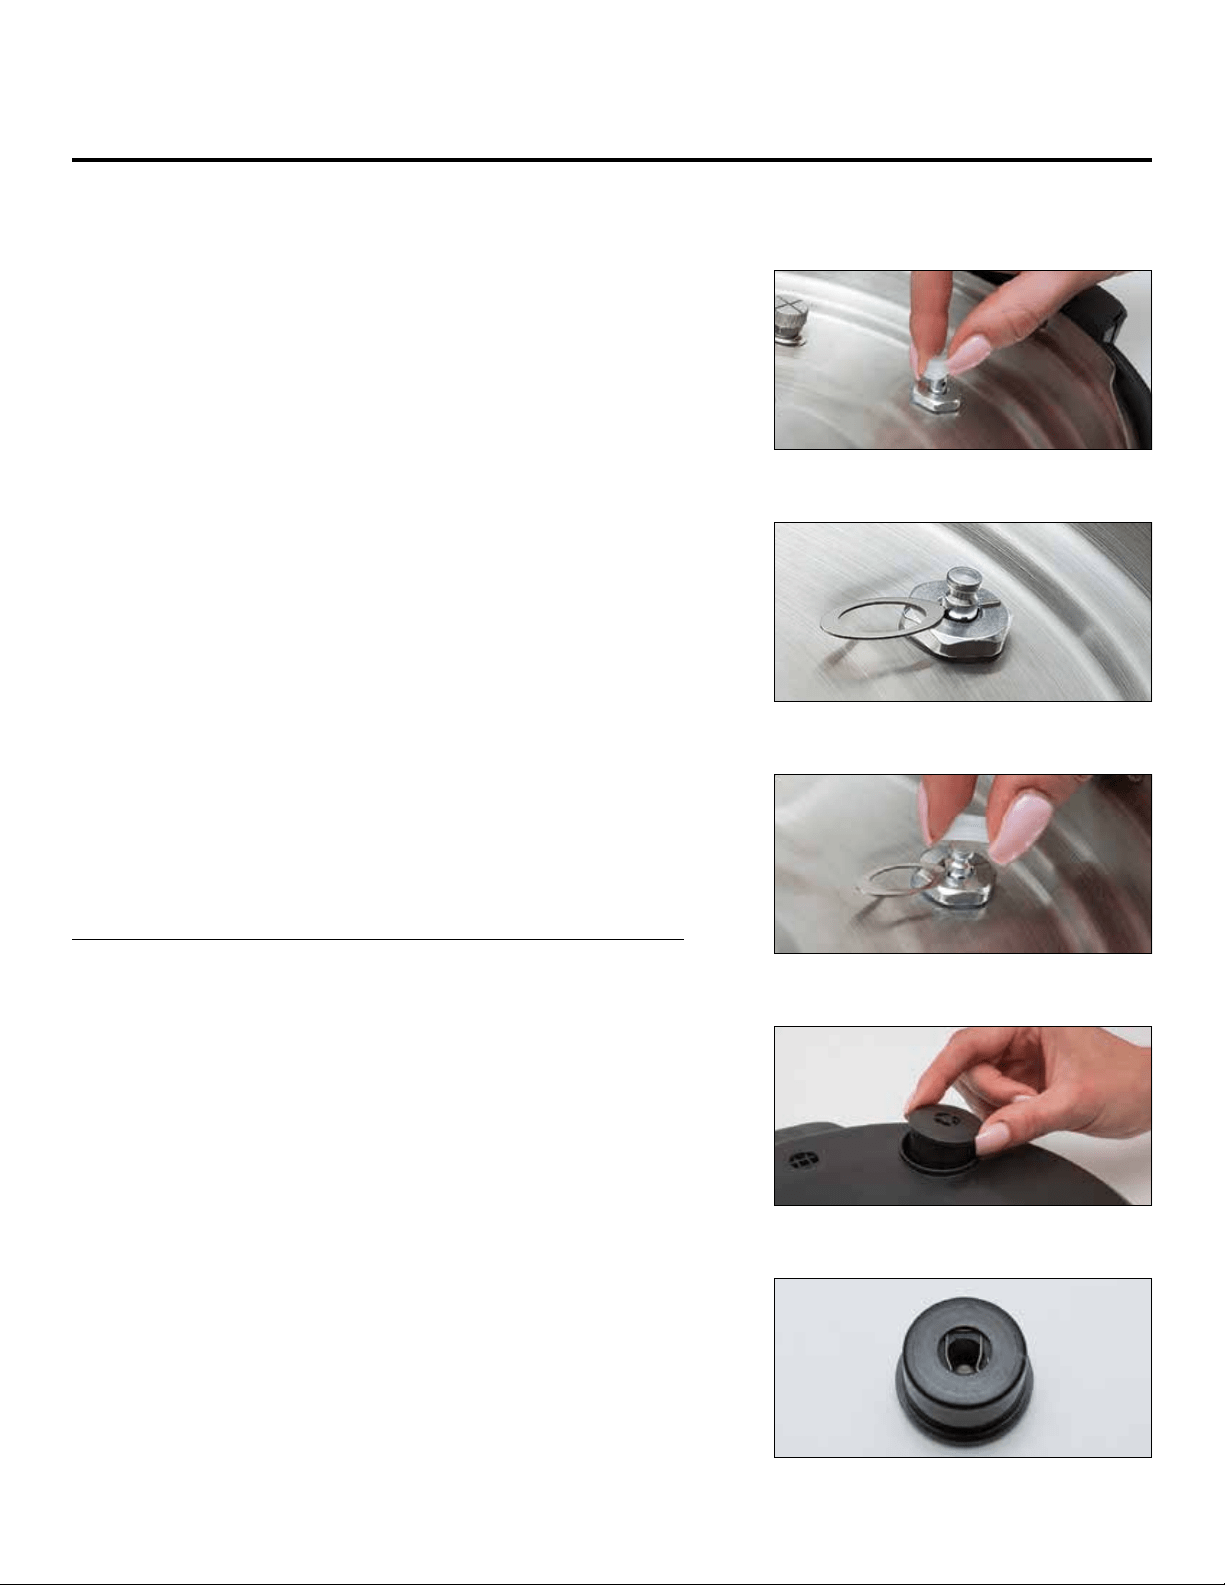
1. Remove the Lid from the Unit and remove the Inner Lid
(see INNER LID ASSEMBLY, p. 12).
2. Pull off the Rubber Gasket at the bottom of the Float Valve
(see Fig. vi). The Float Valve will be loose in its chamber.
3. Inspect that no food is stuck in the chamber and run water
through the Float Valve Chamber to clean it. Be cautious not
to submerge the whole Lid.
4. When the chamber is clear of debris, turn the Lid right side up
to allow the Float Valve to drop into the Float Valve Chamber on
the underside of the Lid. Turn the lid to the side so you can view
the oat valve
5. Stick the pointed end of the Float Valve Pin into the side hole
of the Float Valve (see Fig. vii).
6. With the Float Valve Pin inserted into the side hole, slide
the Rubber Gasket onto the Float Valve, ensuring that the wider
side of the Rubber Gasket is against the Lid (see Fig. viii).
7. The Rubber Gasket should be snug on the Float Valve.
8. Remove the Float Valve Pin.
NOTE:
Do not attempt to assemble or disassemble the Pressure
Release Valve when the Power Quick Pot is in use.
1. Pull to remove the Pressure Release Valve (see Fig. ix).
2. Ensure that the Pressure Release Valve and holes are not blocked
by food or debris. If blocked, wash out or use a pin to unblock.
3. Look at the clip on the underside of the Pressure Release Valve
(see Fig. x). It should not be damaged or severely bent.
4. Press the Pressure Release Valve back into the hole on the Lid.
If the Valve does not insert correctly, it may have a bent clip.
FLOAT VALVE ASSEMBLY
PRESSURE RELEASE VALVE ASSEMBLY
FIG. vi
FIG. ix
FIG. vii
FIG. x
FIG. viii
Loading ...
Loading ...
Loading ...