Loading ...
Loading ...
Loading ...
12
The appliance should always be plugged into its own individual electrical outlet which has a voltage
rating that matches the rating label on the appliance. This provides the best performance and also
prevents overloading house wiring circuits that could cause a fire hazard from overheating. Never
unplug the appliance by pulling on the power cord. Always grip the plug firmly and pull straight out
from the receptacle. Repair or replace immediately all power cords that have become frayed or
otherwise damaged. Do not use a cord that shows cracks or abrasion damage along its length or at
either end. When moving the appliance, be careful not to damage the power cord.
Extension Cord
Because of potential safety hazards under certain conditions, it is strongly recommended that you do
not use an extension cord with this appliance. However, if you must use an extension cord it is
absolutely necessary that it be a UL/CUL-Listed, 3-wire grounding type appliance extension cord
having a grounding type plug and outlet and that the electrical rating of the cord be 115 volts and at
least 10 amperes.
Reversing the Door Swing of your Appliance
This unit has the capability of the door opening from either the left or right side. The unit is delivered
to you with the door opening from the left side. Should you desire to reverse the opening direction,
please follow the reversal instructions shown on the following page.
NOTE: All parts removed must be saved to allow the door swing to be reversed.
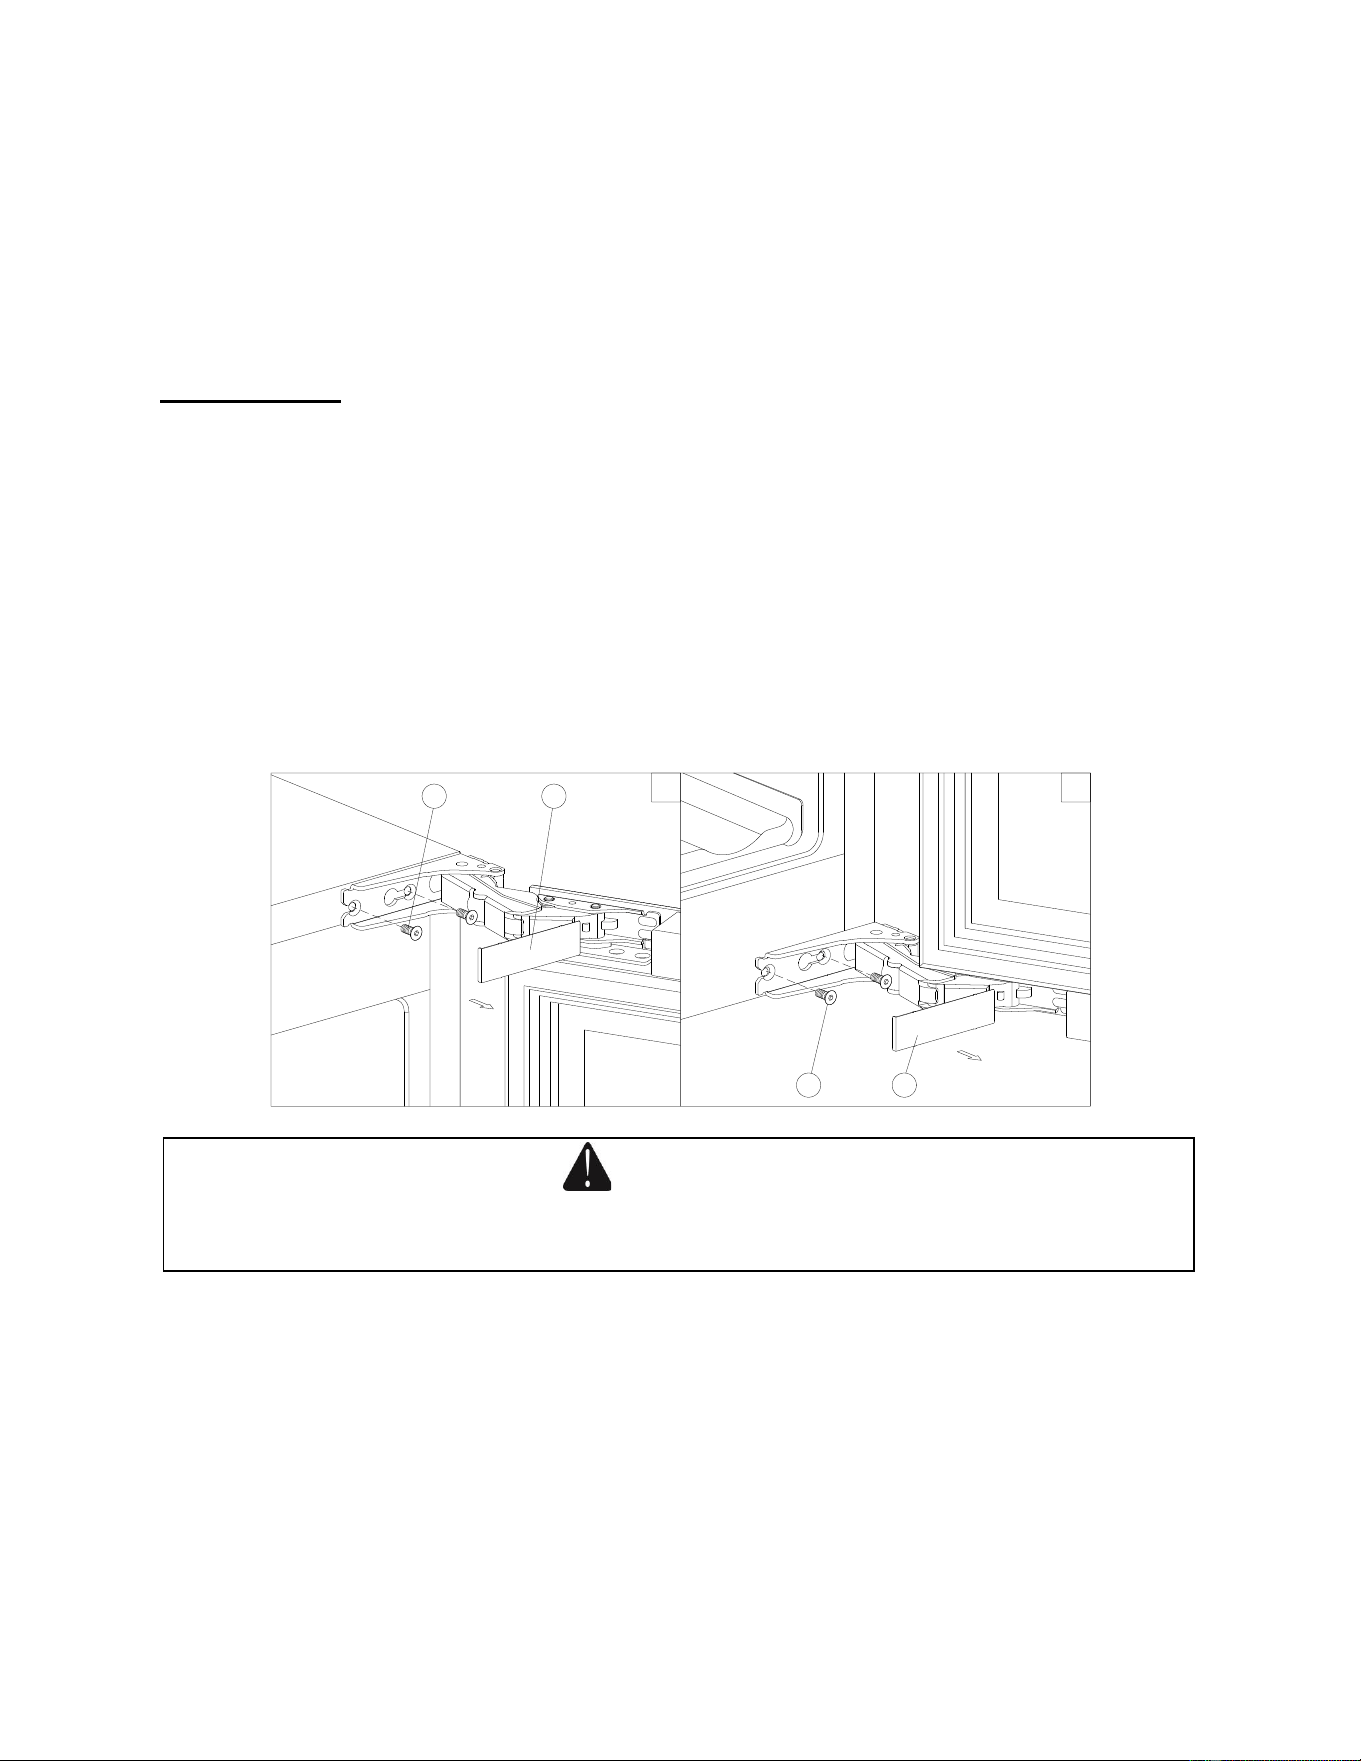
1
3
1
2
3
2
1. Remove the cover caps (3) and then remove the glass door by unscrewing the four screws (1) and
(2). Be careful to hold the glass door firmly after removing the screws and place it on a padded
surface to avoid the risk of damage.
2. Pop out the cover caps on the left side of cabinet and use them to cover the screw holes on the
right-hand side.
3. Rotate the glass door 180°, remove the lock holder and reinstall it to the bottom of the door frame.
4. Refit the glass door to the opposite side. Then screw and tighten it after the door is leveled.
WARNING
Use extreme caution with the articulated hinges. The hinge is self-closing, and many pinch
points exist prior to built-in installation.
Loading ...
Loading ...
Loading ...