Loading ...
Loading ...
Loading ...
15” TRUE ICE
®
MACHINE INSTALL GUIDE
TEC_TM_155 | REV. D | EN 09/23/2022
Page 31 of 66
INSTALLATION
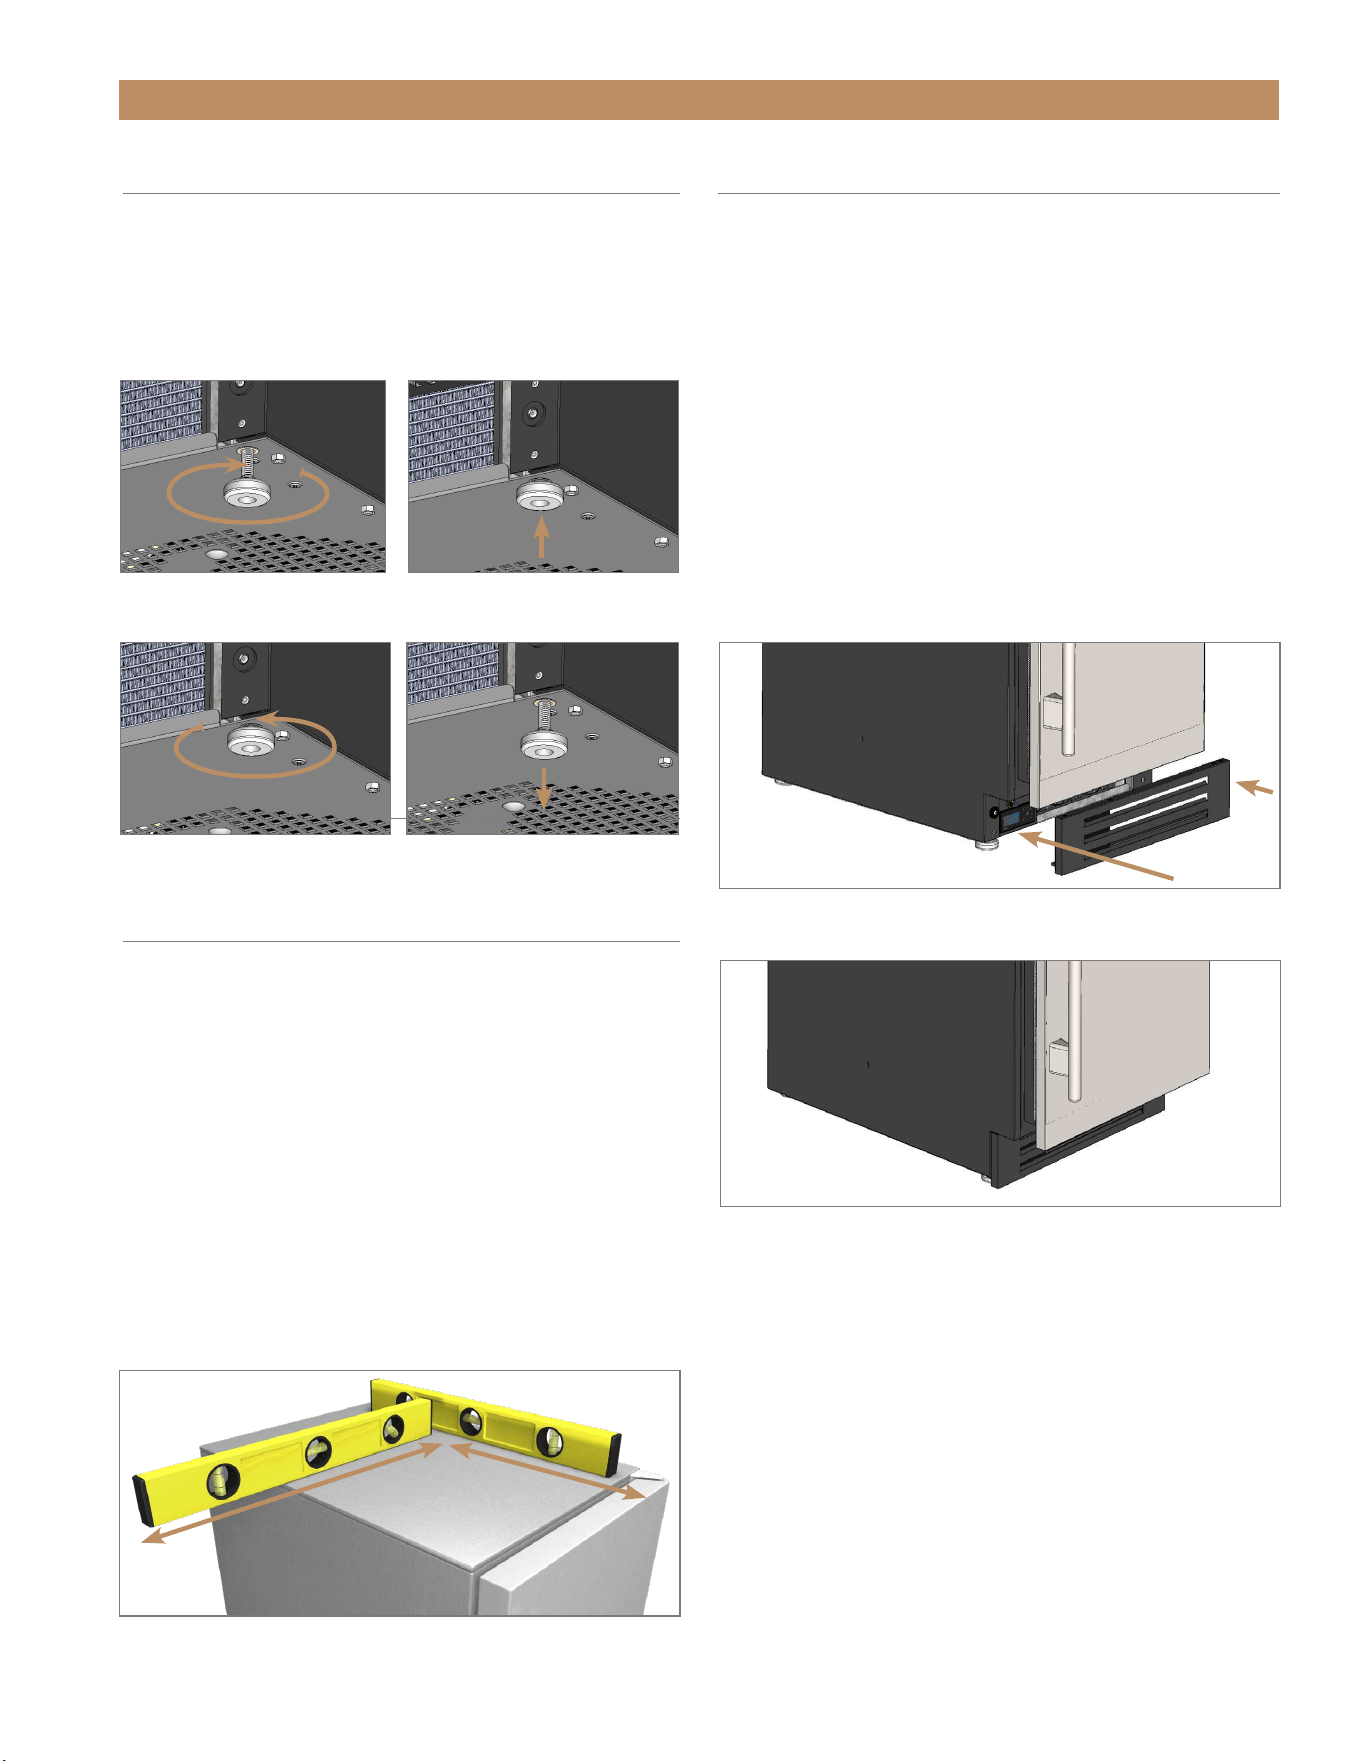
LEVELING LEGS
PROCEDURE
With access to the bottom of the cabinet, turn the
leveling legs to adjust the level as needed.
See figs. 1 and 2.
1.
LEVELING
Proper leveling of your ice maker is critical to
operating success. Leveling effects drainage and door
operation.
PROCEDURE
1. Set the unit in its final location. Be sure there is
adequate ventilation in your room.
2. Verify the unit’s level. On the unit’s top, check the
level front-to-back and side-to-side. See fig. 1.
3. Turn the leveling legs as needed to adjust the
level. See “Leveling Legs” (page 31).
FIG. 1.
Check the level from the top of the unit.
FIG. 1.
Attach the kickplate to the magnets below the door.
FIG. 2.
Adjust the kickplate as needed.
FIG. 1.
Turn the leveling legs clockwise to lower the unit.
FIG. 2.
Turn the leveling legs counterclockwise to raise the unit.
KICKPLATE INSTALLATION
The kickplate is shipped unattached to the unit to allow
easy access for levelling. The kickplate attaches to the
unit with magnets at the bottom of the unit.
INSTALLATION
1. After leveling the unit, position the kickplate below
the door. See figs. 1 and 2.
2. Verify the kickplate is correctly aligned. Adjust
as needed.
REMOVAL
Pull the kickplate away from the unit.
Loading ...
Loading ...
Loading ...