Loading ...
Loading ...
Loading ...
en Operating modes
12
ÇOperating modes
Oper at i ng modes
This appliance can be used in air extraction mode or
circulating-air mode.
Exhaust air mode
Note: The exhaust air must not be conveyed into a
functioning smoke or exhaust gas flue or into a shaft
which is used to ventilate installation rooms which
contain heat-producing appliances.
■ Before conveying the exhaust air into a non-
functioning smoke or exhaust gas flue, obtain the
consent of the heating engineer responsible.
■ If the exhaust air is conveyed through the outer wall,
a telescopic wall box should be used.
Circulating-air mode
Note: To bind odours in circulating-air mode, you must
install an activated carbon filter. The different options for
operating the appliance in circulating-air mode can be
found in the brochure. Alternatively, ask your dealer.
The required accessories are available from specialist
outlets, from customer service or from the Online Shop.
KBefore using for the first
time
Bef or e us i ng f or t he f i r st time
Please read the following information before using the
appliance for the first time:
Clean the appliance and all accessory parts thoroughly.
Before you can use your new appliance, you must apply
certain settings.
Switch the hob on and off using the main switch
#.
Setting the operating mode
The appliance is supplied with a preset air recirculation
mode.
When the hob is installed with an air outlet to the
outside, you must configure the setting
™‚ˆ in this
mode. See section ~ "Basic settings".
The air which is drawn in is cleaned
by the grease filters and conveyed to
the exterior by a pipe system.
The air which is drawn in is cleaned by the
grease filters and an activated carbon filter
and conveyed back into the kitchen.
Operating the appliance en
13
1Operating the appliance
Oper at i ng t he appl i anc e
This chapter explains how to set a hotplate. The table
shows heat settings and cooking times for various
meals.
Tip: Switch on the ventilation system when you start
cooking and only switch it off a few minutes after you
have finished cooking. This is the most effective way to
remove the cooking vapours.
Note: Never operate the appliance without the metal
grease filter and the overflow container.
Switching the hob on and off
The main switch is used to switch the hob on and off.
To switch on: Touch the
# symbol. An audible signal
sounds. The indicator next to the main switch and the
hotplate indicators ‹ light up. The hob is ready to use.
To switch off: Touch the # symbol until the indicator
goes out. All hotplates are switched off. The residual
heat indicator remains lit until the hotplates have cooled
down sufficiently.
Notes
■ The hob switches off automatically if all hotplates
have been switched off for more than 20 seconds.
■ The selected settings are stored for four seconds
after the hob has been switched off. If you switch it
on again during this time, the hob will operate using
the previously stored settings.
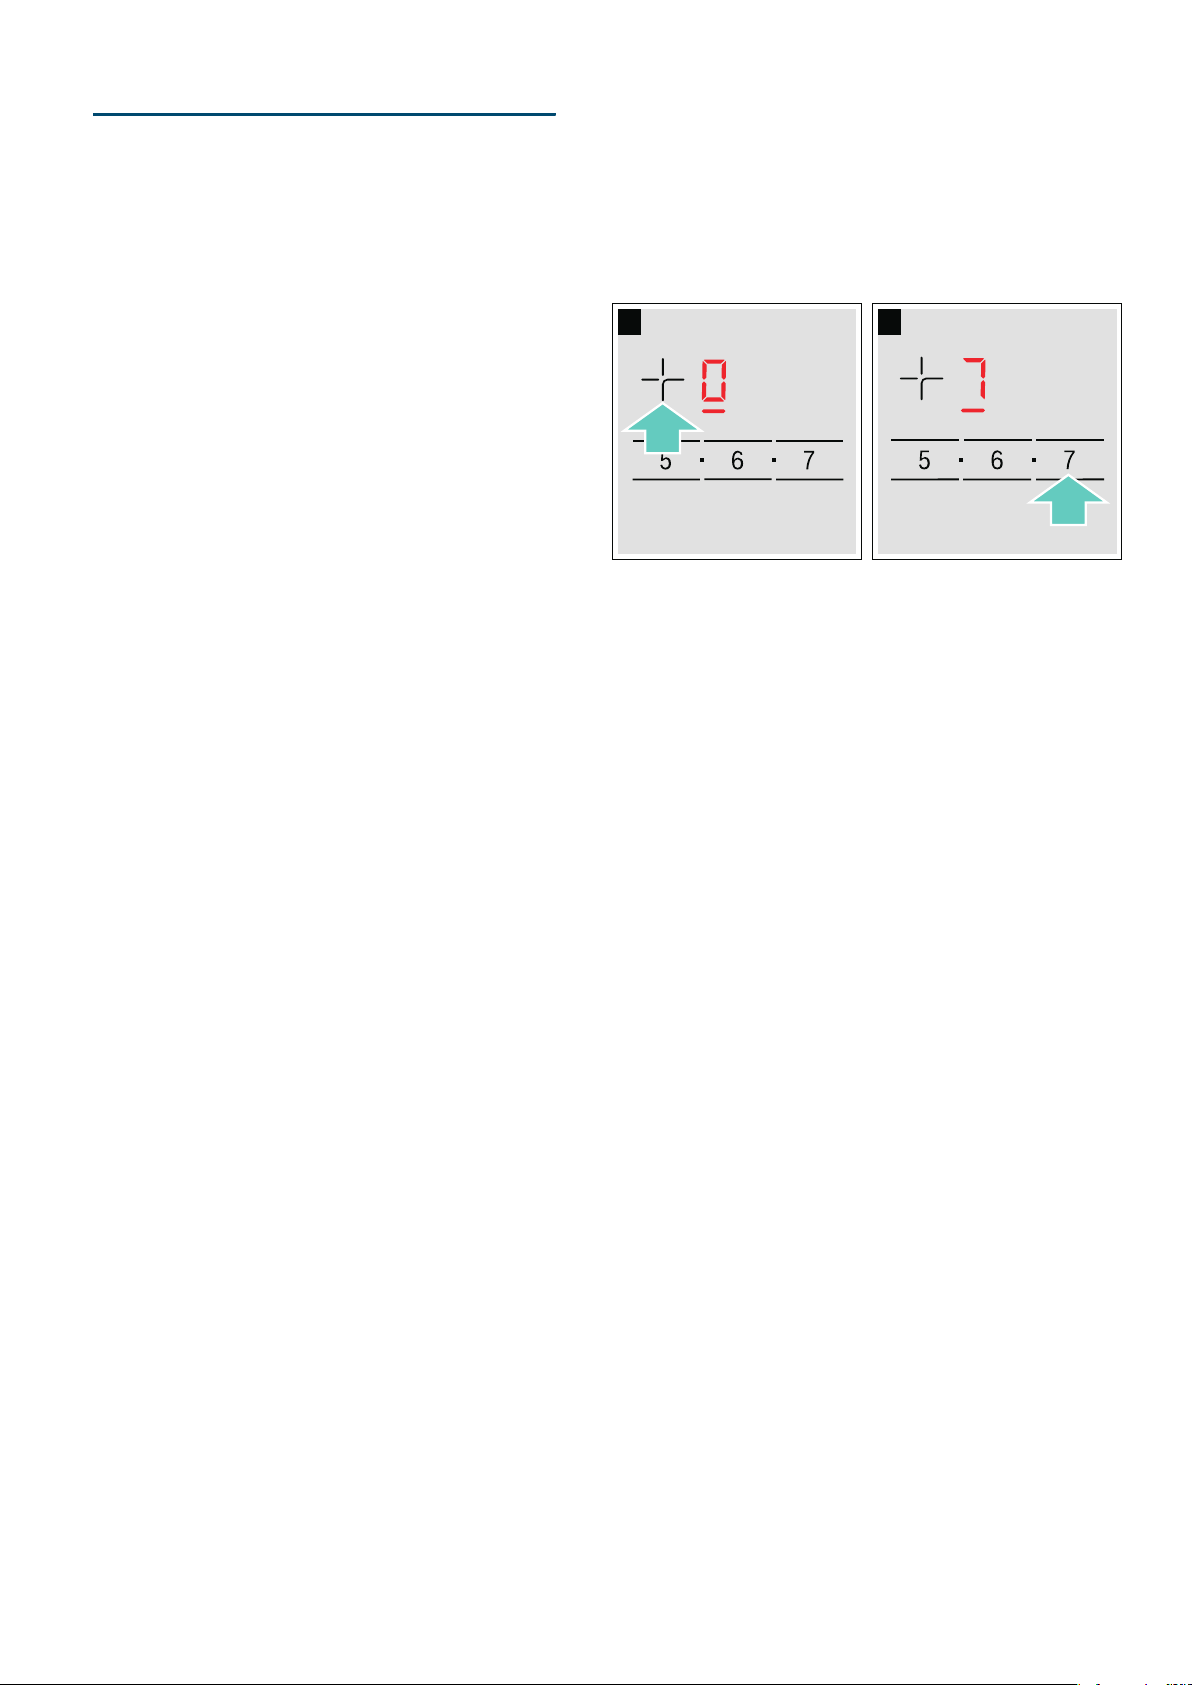
Setting a hotplate
Set the required heat setting using symbols ò to ê.
Heat setting ò = lowest setting.
Heat setting ê = highest setting.
Every heat setting has an intermediate setting. This
intermediate setting is marked in the control panel with
the Ø symbol.
Notes
■ To protect the fragile parts of your appliance from
overheating and electrical overloading, the hob may
temporarily reduce the power.
■ In order to prevent the appliance from producing
excess noise, the hob may temporarily reduce the
power.
Selecting a hotplate and heat setting
The hob must be switched on.
1. Touch the ø symbol for the required hotplate.
The ‹ symbol lights up and the ¬ symbol
underneath.
2. Then select the required heat setting from the
settings range.
The heat setting is set.
Changing the heat setting
Select the hotplate and then set the required heat
setting in the control panel.
Switch off the hotplate
Select the hotplate and set it to ‹ in the programming
panel. The hotplate turns off and the residual heat
indicator appears.
Notes
■ If no pan has been placed on the hotplate, the
selected power level flashes. After a certain time has
elapsed, the hotplate switches off.
■ If a pan has been placed on the hotplate before
switching on the hob, it will be detected within
20 seconds of pressing the main switch and the
hotplate will be selected automatically. Once
detected, select the power level within the next
20 seconds or the hotplate will switch off.
If more than one pan is placed on the hob, only one
will be detected when switching it on.
Loading ...
Loading ...
Loading ...