Loading ...
Loading ...
Loading ...
-
15
With appliance with high emptying sys-
tem:
Turn the programme selector switch to
position C (drive).
Lift the waste container and secure by
means of cylinder support.
Turn the programme selector switch to
"OFF" and remove the KIK-key.
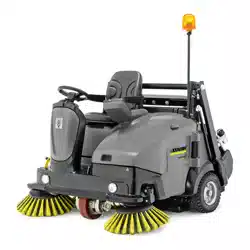
1 Screws
2 Roller brush
Unscrew both screws by hand and pull
the roller brush half from the shaft.
Insert new roller brush halves and tight-
en the screws (pay attention to the
marking "L" = left and "R" = right).
Turn the roller brush by 180 °, loosen
and remove the screws from the sec-
ond roller brush half.
Insert new roller brush half and tighten
the screws.
Then ensure that the roller brushes are
safely locked in place.
With appliance with low emptying sys-
tem:
Reattach the centre bar, ensure proper
seating of the gaskets!
Park the machine on an even surface.
Turn the programme selector switch to
"OFF" and remove the KIK-key.
Side brush and roller brush are raised.
1 Front sealing strip
2 Nut
3 Retaining plate front
4 Rear sealing strip
5 Screw
6 Forward travel direction
Front sealing strip
Adjusting the sealing strip:
Loosen the nuts by approx. 2 rotations,
do not completely unscrew them.
Set the distance between the sealing
strip and the floor so that the bottom
edge trails behind at a distance of be-
tween 80-85 mm.
Tighten nuts.
If worn, replace.
For replacing the sealing strips unscrew
the nuts completley, insert new sealing
strip, fit retaining plate, adjust sealing
strips and screw down retaining plate.
Rear sealing strip
Adjusting the sealing strip:
Loosen screws by approx. 2 rotations,
do not completely unscrew them.
Set the distance between the sealing
strip and the floor so that it tilts towards
the front with an overtravel of 15 -
20 mm.
Tighten the screws.
If worn, replace.
For replacing the sealing strips unscrew
the screws completley, insert new seal-
ing strip, fit retaining plate, adjust seal-
ing strips and screw down retaining
plate.
Side sealing strips
Adjusting the sealing strip:
Loosen screws by approx. 2 rotations,
do not completely unscrew them.
To set the floor clearance, insert a
sheet with a thickness of between 1 and
3 mm under the sealing strip.
Adjust sealing strip.
Tighten the screws.
If worn, replace.
For replacing the sealing strips unscrew
the screws completley, insert new seal-
ing strip, fit retaining plate, adjust seal-
ing strips and screw down retaining
plate.
�
WARNING
Wear a dust mask when working around
the dust filter. Observe safety regulations
on the handling of fine particles.
� CAUTION
Risk of damage!
Do not rinse out the dust filter.
Note: Only clean the dust filter dry, careful-
ly knock out the dirt or blow it out with re-
duced compressed air.
Note: Wait at least 1 minute before remov-
ing the dust filter so that the dust can settle.
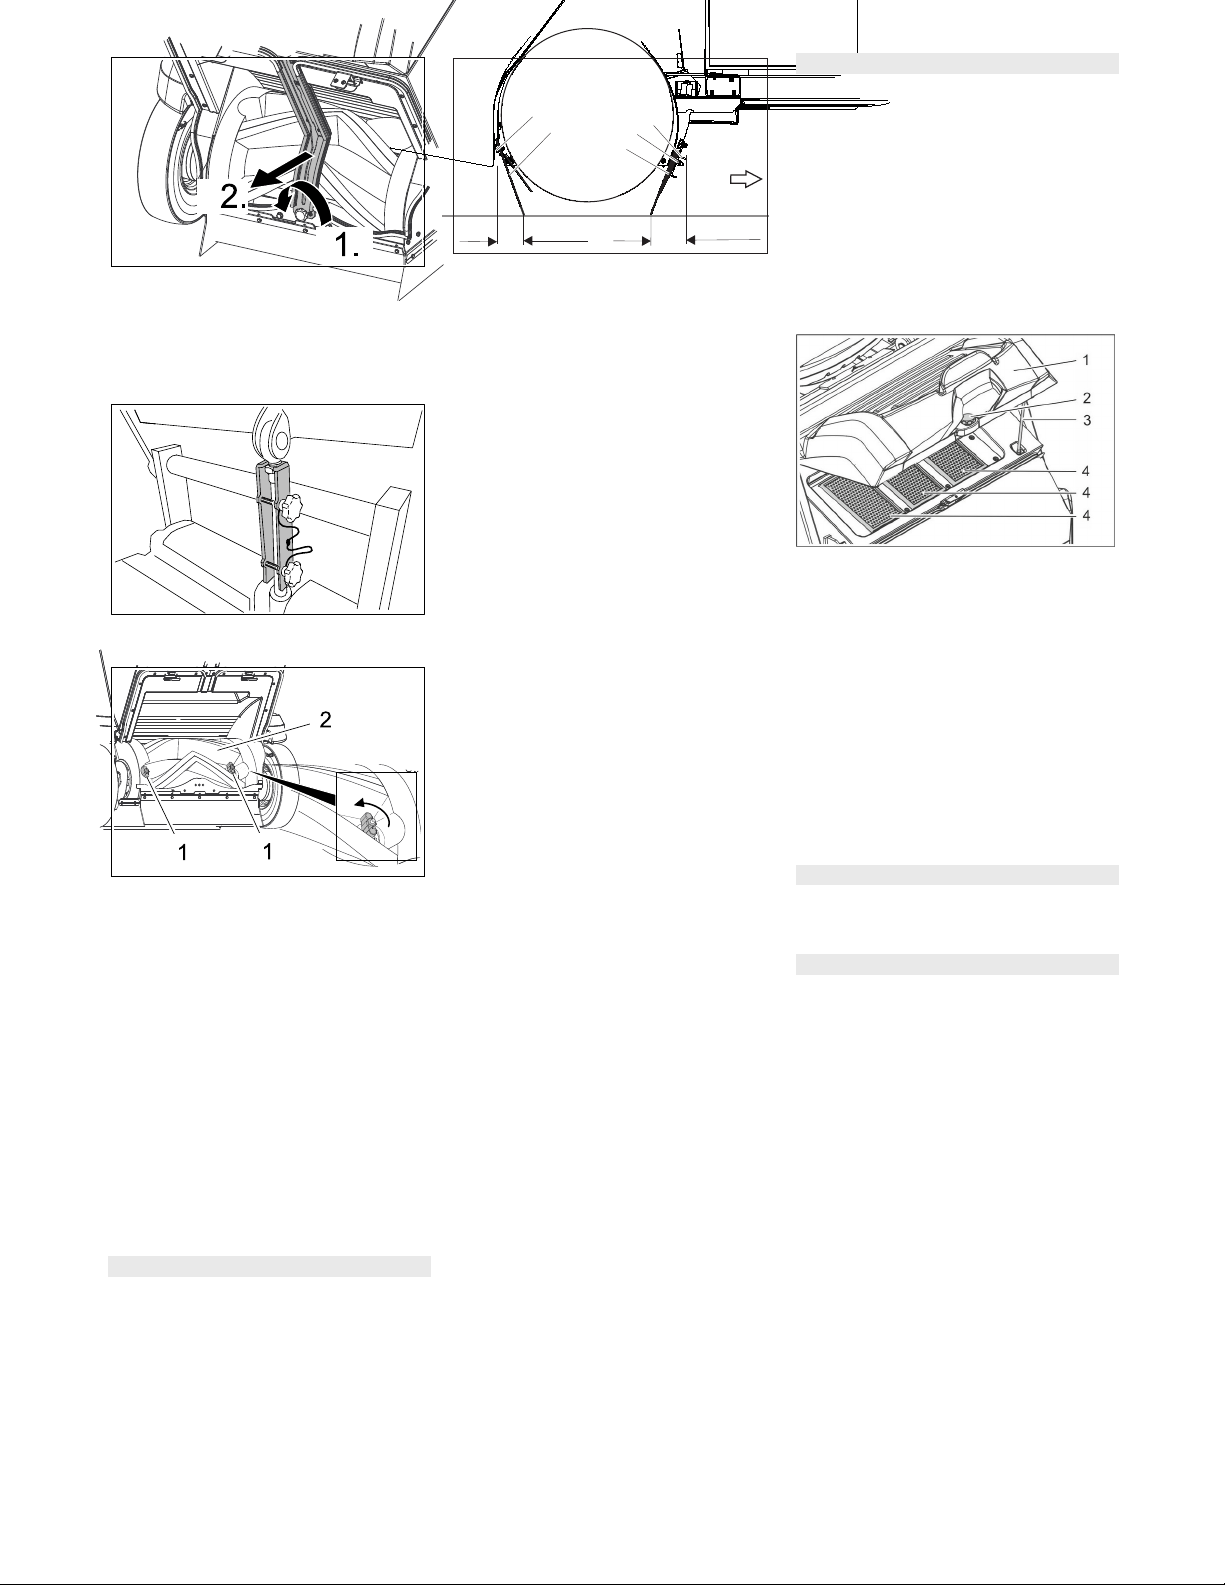
Figure: KM 125/... with 3 flat fold filters; KM
105/... has 2 flat fold filters
1 Lid with cleaning device
2 Screw
3 Support
4 Dust filter (flat-fold filter)
Unscrew the screw.
Fold the lid up and secure it by means
of the support.
Take out the dust filter.
Check dust filter.
Insert cleaned or new dust filter.
Place support into retainer.
Close the lid.
Screw in the screws and tighten them.
Have the suction blower checked for
leaks.
Check by customer service
Check the drive belt of the roller brush
for tension, wear and function.
Check by customer service
Adjusting and replacing sealing strips
80-85 mm
15-20 mm
1
2
4
5
6
3
Check/replace dust filter
Check suction blower
Checking drive belt of roller brush
40 EN
Loading ...
Loading ...
Loading ...