
Loading ...
Loading ...
Loading ...
-
10
When the batteries are charged, first re-
move the charger from the mains and then
disconnect it from the batteries.
With the KM 105/100(110) R Bp Pack the
low-maintenance batteries and the charger
are already installed.
1 Retainers for mains connection (fold-
ing)
2 Mains cable with mains plug
3 Connection for mains connection of the
charger
4 Batteries
Open left cover.
Fold in retainers and remove mains
connection.
Insert the plug of the charger into the
socket.
Note
The progress of the charging process is
shown via a bargraph (5 bars) on the dis-
play.
At the beginning of the charging process
5 lines can be seen briefly.
Little by little the 5 bars are filled (depend-
ing on the charging state of the battery at
the beginning of the charging process,
more slowly or faster). When the last bar is
filled, the battery is charged.
After charging
Unplug the charger from the mains.
Store the mains connection away in the
retainer and clip in the mains plug.
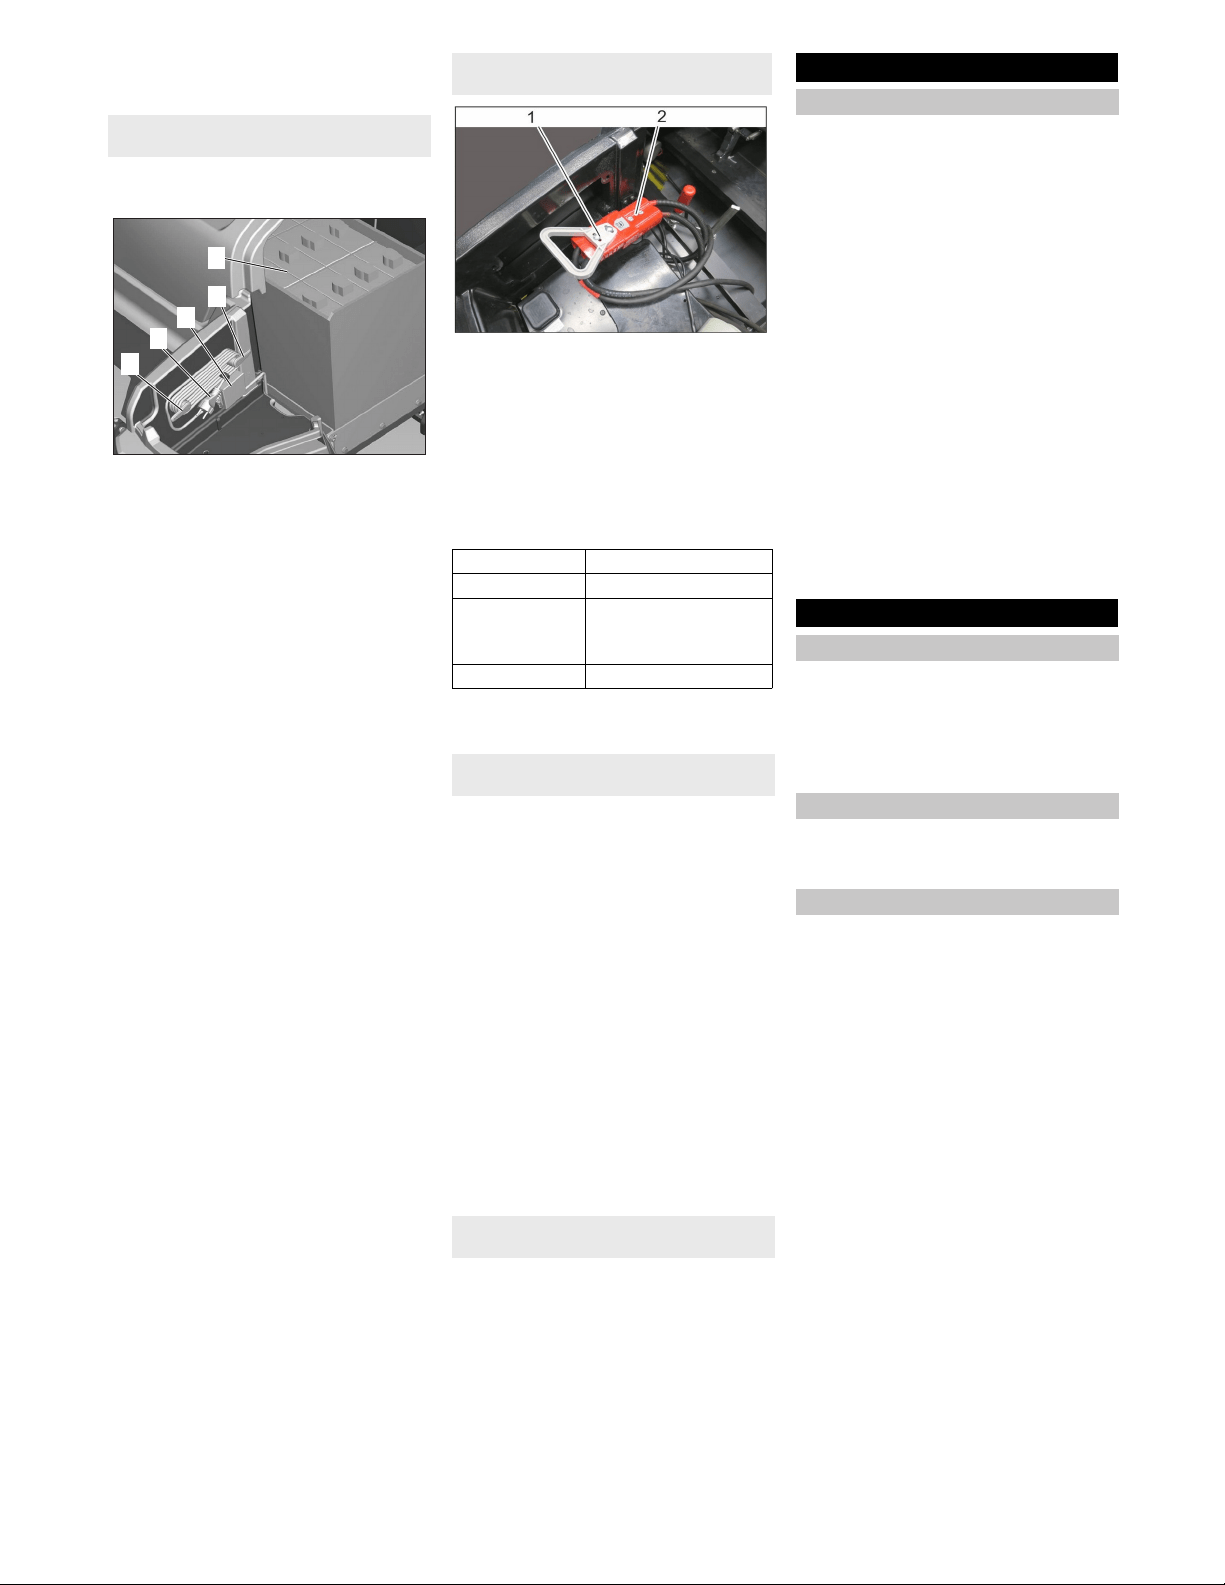
1 Battery socket
2 Working connection
Open left cover.
Unplug the battery plug and replug it in
the charger connection
Insert the mains plug of the charger into
the socket. The charging process will
start.
The progress of the charging process is
displayed on the charger.
After charging
Replug the battery plug into the working
connection
Add distilled water after the charging
process has been completed; observe
the correct acid level. There are corre-
sponding indicators on the battery.
�
DANGER
Danger of causticization!
Adding water to the battery in its dis-
charged state can cause the acid to
leak.
Wear protective glasses and protective
clothing when handling battery acid.
Observe the regulations concerning the
handling of batteries!
� WARNING
Risk of damage!
Use only distilled or desalinated water
(EN 50272-T3) for filling the battery.
Do not add any substances (so-called
performance improving agents), else
warranty claims will not be entertained.
Rinse thoroughly with lots of clear water
if acid gets into the eye or comes in con-
tact with the skin.
Then consult a doctor immediately.
Change clothing.
Wash off the acid If it comes in contact
with the clothes.
To be performed by the operator on a
daily basis!
The description of the checks and work be-
low can be found in Chapter "Care and
maintenance/maintenance work".
Check safety function of the left cover
(device must not start while the cover is
open).
Check function of seat contact switch.
Check the roller brush and the side
brush for wear, foreign bodies and
wrapped belts
During a standstill of the machine:
Check the drive pedal for ease of move-
ment in order to guarantee functional
reliability or timely detect a jamming of
the pedal.
Empty waste container.
Check tyre pressure.
Check battery acid level.
With appliances with high emptying
system: Check filling level at the hy-
draulic unit.
Pull seat adjustment lever inwards.
Slide seat, release lever and lock in
place.
Check that the seat is properly locked in
position by attempting to move it back-
wards and forwards.
Note: The max. load of the storage area is
20 kg.
Ensure safe fastening of the cargo.
Preconditions for the functioning operation
of the appliance are:
– The KIK-key (grey or yellow) with the
authorisation for the operation of the
device must be inserted in the key slot
of the control panel.
– The main switch must be in position 1.
– The programme selector switch may
not be in the "OFF" position.
– Waste container and left cover must be
closed and locked in place.
– Sit on the driver seat, the seat contact
switch is activated.
Charging process KM 105/100(110) R Bp
Pack
1
2
3
1
4
Charging process for devices with
external charger
orange Battery is being charged
green Battery is charged
red Battery is not connected,
deep discharged or de-
fective.
blinks red Battery defective
Information with low-maintenance
batteries
Information concerning accidents with a
risk of chemical burns
Start up
Prior to start/safety test
Operation
Adjusting driver's seat
Storage area
Starting up the appliance
35EN
Loading ...
Loading ...
Loading ...