Loading ...
Loading ...
Loading ...
30
19
1942 43
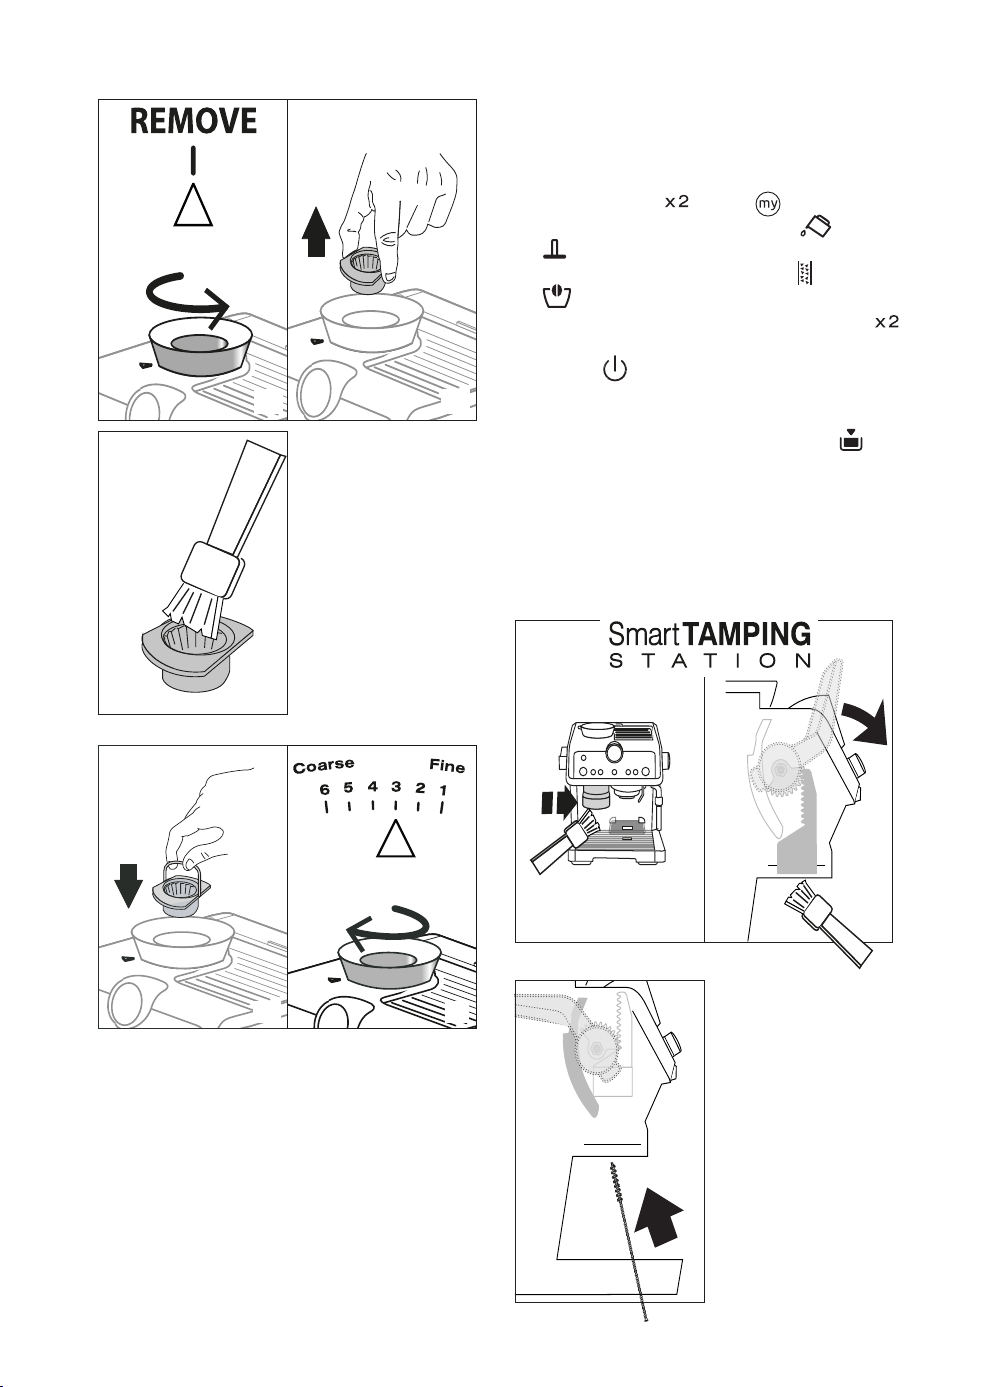
6. Extract the upper burr,
gripping it by the handle
(g. 43).
7. Clean the burr with a
brush (g. 44) and remove
the coee residues using a
vacuum cleaner (g. 41).
8. Put the upper burr back in place:
45
46
• Insert the burr in its housing (g. 45);
• Turn the selector to select the desired grinding level (g.
46);
• Make sure the burr is inserted correctly by pulling it by the
handle. If it is correctly inserted, it will not move;
9. Use a brush to remove any coee residues from the outlet
of the coee mill (A22).
13.9 Replacing the burrs
When the quantity of coee becomes even less, contact a cus-
tomer services centre to have the burrs replaced, then adjust the
mill again as follows:
1. Press and hold the (B3) and (B7) buttons for at
least 3 seconds to access the menu. The (B15) and
(B16) lights alternate;
2. Turn the mode selection dial (B8) to the position. The
light (B14) remains on steadily;
3. Select the original grinding range by pressing the
button;
4. Press the button (B1) to exit the menu. (If the appli-
ance is left idle for about 1 minute, it exits automatically
from the settings menu and is ready for use again);
5. Turn the ground coee quantity dial (B2) to the "min”
position, then proceed to adjust as though it were the rst
time ("4.5 Adjusting the quantity of ground coee in the
lter").
13.10
Cleaning the "Smart tamping station"
To guarantee top quality grinding, clean the “Smart tamping
station” regularly as follows:
47 48
1. Clean the attachment area
with a brush (g. 7).
2. Pull the
lever
(A23) as
far as it will go and clean
the presser cylinder with
a brush (g. 48). Then re-
lease the lever.
3. Use the tube brush (C8)
to clean the coee guide
(g. 49).
44
49
Loading ...
Loading ...
Loading ...