Loading ...
Loading ...
Loading ...
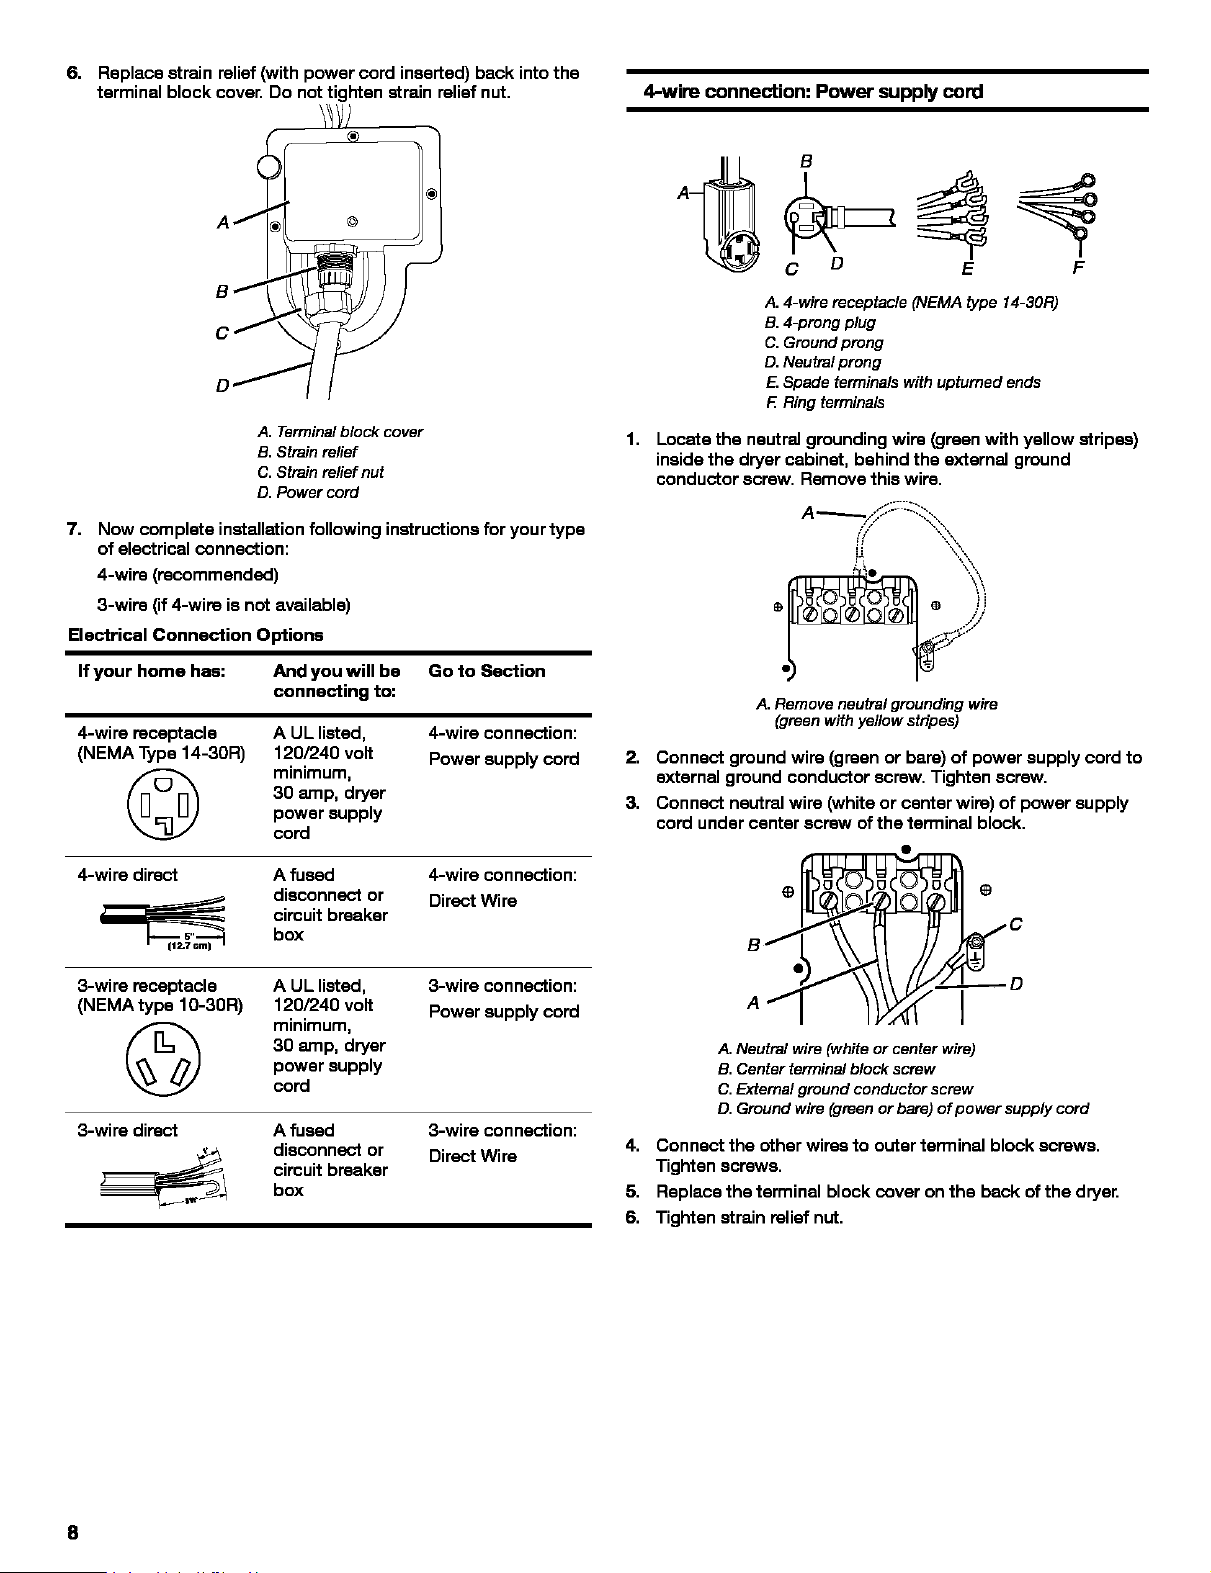
6. Replace strain relief (with power cord inserted) back into the
terminal block cover. Do not tighten strain relief nut.
A. Terminal block cover
B. Strain relief
C. Strain relief nut
D. Power cord
7. Now complete installation following instructions for your type
of electrical connection:
4-wire (recommended)
3-wire (if4-wire is not available)
Electrical Connection Options
If your home has: And you will be Go to Section
connecting to:
4-wira receptacle A UL listed,
(NEMA Type 14-30R) 120/240 volt
minimum,
30 amp, dryer
power supply
cord
4-wira connection:
Power supply cord
4-wira direct A fused
disconnect or
circuit breaker
box
4-wira connection:
Direct Wire
3-wira receptacle A UL listed,
(NEMAtype 10-30R) 120/240 volt
minimum,
30 amp, dryer
power supply
cord
3-wira connection:
Power supply cord
3-wira direct A fused
disconnect or
circuit breaker
box
3-wira connection:
Direct Wire
4-wire connection: Power supply cord
1.
A. 4-wire receptacle (NEMA type 14-30R)
B. 4-prong plug
C. Ground prong
D. Neutral prong
E. Spade terminals with upturned ends
K Ring terminals
Locate the neutral grounding wire (green with yellow stripes)
inside the dryer cabinet, behind the external ground
conductor screw. Remove this wire.
A. Remove neutral grounding w/re
(green with yellow stripes)
2. Connect ground wire (green or bare) of power supply cord to
external ground conductor screw. Tighten screw.
3. Connect neutral wire (white or center wire) of power supply
cord under center screw of the terminal block.
A. Neutral wire (white or center wire)
B. Center terminal block screw
C. External ground conductor screw
D. Ground wire (green or bare) of power supply cord
4. Connect the other wires to outer terminal block screws.
Tighten screws.
5. Replace the terminal block cover on the back of the dryer.
6. Tighten strain relief nut.
8
Loading ...
Loading ...
Loading ...