Loading ...
Loading ...
Loading ...
Vent Length Chart
Number of Type of vent Box or Angled
90° turns Iouvered hoods
or elbows hoods
O Rigid metal g0 ft (27.4 m) 80 ft (24.4 m)
Flexible metal 64 ft (19.5 m) 58 ft (17.7 m)
1 Rigid metal 80 ft (24.4 m) 70 ft (21.3 m)
Flexible metal 58 ft (17.7 m) 52 ft (15.8 m)
2 Rigid metal 70 ft (21.3 m) 60 ft (18.3 m)
Flexible metal 50 ft (15.2 m) 42 ft (12.8 m)
2. Turn the coupling and exhaust vent assembly
counterclockwise in the exhaust hole on the back of the
dryer.
3. Make sure the exhaust vent isplaced inside the exhaust hood
and then secured to the exhaust hood with a 4" (10,2 cm)
vent clamp,
1,
2.
3.
InstallVent System
Install exhaust hood. Use caulking compound to seal exterior
wall opening around exhaust hood.
Connect vent to exhaust hood. Vent must fit inside exhaust
hood. Secure vent to exhaust hood with 4" (10.2 cm) clamp.
Run vent to dryer location. Use the straightest path possible.
See "Determine vent length." Avoid 90° turns. Use clamps to
seal all joints. Do not use duct tape, screws or other fastening
devices that extend intothe interior of the vent to secure
vent.
LevelDryer
Check the levelness of the dryer. Check levelness first
side to side, then front to back.
Ifthe dryer is not level, prop upthe dryer using awood block.
Use a wrench to adjust the legs up or down and check again for
levelness.
NOTE: It might be necessary to levelthe dryer again after it has
been moved into its final position.
1,
ConnectVent
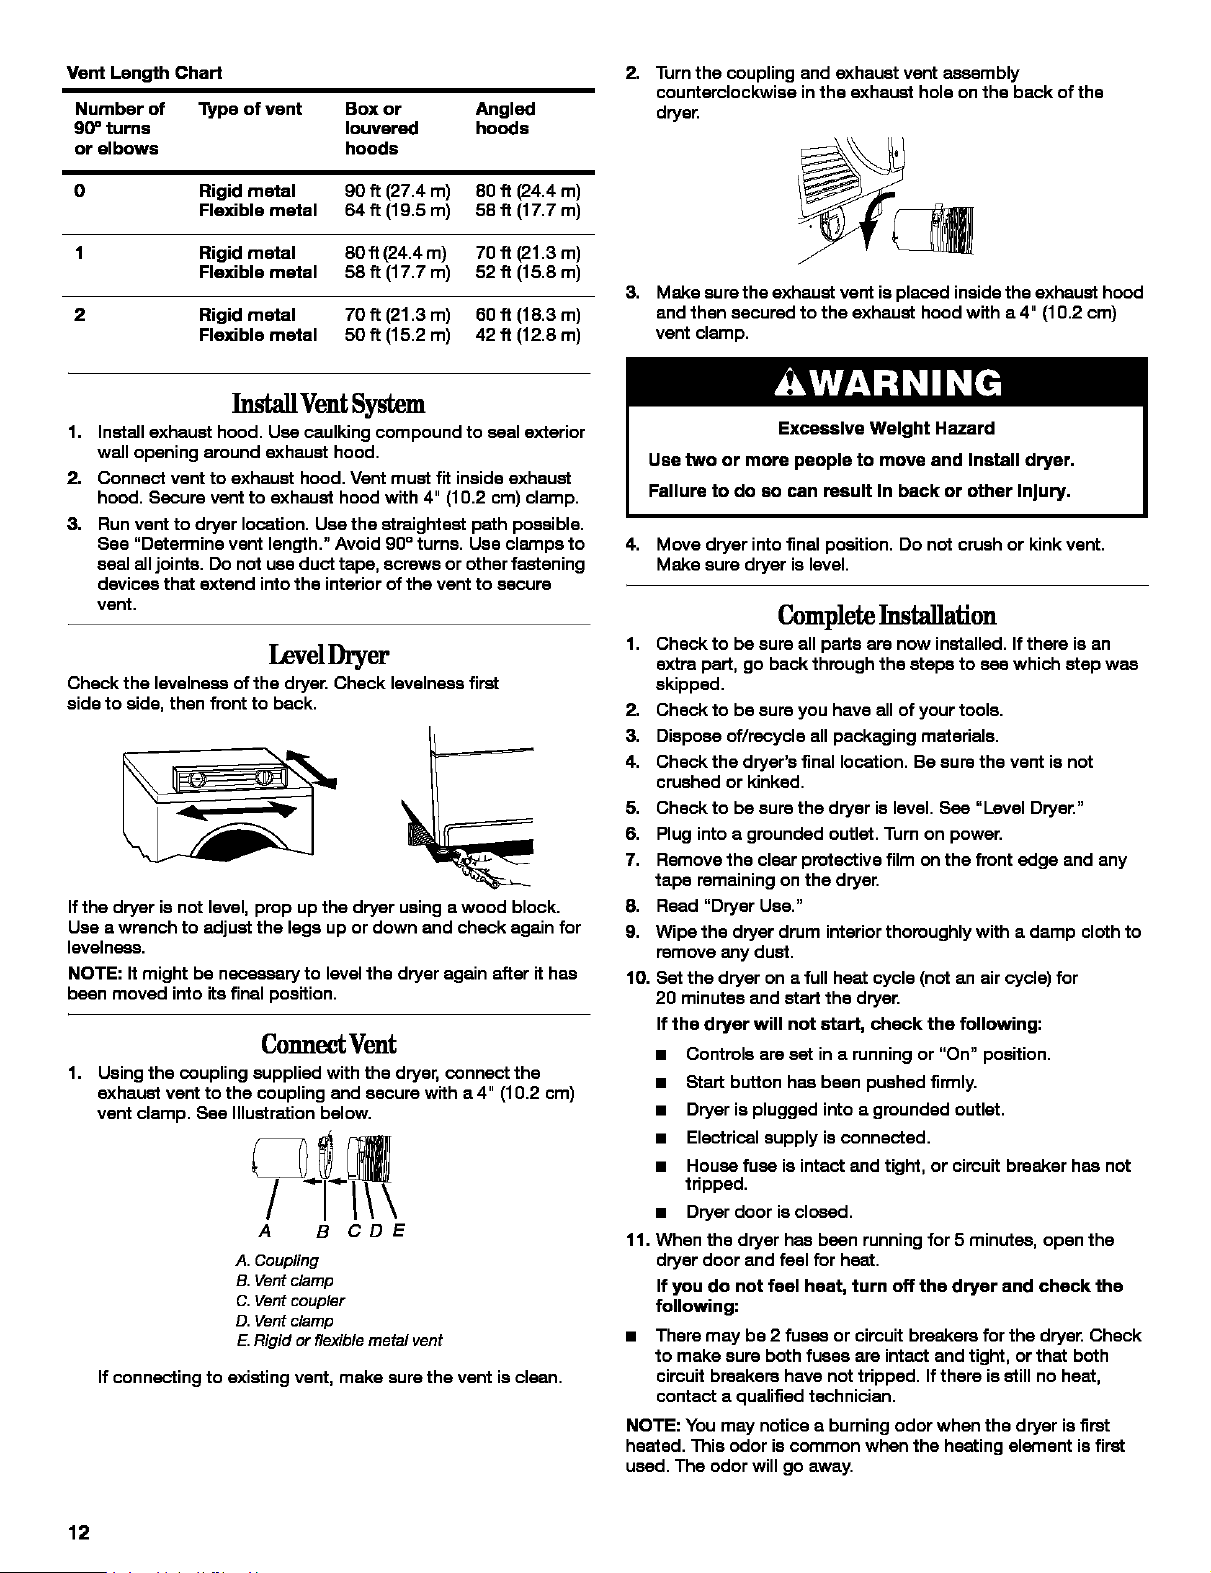
Using the coupling supplied with the dryer, connect the
exhaust vent to the coupling and secure with a 4" (10.2 cm)
vent clamp. See Illustration below.
A B CDE
A. Coupling
B. Vent clamp
C. Vent coupler
D. Vent clamp
E.Rigid or flexible metal vent
If connecting to existing vent, make sure the vent is clean.
4. Move dryer into final position. Do not crush or kink vent.
Make sure dryer is level.
Complete Installation
1. Check to be sure all parts are now installed. If there is an
extra part, go back through the steps to see which step was
skipped.
2. Check to be sure you have all of your tools.
3. Dispose of/recycle all packaging materials.
4. Check the dryer's final location. Be sure the vant is not
crushed or kinked.
5. Check to be sure the dryer is level. Sse "Level Dryer."
6. Plug into a grounded outlet. Turn on power.
7. Remove the clear protective film onthe front edge and any
tape remaining on the dryer.
8. Read "Dryer Use."
9. Wipe the dryer drum interior thoroughly with a damp clcth to
remove any dust.
10. Set the dryer on a full heat cycle (not an air cycle) for
20 minutes and start the dryer.
If the dryer will not start, check the following:
• Controls are set in a running or "On" position.
• Start button has been pushed firmly.
• Dryer is plugged into a grounded outlet.
• Electrical supply is connected.
• House fuse is intact and tight, or circuit breaker has not
tripped.
• Dryer door is closed.
11. When the dryer has been running for 5 minutes, open the
dryer door and feel for heat.
If you do not feel heat, turn off the dryer and check the
following:
• There may be 2 fuses or circuit breakers for the dryer. Check
to make sure both fuses are intact and tight, or that both
circuit breakers have not tripped. If there isstill no heat,
contact a qualified technician.
NOTE: You may notice a burning odor when the dryer isfirst
heated. This odor is common when the heating element is first
used. The odor will go away.
12
Loading ...
Loading ...
Loading ...