Loading ...
Loading ...
Loading ...

4
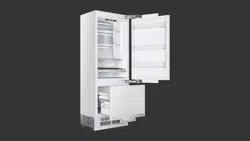
3.1 Transport to installation site and unpacking
WARNING
The product can present a tip hazard if not secured to
adjacent cabinets or if anti tip brackets are not installed.
Due to tip hazard handle with care when unpacking
and transporting the unit.
To avoid injury or death it is recommended that the
installation and repair be conducted by a qualified
contractor. Before installing the appliance, make sure
that the voltage, load and circuit current parameters on
the data plate are in compliance with the power mains
in your house.
Please wait for 3-6 hours before energizing the product
to protect it against possible damages. This way, the
refrigerant and the lubricants in the system get
balanced.
3.4 Preparation of Cabinetry
3.Preparing for the Installation
3.2 Pre-installation
•Always ensure ventilation holes are respected to ensure
proper function of unit.
•Please ensure min clearances from unit and surrounding
structures are respected.
•It is recommended the product be connected to a correct
3 prong receptacle on a dedicated 15 amp circuit, local
electrical and building codes should be respected. Failure
to comply may result in death, fire or electric shock. Always
connecting the grounding conductor properly to avoid
electric shock, if unsure confirm proper grounding of the
product by a qualified electrician.
•The appliance is provided with a cULs listed NEMA 5-15 P
plug and a 3-pin power cable to be connected to a 120 V,
60 Hz power supply.
•Where applicable water connection should be conducted
by a qualified contractor and tested prior to installation
•A circuit breaker, fuse, or socket must be accessible to
disable power to the product if required.
•Extension cords and other non approved wiring
(ungrounded two-terminal) adapters must never be used.
•It is recommended the product be installed by a qualified
technician according to the local building codes and
installation instructions
3.3 Installation Location
•It is recommended that the floor at the install location be
suitable for bearing the weight of the unit and food weight.
•Ensure the floor is flat and level from front to back to
ensure ease of installation and unobstructed airflow.
•The power socket and water supply (if applicable) must
be located correctly as per instructions.
•
•
Dimensions of the cabinet niche must meet the
necessary dimensions given in the manual.
It is recommended the installation area not be located
in proximity to heat sources, ovens, radiators etc. This
is to ensure the unit can dissipate the heat generated
during operation.
•The ambient temperature must be between 55°F (13°
C) and 110°F (43°C). Otherwise, function errors may
arise when the product is running.
•Never install this unit in an area exposed to
temperatures below freezing.
•
•
Ensure cabinets openings have provided the correct niche
and that cabinets are correctly installed and properly
secured to surrounding walls and floor.
For the best installation results, product clearances from
cabinets should be as specified in the installation
instructions.
•Minimum thickness of the doors to be attached to the
product must be ¾" (19 mm) .
3.5 Ventilation
•Ventilation openings must never be obstructed where the
air enters and exits the unit. Consumer must periodically
clean the dust and debris that can accumulate on the grill
over time.
3.6 Electrical Connection
•Follow niche diagram for proper outlet location (refer to
niche diagram).
•It is required the product be connected to the correct 3
prong receptacle on a dedicated 15 amp circuit, local
electrical and building codes should be respected. Failure
to comply may result in death, fire or electric shock.
•Always connecting the grounding conductor properly to
avoid electric shock, if unsure confirm proper grounding
of the product by a qualified electrician.
•Ensure power is off to unit before plugging in appliance.
•Power up before final installation to ensure proper
connection and power supply .
IMPORTANT
Loading ...
Loading ...
Loading ...