
Loading ...
Loading ...
Loading ...
10
IMPORTANT
If you are not comfortable the supplied connection and
anti tip brackets are fit to the wall as securely as they
should be, you can use alternative anti-tip methods.
If there is a cabinet panel at the back wall of the
refrigerator, please make sure that it is securely fixed to
the wall. For this, you need to be sure that the back wall
of the cabinet panel is affixed to the wall stud.
6.2 Alternative anti-tip method:
•If the anti-tip brackets cannot be connected securely,
you must use the alternative blocking method below.
•In this method, you can use wooden blocking to avoid
the risk of tipping over.
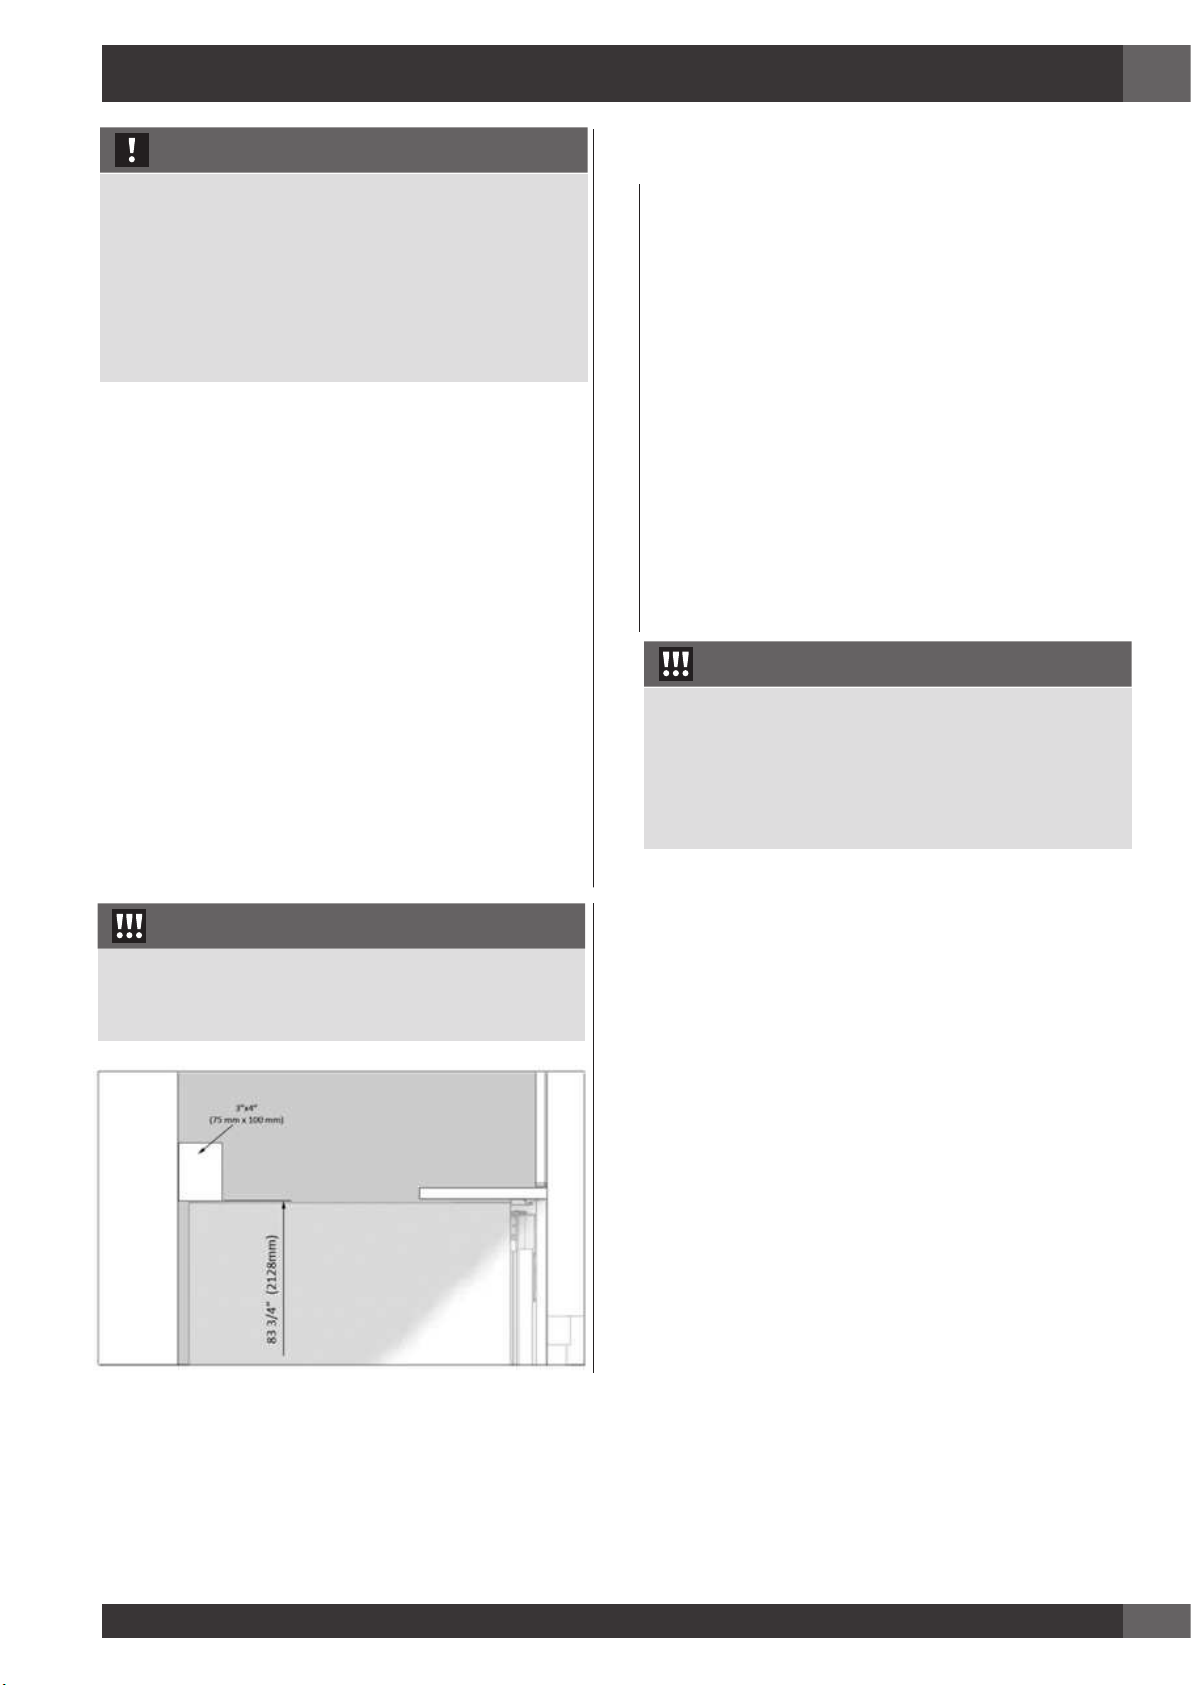
•It must be installed as illustrated in the figure below.
•There must be no clearance between the product and
the wooden girder.
•Minimum section dimensions of the wooden girder must
be 3"x4" (75 mm x 100 mm). Width of the girder must
be equal to the clearance where it will be installed. This
can be achieved using a 1 X 4”x4” or 2 X 2’x4” framing
lumber
•The calculation of blocking depth is based on a standard
niche depth, if the depth of niche is greater than 24”,
insure the blocking overlaps the upper rear fridge body
by 2”
•Select the location of the wood blocking and affix to wall
studs using suitable screws or fasteners and connect
safely.
WARNING
Quantity and type of screws or fasteners to be used for
affixing wood blocking must be suitable to ensure a
secure connection to the rear wall.
6.3 Preparing the Water Hose
•Inspect all water connections for leaks. Water
leaks can cause excessive damage over time. It is
recommended to us a ¼” supply line with a min
length of 60" (1.5 meters) with a threaded ¼”
female connector end. Before completing the
installation turn water on to ensure water is flowing,
and there are no leaks.
•Allow for sufficient slack in water supply line
providing minimum 10” of length from base of unit
once installed in niche. This provides some
tolerance for connections and adjustments if
needed.
6.4 Preparing the Electrical
•It is required the product be connected to the
correct 3 prong receptacle on a dedicated 15 amp
circuit, local electrical and building codes should be
respected.
WARNING
Failure to comply may result in death, fire or electric
shock. Always connecting the grounding conductor
properly to avoid electric shock, if unsure confirm proper
grounding of the product by a qualified electrician. Power
up before final installation to ensure proper connection
and power supply.
Loading ...
Loading ...
Loading ...