
Loading ...
Loading ...
Loading ...
13
IMPORTANT
The depth of the niche must also be designed to
accommodate the minimum depth requirement plus the
thicker door panel if desired. Regardless of door
thickness the maximum panel weights must always be
respected or warranty of product will be void.
7.5 Screwing the side brackets
•Attach the Side Brackets to the cabinet with screws (12
x #11) for each bracket.
•Fix the brackets(#17) to the unit, with 2 on the top, and
3 on every side. Use the screws (Item #18) to tighten.
•Use the 12 long screws (#16) to join the product and
the cabinet.
NOTE
Preparing a pilot reference hole in the side gable could
make these process of afixing to side cabinet gable easier
IMPORTANT
Before screwing the side brackets into cabinet gables
ensure screw is shorter than gable thickness to avoid
damage on finished side
Before starting to screw the side and upper brackets,
please ensure unit is connected to power and water (if
applicable) is supplied to the product and water
connection is tested for leaks.
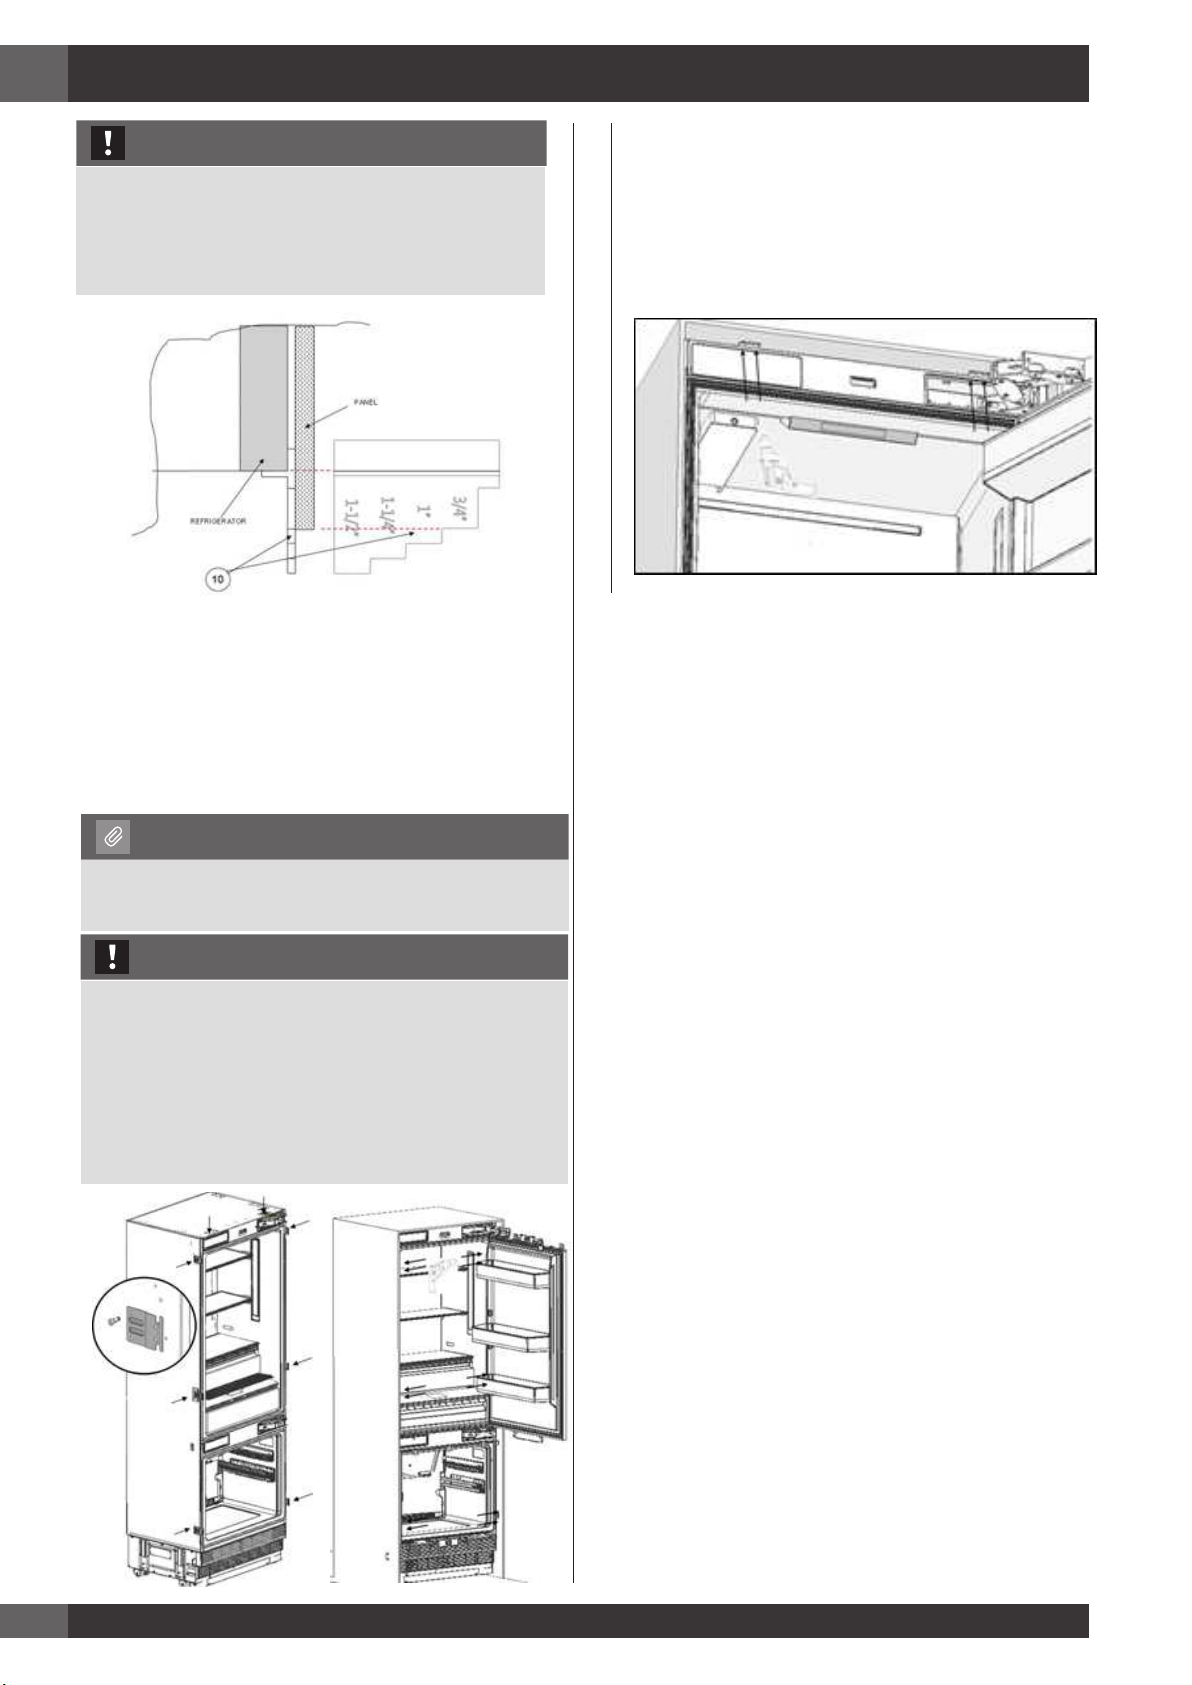
7.6 Securing the upper bracket
•Attach the upper bracket to the furniture with 4
screws (Item #16).
•Preparing a pilot reference hole in the side gable
could make these process of afixing to side cabinet
gable easier
Loading ...
Loading ...
Loading ...