Loading ...
Loading ...
Loading ...
14
8.Bottom Cabinet Installation
IMPORTANT
•Use proper hand tools to ensure a water tight
connection from supply line to refrigerator valve.
•The supply line should be one complete length. The
use of extension hoses is not recommended
•Always ensure power is disconnected when making
the water connection of the product.
•It is recommended the water valve remains accessible
after installing the product.
•This product is suitable for use with cold potable water
supply only.
•Pressure of the water system must be between 25-80
psi (1.7-5.5 Bar).
Once the connection is complete, you must turn on the
water valve and make sure that there is no leakage at that
point.
8.2 Attaching the upper vent hole part
Use 2 screws to attach the upper vent hole part.
8.3 Attaching the lower vent hole assembly
Use 2 screws to attach the lower vent hole part.
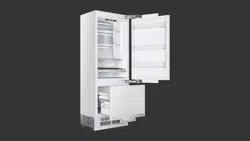
8.1 Complete the water connection
Allow sufficient slack in waterline to ensure an
easy bend and clear connection with no tension or
potential kinks in the supply line to the connector
The lower grill can be adjusted to accommodate the
cabinet toe kick. Also a piece of decorative cabinet toe
kick material can be affixed to the lower grill to match
cabinets provided there is no obstruction to vent grills
and air flow.
IMPORTANT
If installing a one piece cabinet toe kick across the
front of the fridge you must ensure proper air flow and
no obstruction to the vent grills
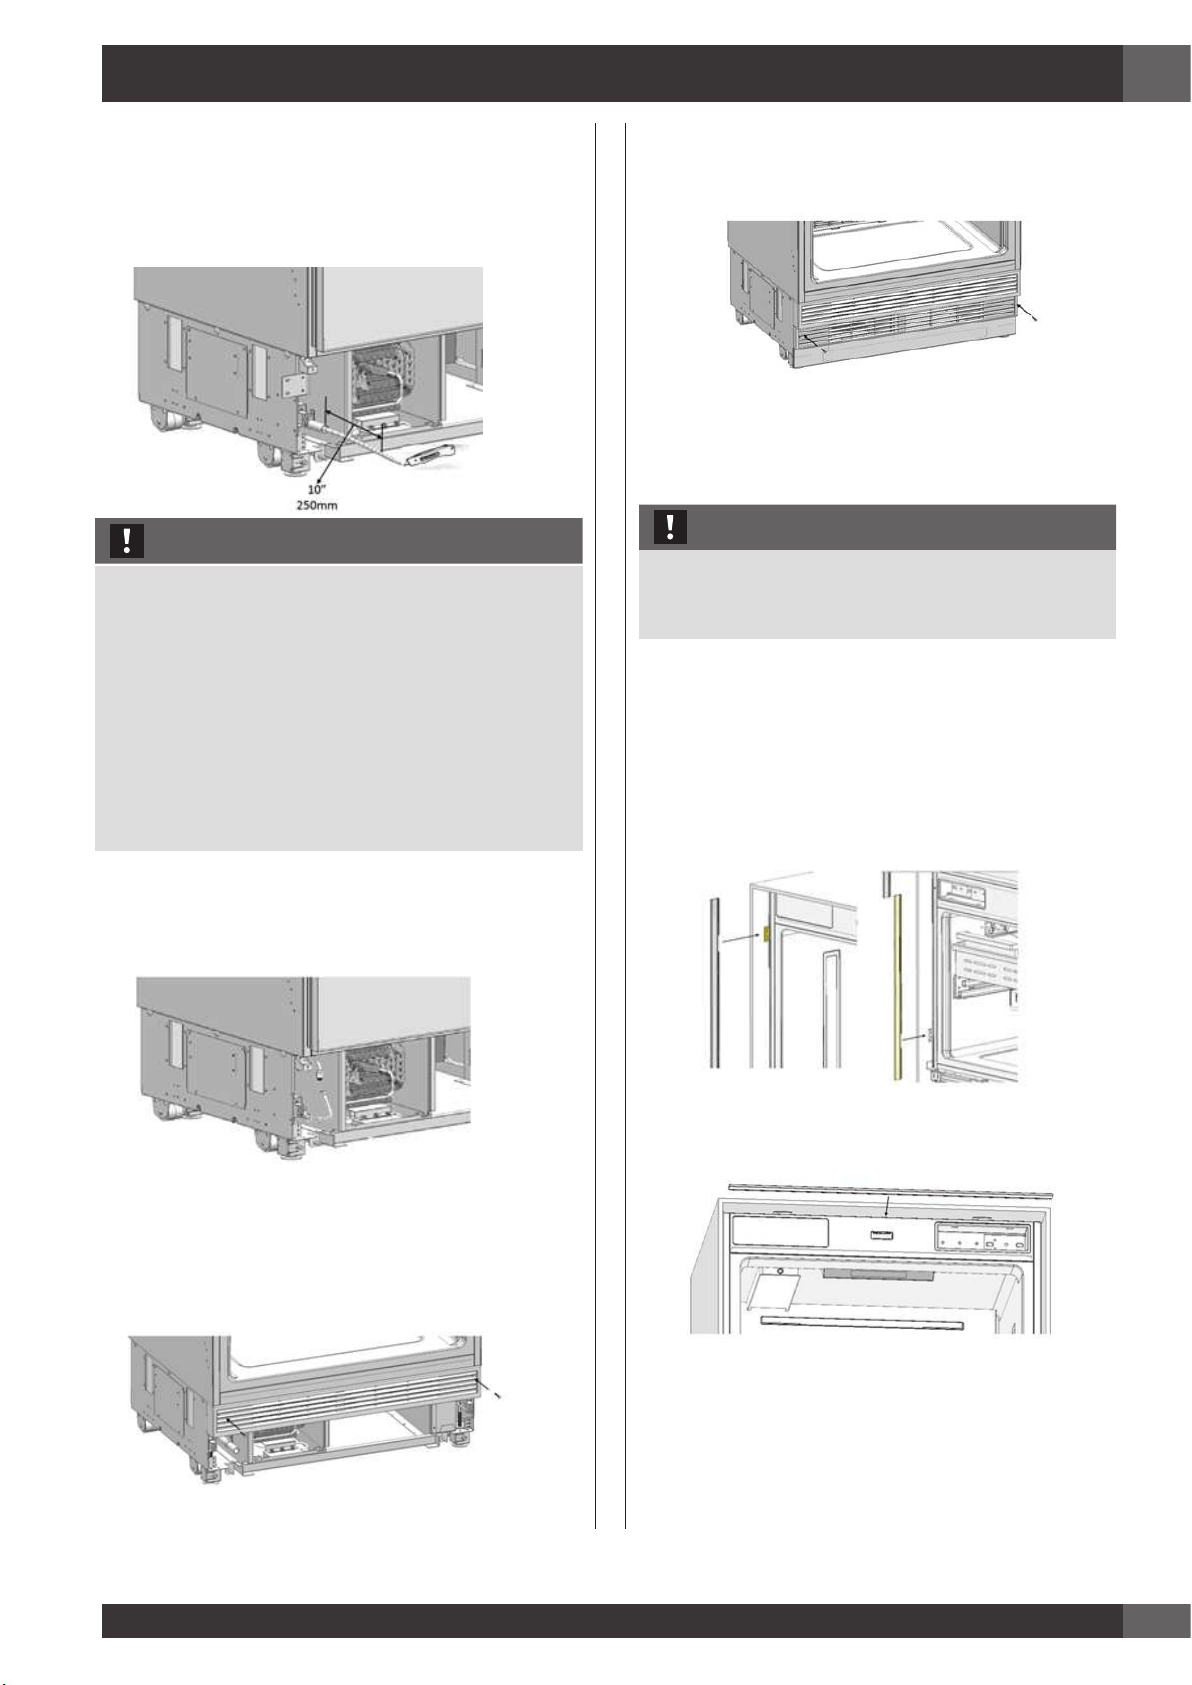
8.4 Attaching the decorative finishing trims
The decorative side trim is a soft plastic material with a
barbed end to insert between the cabinet gable and
product body (#1) onto the right/left connection
brackets. Some trimming may be required to ensure
the trims can fit around bracket, or thickness of barbed
end may require trimming due to width of opening from
side body and cabinet gable.
Push in finished trim (#4) onto the upper connection
bracket.
Loading ...
Loading ...
Loading ...