Loading ...
Loading ...
Loading ...
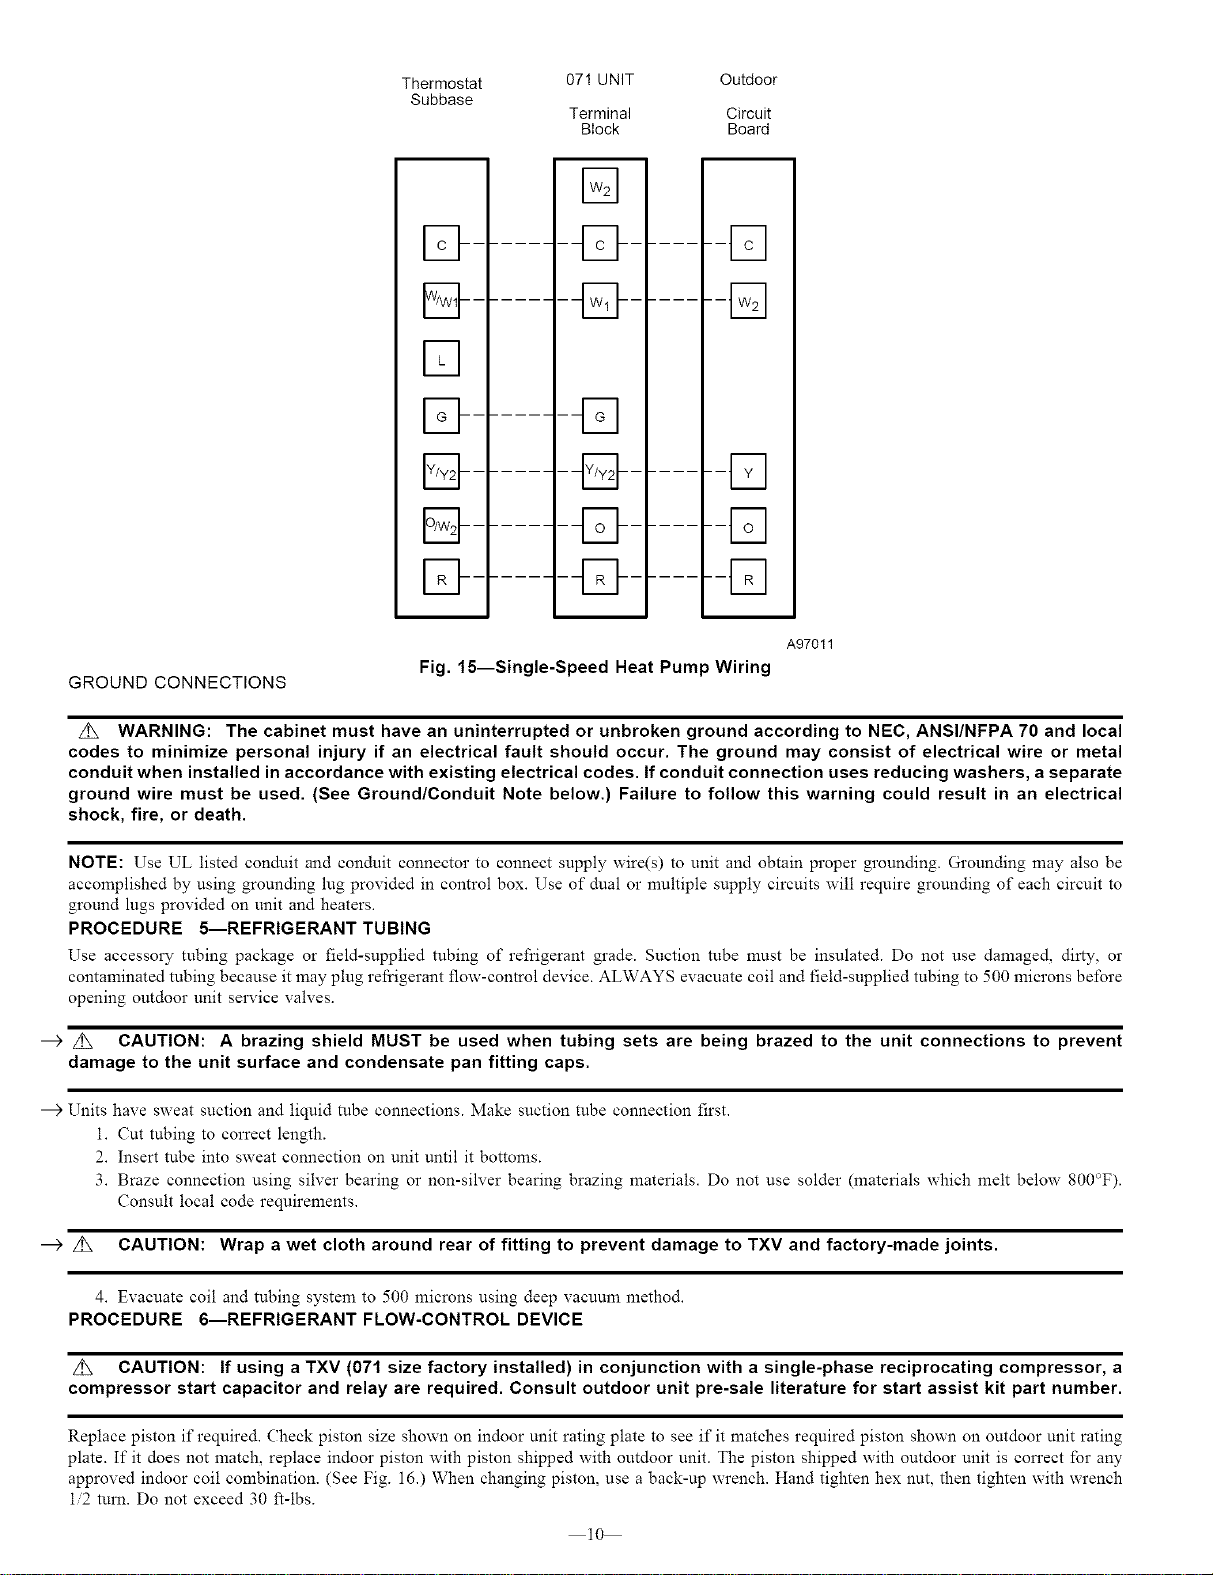
Thermostat
Subbase
m
D-
Fq
El--
D-
E_-
13--
07! UNIT
Terminal
BIock
rq
D
Outdoor
Circuit
Board
--t-q
GROUND CONNECTIONS
A97011
Fig. 15--Single-Speed Heat Pump Wiring
z_x WARNING: The cabinet must have an uninterrupted or unbroken ground according to NEC, ANSI/NFPA 70 and local
codes to minimize personal injury if an electrical fault should occur. The ground may consist of electrical wire or metal
conduit when installed in accordance with existing electrical codes. If conduit connection uses reducing washers, a separate
ground wire must be used. (See Ground/Conduit Note below.) Failure to follow this warning could result in an electrical
shock, fire, or death.
NOTE: Use UL listed conduit and conduit connector to connect supply wire(s) to unit and obtain proper grounding. Grounding may also be
accomplished by using grounding lug provided in control box. Use of dual or muhiple supply circuits will require grounding of each circuit to
ground lugs provided on unit and heaters.
PROCEDURE 5--REFRIGERANT TUBING
Use accessory tubing package or field-supplied tubing of refrigerant grade. Suction tube must be insulated. Do not use damaged, dirty, or
contaminated robing because it may plug rel}igerant flow-control device. ALWAYS evacuate coil and field-supplied tubing to 500 microns before
opening outdoor unit sel_'ice valves.
--_ Z_ CAUTION: A brazing shield MUST be used when tubing sets are being brazed to the unit connections to prevent
damage to the unit surface and condensate pan fitting caps.
Units have sweat suction and liquid robe connections. Make suction tube connection first.
i. Cut tubing to correct length.
2. Insert tube into sweat connection on unit until it bottoms.
3. Braze connection using silver bearing or non-silver bearing brazing materials. Do not use solder (materials which melt below 800°F).
Consult local code requirements.
--_ Z_ CAUTION: Wrap a wet cloth around rear of fitting to prevent damage to TXV and factory-made joints.
4. Evacuate coil and tubing system to 500 microns using deep vacuum method.
PROCEDURE 6--REFRIGERANT FLOW-CONTROL DEVICE
Z_X CAUTION: If using a TXV (071 size factory installed) in conjunction with a single-phase reciprocating compressor, a
compressor start capacitor and relay are required. Consult outdoor unit pre-sale literature for start assist kit part number.
Replace piston if required. Check piston size shown on indoor unit rating plate to see if it matches required piston shown on outdoor unit rating
plate. If it does not match, replace indoor piston with piston shipped with outdoor unit. The piston shipped with outdoor unit is con'ect for any
approved indoor coil combination. (See Fig. 16.) When changing piston, use a back-up wrench. Hand tighten hex nut, then tighten with wrench
i/2 turn. Do not exceed 30 ft-lbs.
10
Loading ...
Loading ...
Loading ...