Loading ...
Loading ...
Loading ...
3. TVFeatures 23
So.ndProjector,contin.ea
3,
4,
Adjusting
a.
b.
C.
d.
e_
Beam Angles
Adjust Center Beam Angle until sound is
about equal in both ears.
Adjust Left Beam Angme to maximize sound
heard from the front left side.
Adjust Right Beam Angme to maximize sound
heard from the front right side.
Adjust Left Surround Beam Angme to where
the sound seems to come from the left rear
side. Rfthis cannot be achieved, make the
setting the same as that for Left Beam Angle.
Adjust Right Surround Beam Angme to where
the sound seems to come from the right rear
side. Rfthis cannot be achieved, make the
setting the same as that for Right Beam Angle.
Adjusting Levels
a, Adjust Center Levemto the mid level.
b, Adjust the following levels one at a time so that
each one sounds about the same as the center
level:
Left Levem
Right Levem
Left Surround Levem
Right Surround Levem
c, Check all sound levels by quickly switching
between them using A V.
d, Readjust individual levels in smaU increments
and recheck as above until all sound levels
seem about the same.
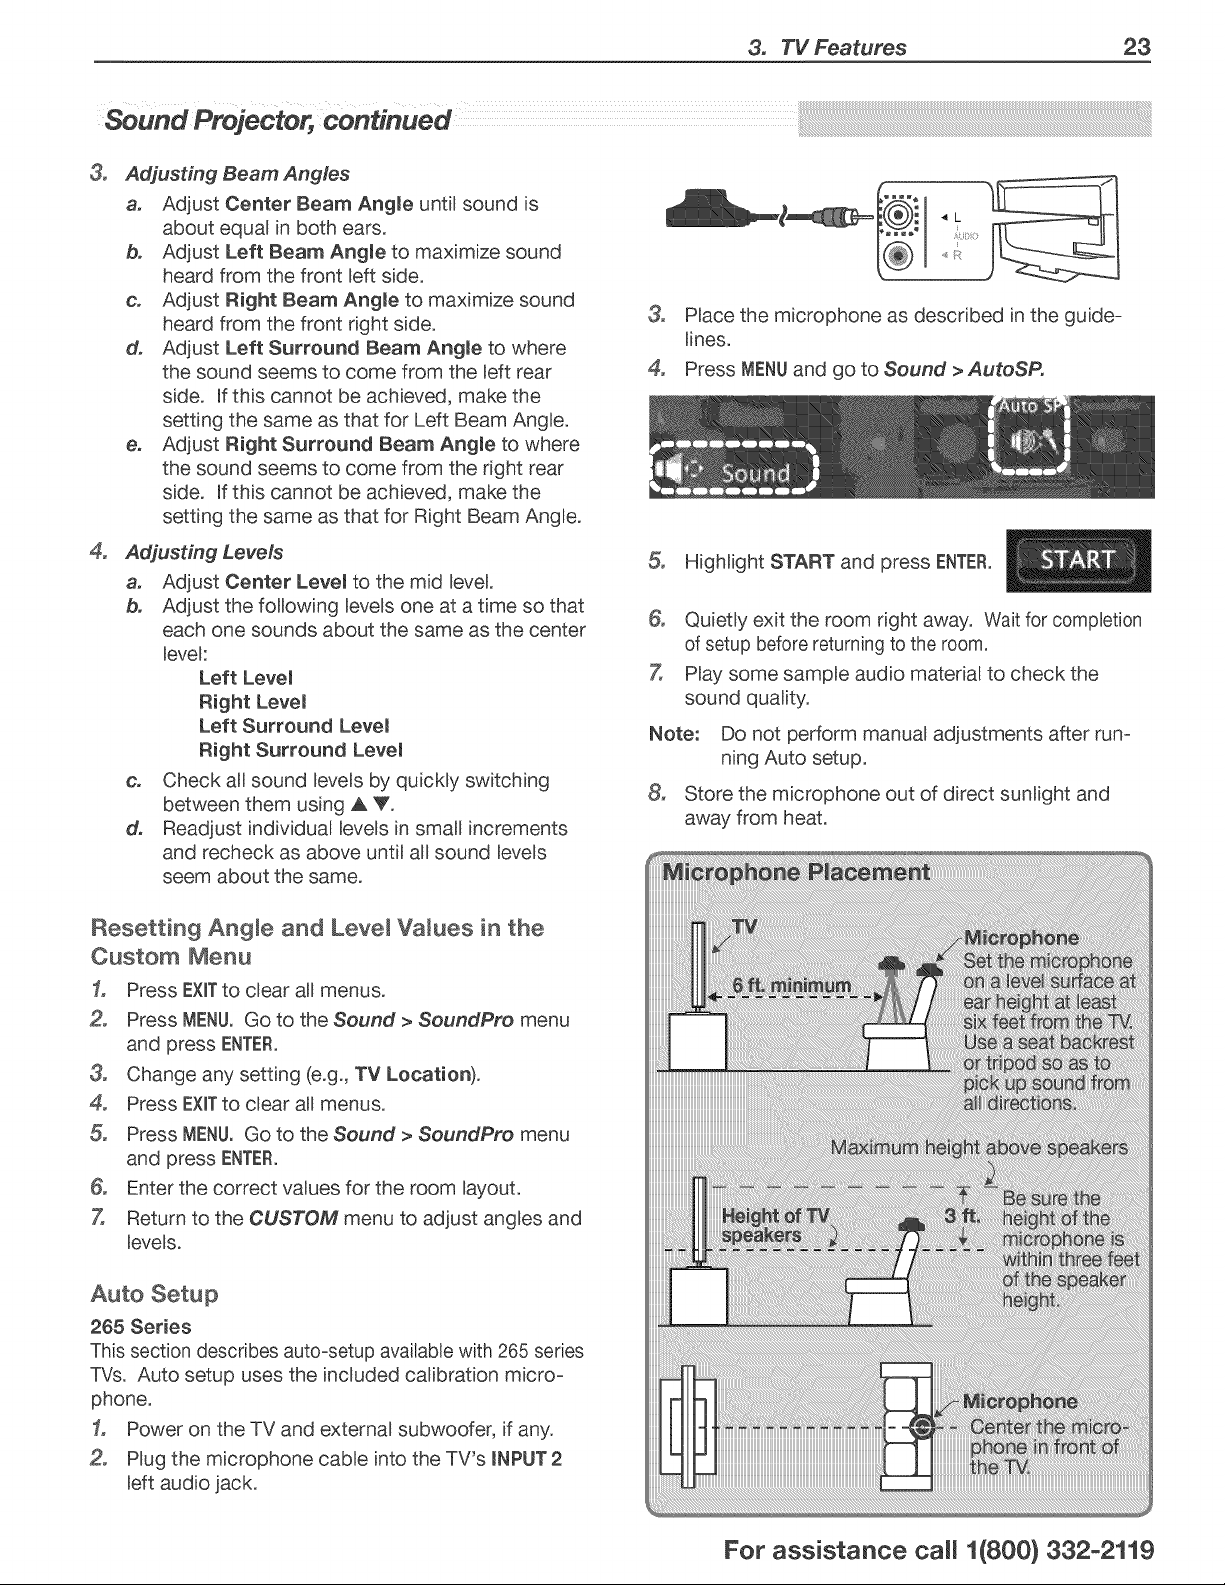
3, Place the microphone as described in the guide-
lines.
4, Press MENUand go to Sound > AutoSP,
Highlight START and press ENTER.
6, Quietly exit the room right away. Wait for completion
of setup before returning to the room.
7, Play some sample audio material to check the
sound quality.
Note: Do not perform manual adjustments after run-
ning Auto setup.
8, Store the microphone out of direct sunlight and
away from heat.
Resetting AngJe and LeveJ Values in the
Custom Menu
1, Press EXITto clear all menus.
Press MENU. Go to the Sound > SoundPro menu
and press ENTER.
3, Change any setting (e.g., TV Location).
4, Press EXITto clear all menus.
Press MENU. Go to the Sound > SoundPro menu
and press ENTER.
6, Enter the correct values for the room layout.
7, Return to the CUSTOM menu to adjust angles and
levels.
Auto Setup
265 Series
This section describes auto-setup available with 265 series
TVs. Auto setup uses the included calibration micro-
phone.
1, Power on the TV and external subwoofer, if any.
Plug the microphone cable into the TV's mNPUT2
left audio jack.
For assistance ca((1(800} 332-2119
Loading ...
Loading ...
Loading ...