Loading ...
Loading ...
Loading ...
Removing the built-in appliance
Disconnect the appliance from the power mains. Use a suitable tool to remove the silicone gasket
from the perimeter. Remove the appliance by pushing it upwards from the bottom side.
WARNING!
Do not attempt to remove the appliance from the upper side of the counter!
WARNING!
The service department shall only be responsible for repair and servicing of the cooking hob.
Consult your specialized kitchen equipment dealer regarding the re-installation of the flush-mount
cooking hob.
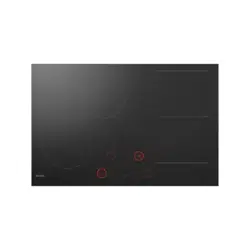
Stone countertop
1. Countertop
2. Appliance
3. Slot
Given the margin of error (tolerance) for the glass ceramic plate of the appliance, and the cutout in
the countertop, the slot is adjustable (min. 2 mm).
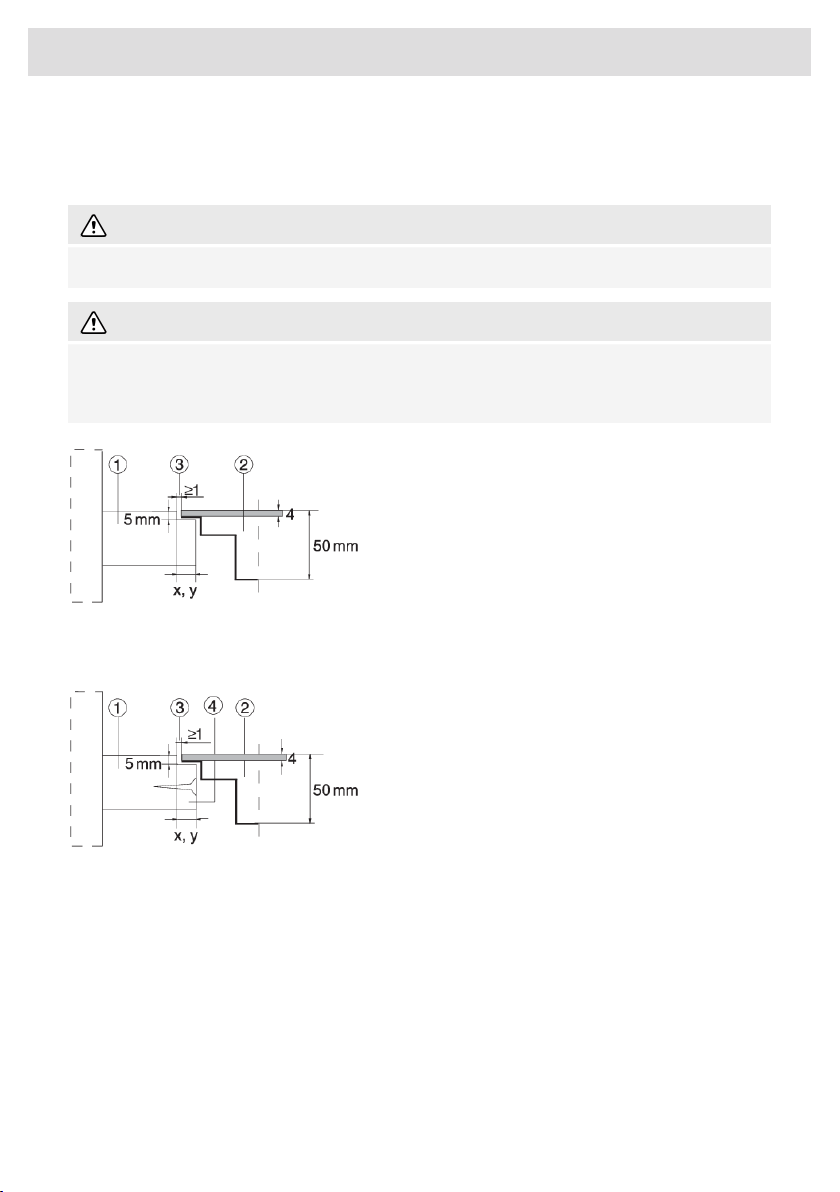
Ceramic, wooden, or glass countertop
1. Countertop
2. Appliance
3. Slot
4. Wooden frame, thickness 16 mm.
49
Installation
Loading ...
Loading ...
Loading ...