Loading ...
Loading ...
Loading ...
Other External Components
86
7
[None] *
2
Assign no position to the view camera
connected to the selected input terminal.
*1 The [REAR VIEW CAMERA] and [FRONT
VIEW CAMERA / DASH CAM] setting
screens only.
*2 Except the [REAR VIEW CAMERA] setting
screen.
4
Touch [Enter].
NOTE
• The screen shot above is for the [FRONT VIEW
CAMERA / DASH CAM] setting screen. It may
be different from the ones for [REAR VIEW
CAMERA], [3rd VIEW CAMERA] and [AV-IN].
• The Dashboard Camera can be selected when it is
connected. ( P.117)
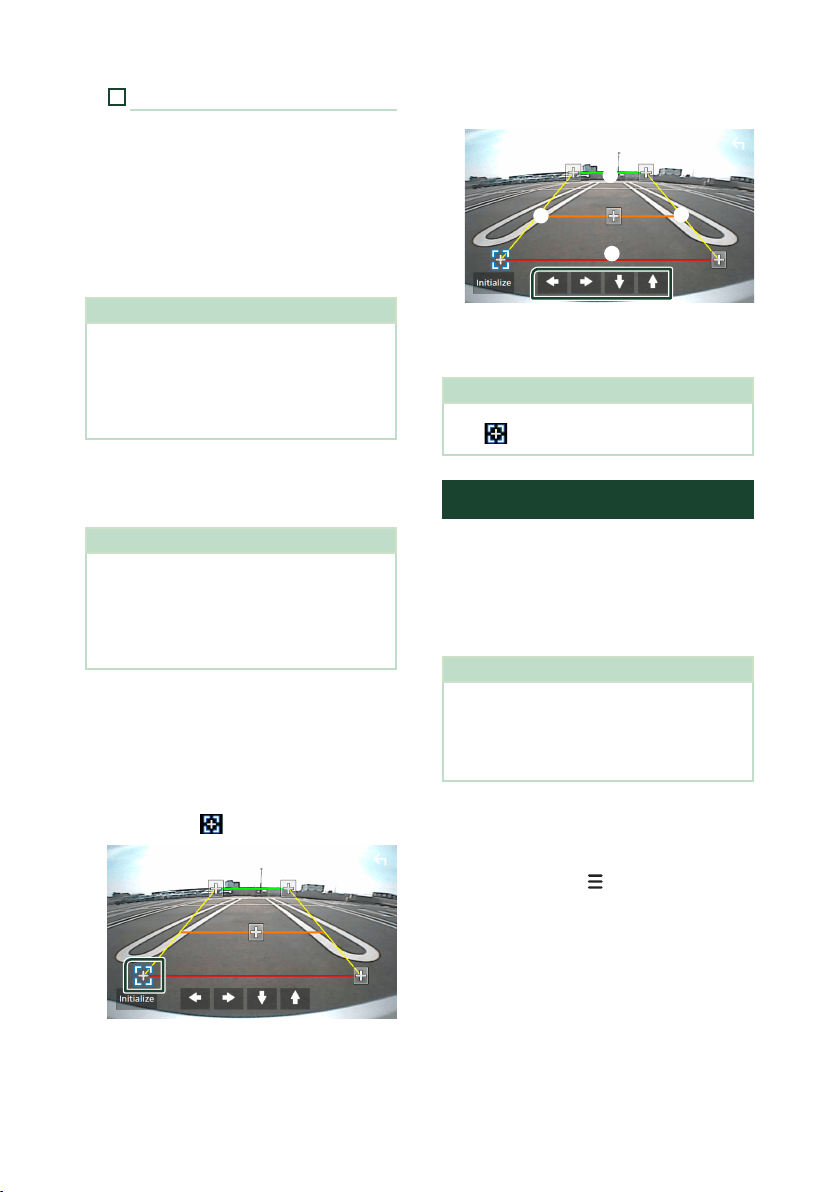
Ñ To adjust the parking
guidelines
NOTE
• Install the rear view camera in the appropriate
position according to the instruction manual
supplied with the rear view camera.
• When adjusting the parking guidelines, make
sure to apply the parking brake to prevent the car
from moving.
1
Touch [Parking Guidelines] in the Camera
screen and set to [ON]. (P. 84)
2
Touch [Guidelines SETUP] on the Camera
screen.
3
Adjust the parking guidelines by
selecting the
mark.
4
Adjusting the position of the selected
mark.
A
B
C
D
Make sure that lines A and B are
horizontally parallel, and that lines C and
D are of the same length.
NOTE
• Touch [Initialize] and then touch [Yes ] to set all
the
marks to their initial default position.
Use Dashboard Camera
A Dashboard Camera, DRV-N520 (optional
accessory), connected to this unit lets you play
video-recorded data and so on.
For details, see the instruction manual of
the Dashboard Camera DRV-N520 (optional
accessory).
NOTE
• To connect a dashboard camera, see Connecting
the camera (P.117).
• To use the dashboard camera function, it is
necessary to set “Camera Assignment Settings” to
“Dashboard Camera”. ( P. 85)
Ñ Display the dashboard camera
screen
1
Press the [MENU]/[ ] button.
Popup menu appears.
Loading ...
Loading ...
Loading ...