Loading ...
Loading ...
Loading ...
Tool:
13 – 15mm Wrench
ASSEMBLY
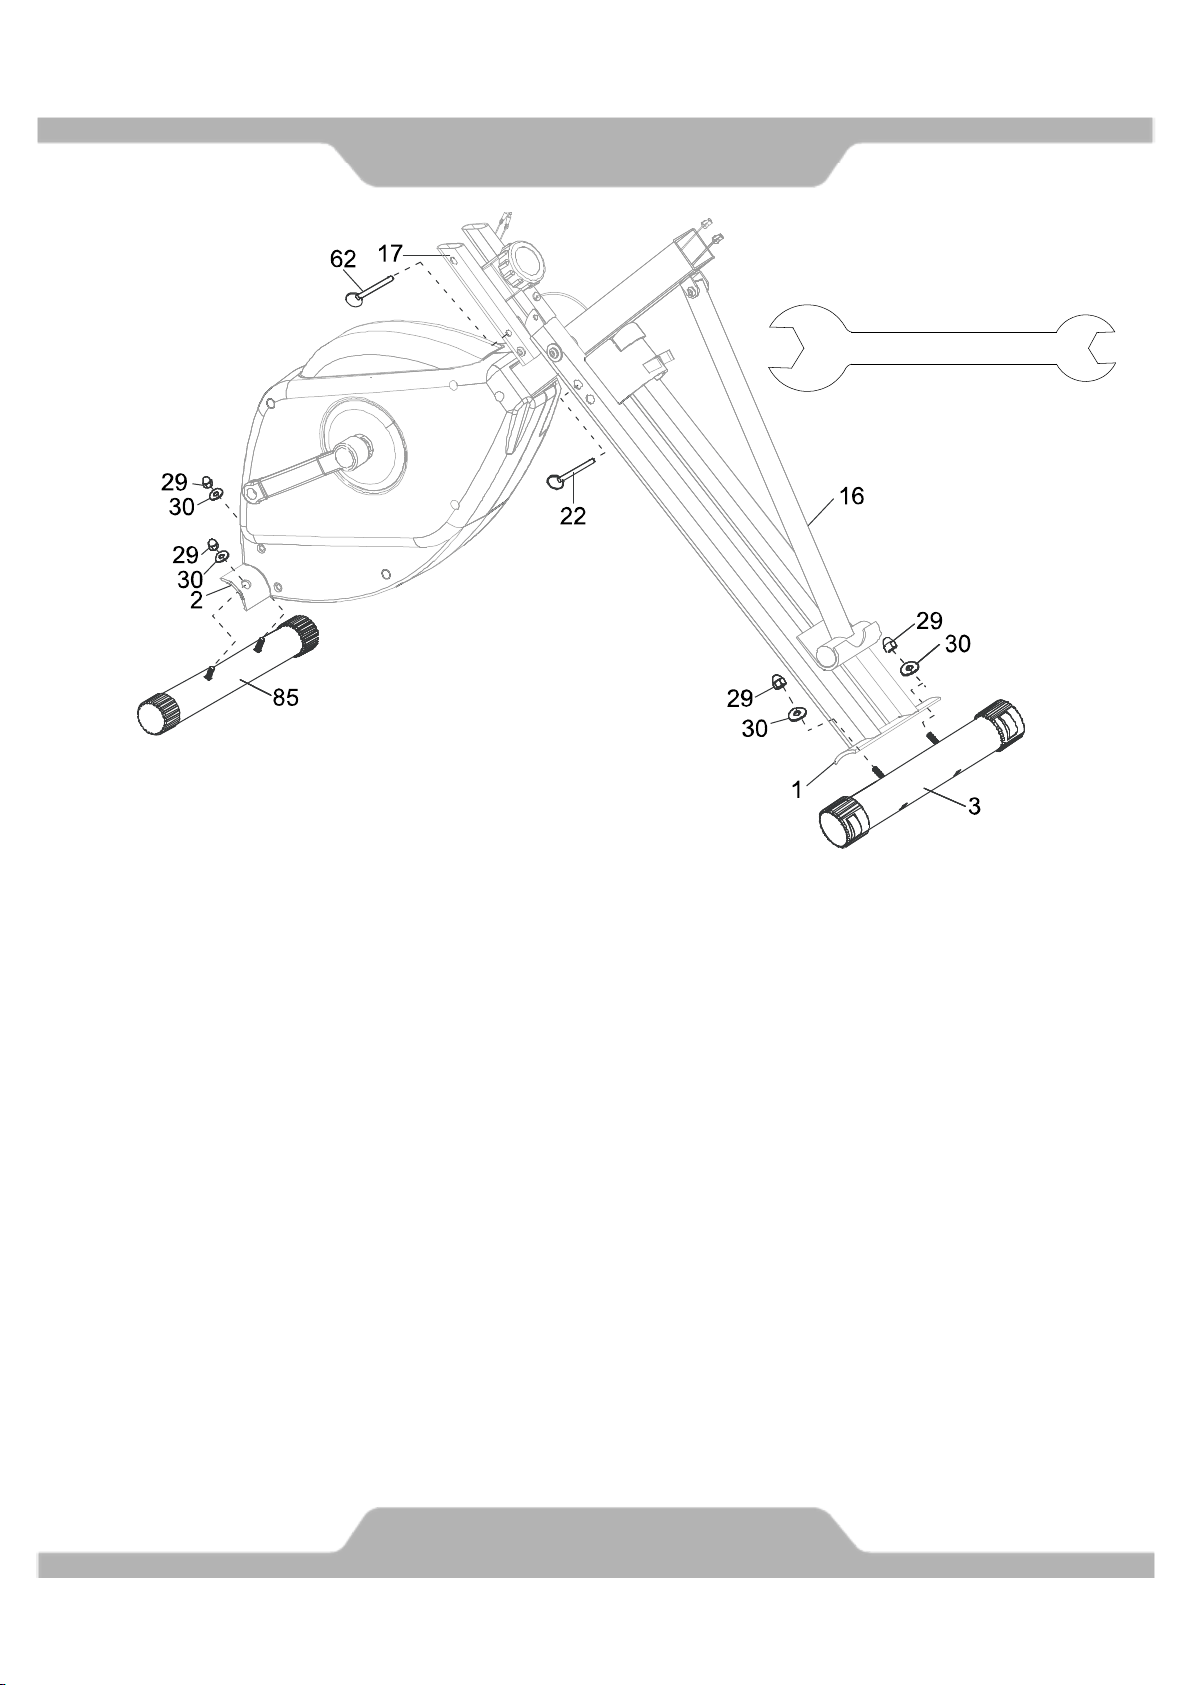
Step 1
Remove the Safety Pin A (22) from the Rear Frame (1) and the Safety Pin B (62) from
the Computer Post (17). Pull the Rear and Front Frames (1, 2) apart from each other. Rest
the Support Tube (16) into the hooked plate on the Rear Frame (1). Align the upper pin
holes on the Rear and Front Frames (1, 2), then insert the removed Safety Pin A (22) into
the upper holes to lock the frames in place. Align the pin holes on the Computer Post (17)
and Front Frame (2), and then insert the removed Safety Pin B (62) into the holes to lock
the Computer Post (17) in place.
Remove the two Hexagon Nuts Cap (29) and two Curve Washers (30) from the Front
Stabilizer (85), and the Rear Stabilizer (3).
Attach the Front Stabilizer (85) to the curved bracket on the Front Frame (2) with the
two Hexagon Nuts Cap (29) and two Curve Washers (30) that were removed. Tighten the
Hexagon Nut Caps (29) with the 13 – 15mm Wrench provided.
Attach the Rear Stabilizer (3) to the curved bracket on the Rear Frame (1) with the two
Hexagon Nuts Cap (29) and two Curve Washers (30) that were removed. Tighten the
Hexagon Nut Caps (29) with the 13 – 15mm Wrench provided.
8
Loading ...
Loading ...
Loading ...