Loading ...
Loading ...
Loading ...
22
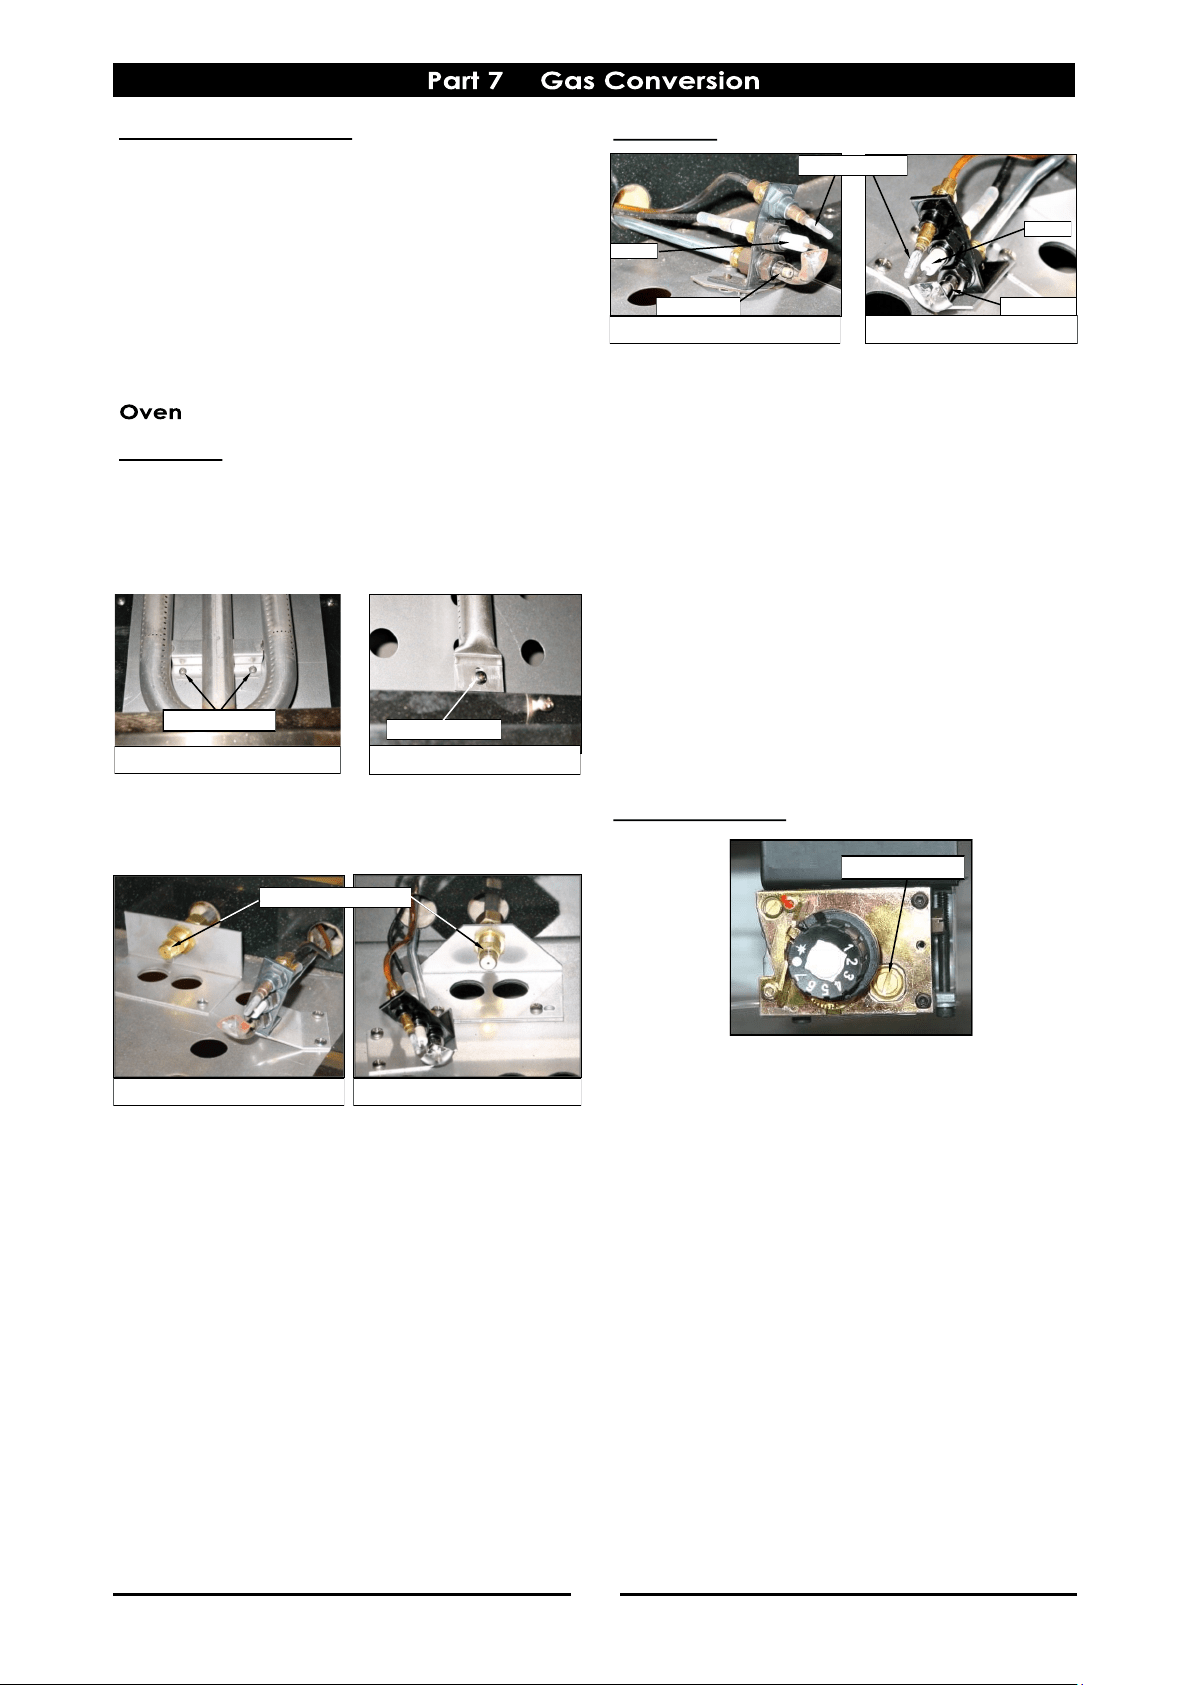
Thermocouple Connection
a. Check that the thermocouple connection to the
gas valve is tight.
NOTE:
When screwing the thermocouple back into the gas
control valve, once threaded up, tighten up another
¼ turn only. Do not over tighten.
Main Burner
1. Turn off gas supply at main supply.
2. Remove oven racks, oven tray and flame baffle
from inside oven.
3. Remove the oven main burner.
4. Remove main burner injector and replace with
correct size injector. (Refer to ‘Gas
Specifications’ table at rear of this section).
5. Refit the main burner.
Main Burner - CR9 Model
Securing Screws
Securing Screw
Main Burner - CR6 Model
Main Burner Injector - CR6 Main Burner Injector CR9
Main Burner Injector
Pilot Burners
1. Remove the following:-
Thermocouple (for access).
Piezo electrode (for access).
Unscrew pilot supply tube.
2. Remove pilot injector and replace with correct
size injector. (Refer to ‘Gas Specifications’ table
at rear of this section).
3. Refit the following:-
Thermocouple (removed for access).
Piezo electrode (removed for access).
Pilot supply tube.
Flame baffle.
Oven racks.
Oven trays.
Low Fire Adjustment
1. To change the thermostat ‘Low Fire’ screw for
the gas type required, remove the following:-
Gas control knobs.
Control Panel.
Unscrew ‘Low Fire’ screw from gasvalve.
and fully screw in the new ‘Low Fire’
screw for the new gas type. (Refer to the
‘Gas Specifications’ table at the rear of
this section for the correct low fire screw
sizes).
2. Refit the control panel.
3. Refit the gas control knobs.
Piezo
Pilot Burner CR6
Pilot Burner
Pilot Burner CR9
Thermocouple
Pilot Burner
Piezo
Low Fire Screw
Loading ...
Loading ...
Loading ...