Loading ...
Loading ...
Loading ...
69-2715EF—07 4
C
C
MCR33823
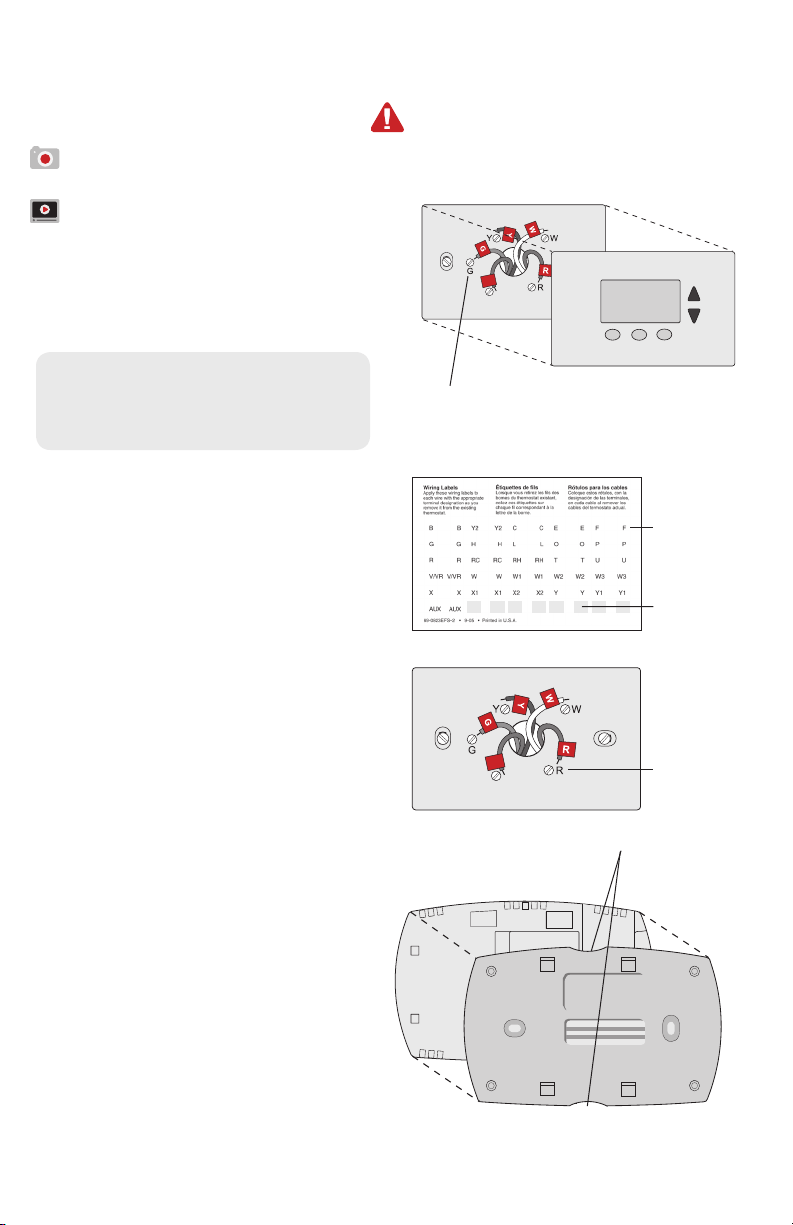
If you have an older thermostat with
a sealed mercury tube, turn to page
ii for proper disposal instructions.
Terminal
designation
Installing your thermostat
2 Remove old thermostat faceplate
and leave wires connected.
2a Take a picture of the wire
connections for later reference.
2b If no wire is connected to a
terminal labeled C or no C terminal
exists on the old thermostat, view
the Alternate Wiring videos at
honeywellhome.com/wifi-thermostat
Important! C wire is required and
is the primary power source for your
thermostat. Without a C wire, your
thermostat will not power up.
3 Label wires.
Do not label by wire color. Use
the supplied sticky tags to label
each wire as you disconnect it.
Label wires according to the old
thermostat terminal designations,
not by wire color.
Note: If no tag matches a wire
terminal label, write the terminal
label on a blank tag.
4 Remove wallplate.
Remove the old wallplate from
the wall after all wires have been
labeled and disconnected.
Blank sticky
tags
Sticky tags
Terminal
designation
C
C
MCR31537
5 Separate thermostat and its
wallplate.
On your new thermostat, grasp the
finger holds on the top and bottom
of the wallplate with one hand and
the thermostat (front) with the other
hand. Pull pieces apart.
Thermostat
Wallplate (back view)
Finger holds
M33856
PULL HERE
TO REMOVE
PULL HERE
TO REMOVE
Loading ...
Loading ...
Loading ...