Loading ...
Loading ...
Loading ...
Top
Hinge
Fix plate
Screw hole cover
Top cover
Unit top surface
Left fix
piece
Right fix
piece
Change
Move
Left
bottom
hinge
Right
bottom
Hinge
1. Ensure the unit is unplugged before starting door reversal.
2. Remove the 2 Screw hole cover on the top cover,unscrew 2 screws which
fix the top over.
3. Remove the 2 screws from the top hinge, and 2 screws from the fix plate.
4. Lift the door up and take off the door.
5. Set the freezer door on a non-scratching surface with the outside up.
6. Unscrew the 2 screws on the handle , fix on the opposite side of the door.
Remove the screw on the right fix piece, fix the left fix piece(from accessory
bag) to the door.
7. Remove the right bottom hinge by removing the 3 screws, than fix the 3
screws back without hinge .
8. Remove the hinge pin on the right bottom hinge and reinstall on the left
bottom hinge.
9. Remove the 3 screws from the left side and fix the left bottom hinge on the
unit.
10. Place the door on the left bottom hinge. With the magnetic gasket holding
the door in place, make sure the door is aligned with the unit, and secure the
top hinge on the left with 2 screws.
11. Open and close both the door several times to confirm the door is
positioned correctly and the gasket is sealed well. If this is not the case,
please adjust the door again.
12. Fix the Fix plate back on the right side. Fix the top cover with 2 screws,
cover the screw hole with the Screw hole cover.
13. Wait at least 30 minutes before plugging in the refrigerator to allow the
refrigerant to settle down. Then plug in the unit.
Handle
Handle
Handle pin
Handle pin
a)This unit is not for outdoor use. Keep the proper room temperature and
inlet water temperature according to above specification table. Otherwise it
will affect the ice making performance.
b)This unit should not be located near any heat resource.
c)The unit should be located on a firm & level foundation at normal counter
top height.
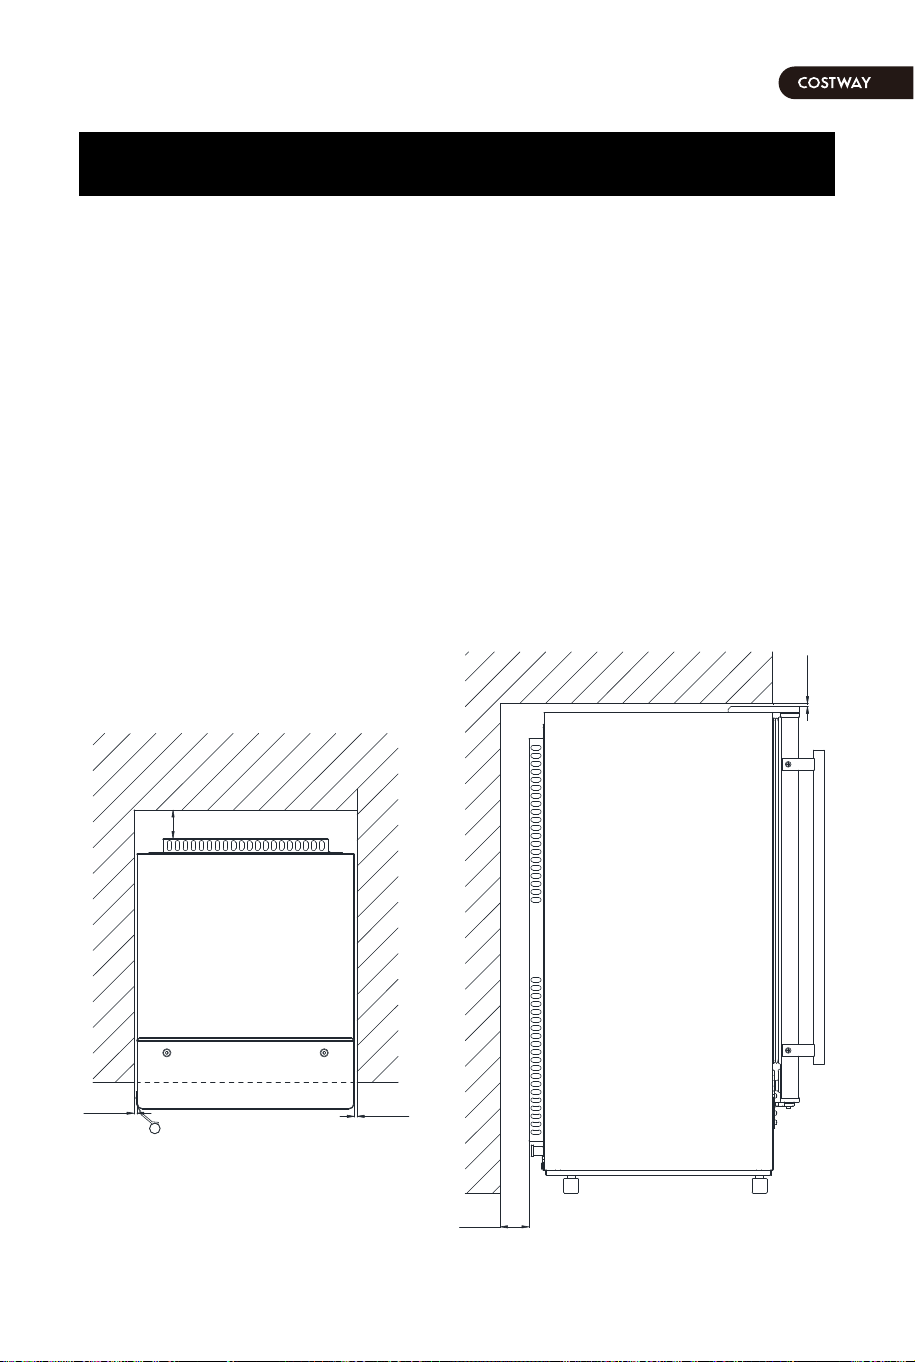
d)There must be at least 2 inch clearance at rear side for connection and 10
inch clearance in front to open the door and keep good air circulation.
e)Do not put anything on the top of the ice maker.
Installation clearance
INSTALLATION LOCATION REQUIREMENT
Top view
Side view
14 15
5mm
[0.2” ]
50mm
[2.0”]
5mm
[0.2”]
5mm
[0.2”]
50mm
[2.0”]
Loading ...
Loading ...
Loading ...