Loading ...
Loading ...
Loading ...

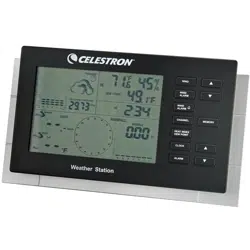
5
• Heat Index – combines the effects of temperature and humidity and is the apparent temperature
of how hot the heat/humidity combination makes it feel. Push the button “Heat Index/Dew
Point” to display either the heat index or the dew point.
• Dew Point – is the saturation point of the air, or the temperature to which the air has to be
cooled in order to get condensation. Push the “Heat Index/Dew Point” button to obtain the
information the same way as noted above under “Heat Index”.
• Ice Alert – an ice alert icon (*) appears on the display next to the wind chill reading when the
outdoor temperature falls to or below 4° C (39.2° F).
• Wind Speed & Direction – the Anemometer allows you to sample the wind speed and
direction. Set the display to read the wind speed type by pushing the button on the rear of the
Receiver called “WIND UNIT” to the choice you desire – kmp (kilometers per hour), mph
(miles per hour), m/s (meters per second), knots, or Beaufort. The display shows 16 wind
directions as “N” for north, “SW” for southwest, etc. and displays the average wind direction
over a two minute period. Press the “WIND” button to select gust wind speed and it will show
the maximum wind speed over a ten minute period and press the button again to show the
average wind speed over a two minute period.
• Wind Chill – is the apparent temperature felt on exposed skin due to the combination of air
temperature and wind speed. The wind chill reading on the display is calculated based on the
temperature measured by the Anemometer and the average wind speed.
• Wind Gust & Wind Chill Alarm – you can set the Receiver to sound an alarm for about one
minute when wind gust reaches or exceeds a set limit. Press the “WIND ALARM” button to
silence the alarm sound but the related high alarm icons will continue to flash until the alarm
condition is no longer met.
Press the “WIND ALARM” to show high wind gust alarm display and alarm icons appear in the
wind gust area. Press and hold the “WIND ALARM” button to enter the setting mode and
wind gust digits will flash. Use the up and down buttons to set the values you want and then
press “WIND ALARM” to exit.
You can set the Receiver to sound an alarm for about one minute when the wind chill reaches or
falls below the set limit. Press the “WIND ALARM” to silence the alarm sound. The related
low alarm icon will continue to flash until the alarm condition is no longer met.
Press the “WIND ALARM” repeatedly until the alarm icon appears in the wind chill display
area. Press and hold the “WIND ALARM” button to enter its setting mode and the wind chill
digits will flash. Press the up and down buttons to set the values you want to use and press
“WIND ALARM” to confirm the setting and exit.
Press the “WIND ALARM” button on the rear of the Receiver repeatedly to enable or disable
the wind gust alarm or the wind chill alarm. When enabled, the Receiver will have icons of
“Hi” and/or “Lo” for the functions.
• Rainfall Measurement – The wireless Rain Gauge provides daily, weekly, monthly and
accumulated rainfall measurements. Press the “RAIN/CLEAR” button repeatedly to switch
between the different modes and the corresponding daily, weekly, monthly, or total icon will
appear indicating your current display mode. In each mode, press and hold the “RAIN/CLEAR”
button for a few seconds to clear the readings. Press the “RAIN UNIT”
button on the rear of the
Receiver to change the rain measurement unit between mm and inch to your choice.
• Rainfall History – the Receiver has a large capacity memory that can store and display – daily
rainfall (up to the last six days as well as the current day), weekly rainfall (up to the last six weeks
as well as the current week), and monthly rainfall (up to the last six months as well as the current
month).
Loading ...
Loading ...
Loading ...