Loading ...
Loading ...
Loading ...
25
bromic.com/heat
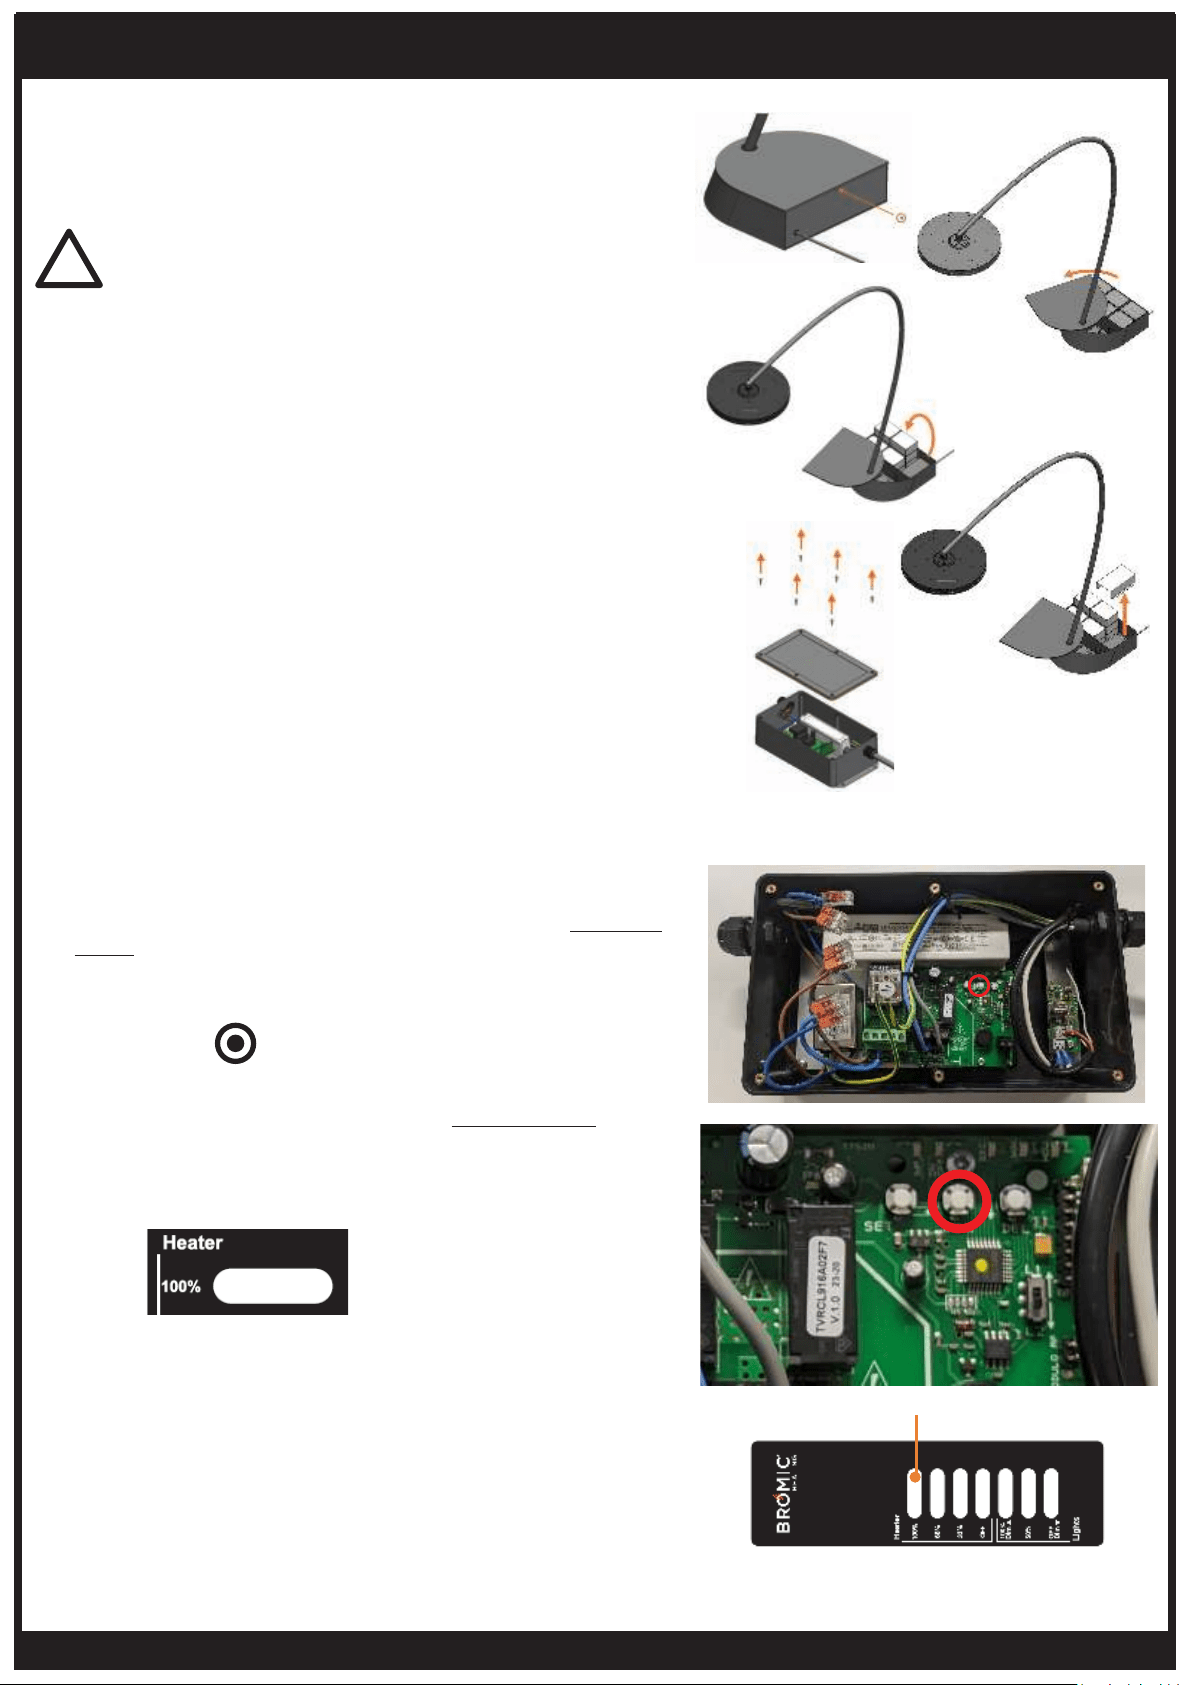
OPENING CONTROL BOX TO PAIR A NEW REMOTE
1. Switch the power supply to the Eclipse Portable Control
ON.
2. With the Eclipse Portable Control powered ON, PRESS &
HOLD the middle ‘MEM’ button on the large heater control
PCB. (A long “Beep” sound should be heard whilst the
button is held down).
Whilst the ‘MEM’ button is held down, SHORT PRESS the
Heater 100% button on the remote control. (Three short
“Beep” sounds should be heard to indicate the remote has
been paired successfully.
3. Refit the lid to the Portable Control Box, using the 6x
Oval head screws (#4-40 - Length: 1/2”).
4. Refit the Portable Control Box Cover using 4x M4x8mm
Dome Head Phillips screws.
5. Replace the two weights onto the Portable Control
Box Cover, and rotate the Base Top Cover to the correct
position on the Base.
6. Replace the 1x M4x6mm Dome Head Screw into the rear
of the Base Top Cover.
Lights 100% (DIM˄)
Lights OFF (DIM˅)
DANGER
ELECTRICAL SHOCK HAZARD! Serious injury or
death may occur. Do not touch any components
other than specified below. Protective equiment
including insulated gloves must be worn.
!
PAIRING REMOTE CONTROL TO HEATER PCB (TOP 4 BUTTONS OF REMOTE)
WARNING: MUST ONLY BE SERVICED BY LICENSED &
AUTHORIZED TECHNICIAN.
1. Remove 1x M4x6 Screw from Base Top Cover, and rotate
the Base Top Cover to expose the Base weights.
2. Move the two left most weights onto the other weights
to expose the Portable Control Box Cover.
3. Remove 4x M4x8mm Dome Head Phillips screws and the
Portable Control Box Cover, to expose the Portable Control
Box.
4. Open lid to the Portable Control Box, by removing 6x
Oval head screws (#4-40 - Length: 1/2”) from the cover.
1s (short)
(hold)
‘MEM’ button
OPERATING INSTRUCTIONS
Loading ...
Loading ...
Loading ...