Loading ...
Loading ...
Loading ...
17
94
53
6
34
18
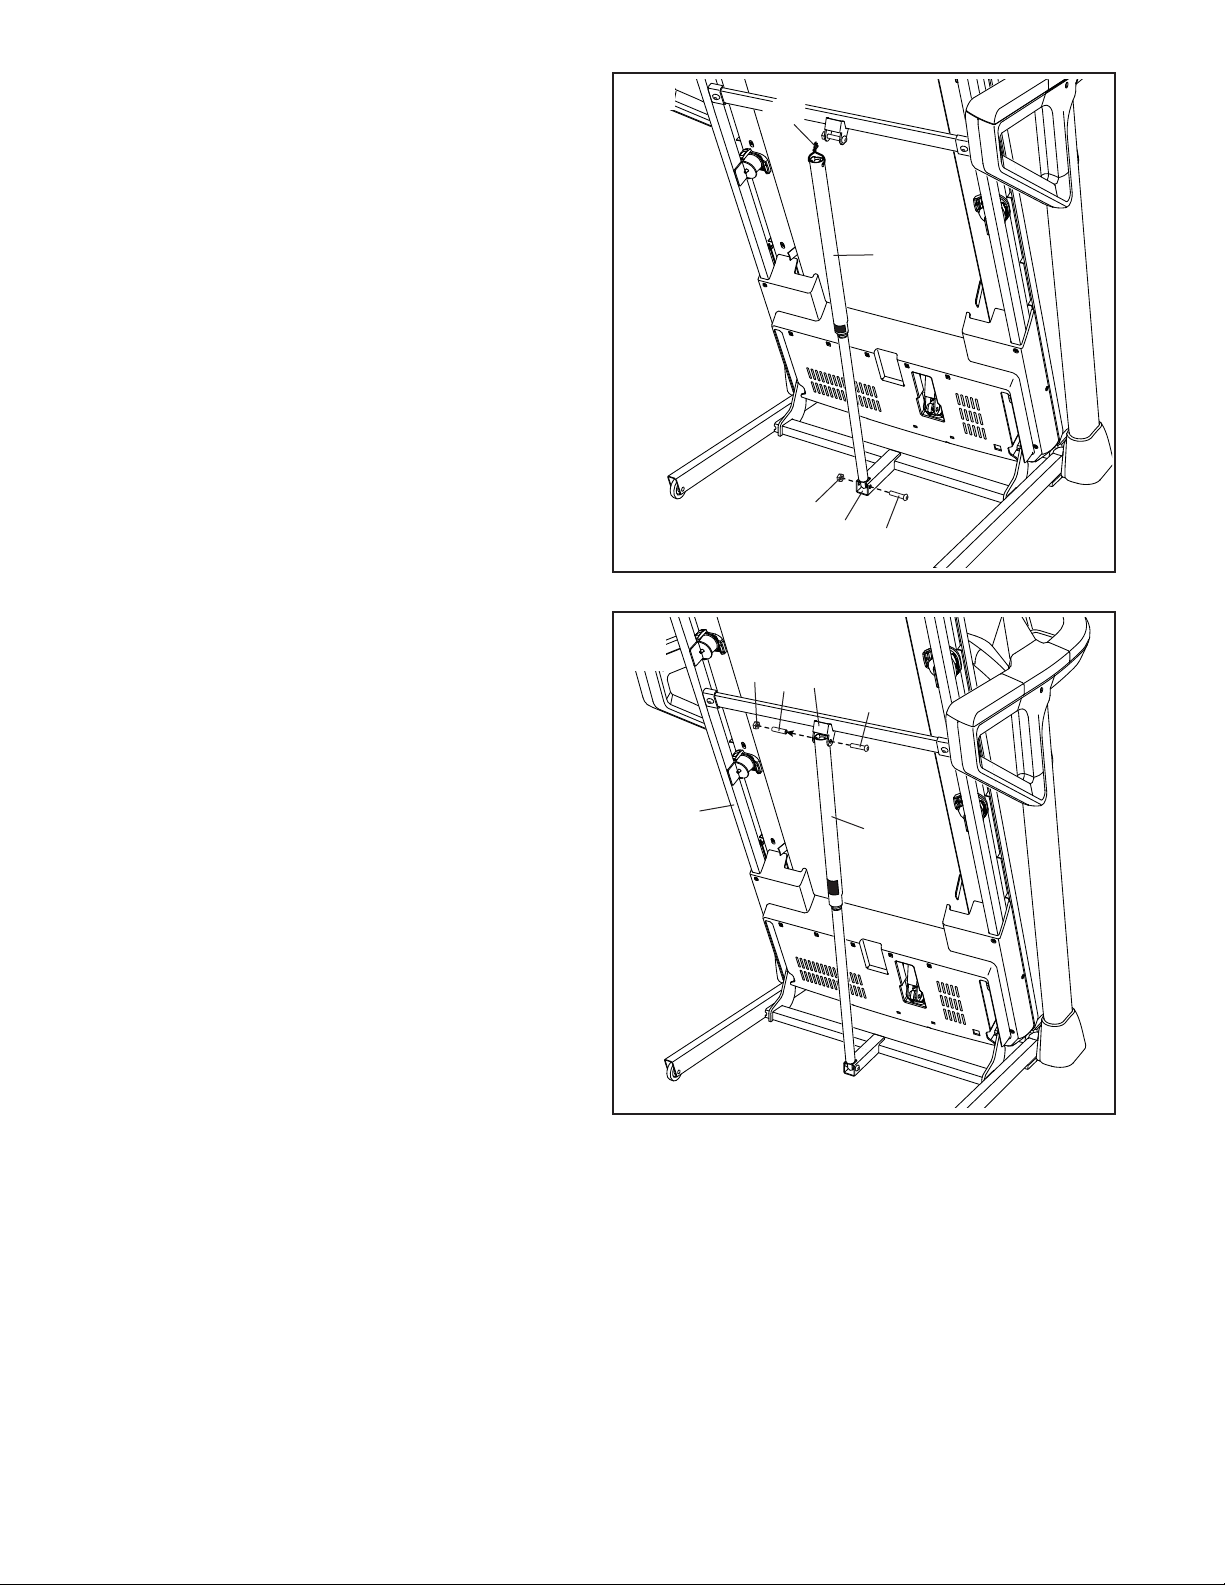
18. Remove the 5/16" Nut (34) and the 5/16" x 1 3/4"
Bolt (6) from the bracket on the Base (94).
Next, orient the Storage Latch (53) as shown.
Attach the lower end of the Storage Latch (53)
to the bracket on the Base (94) with the 5/16" x
1 3/4" Bolt (6) and the 5/16" Nut (34) as shown.
Then, raise the Storage Latch (53) to a vertical
position, and remove the tie (T).
T
41
3
56
34
53
19
19. Remove the 5/16" Nut (34) and the 5/16" x
2 1/4" Bolt (3) from the bracket on the Latch
Crossbar (41).
Align the upper end of the Storage Latch (53)
with the bracket on the Latch Crossbar (41),
and insert the 5/16" x 2 1/4" Bolt (3) through the
bracket and the Storage Latch. This will push a
spacer (U) out of the Storage Latch; discard
the spacer.
Next, tighten the 5/16" Nut (34) onto the 5/16" x
2 1/4" Bolt (3). Do not overtighten the Nut; the
Storage Latch (53) must be able to pivot.
Then, lower the Frame (56) (see HOW TO
LOWER THE TREADMILL FOR USE on
page 31).
U
Loading ...
Loading ...
Loading ...