Loading ...
Loading ...
Loading ...
ENGLISH I 7
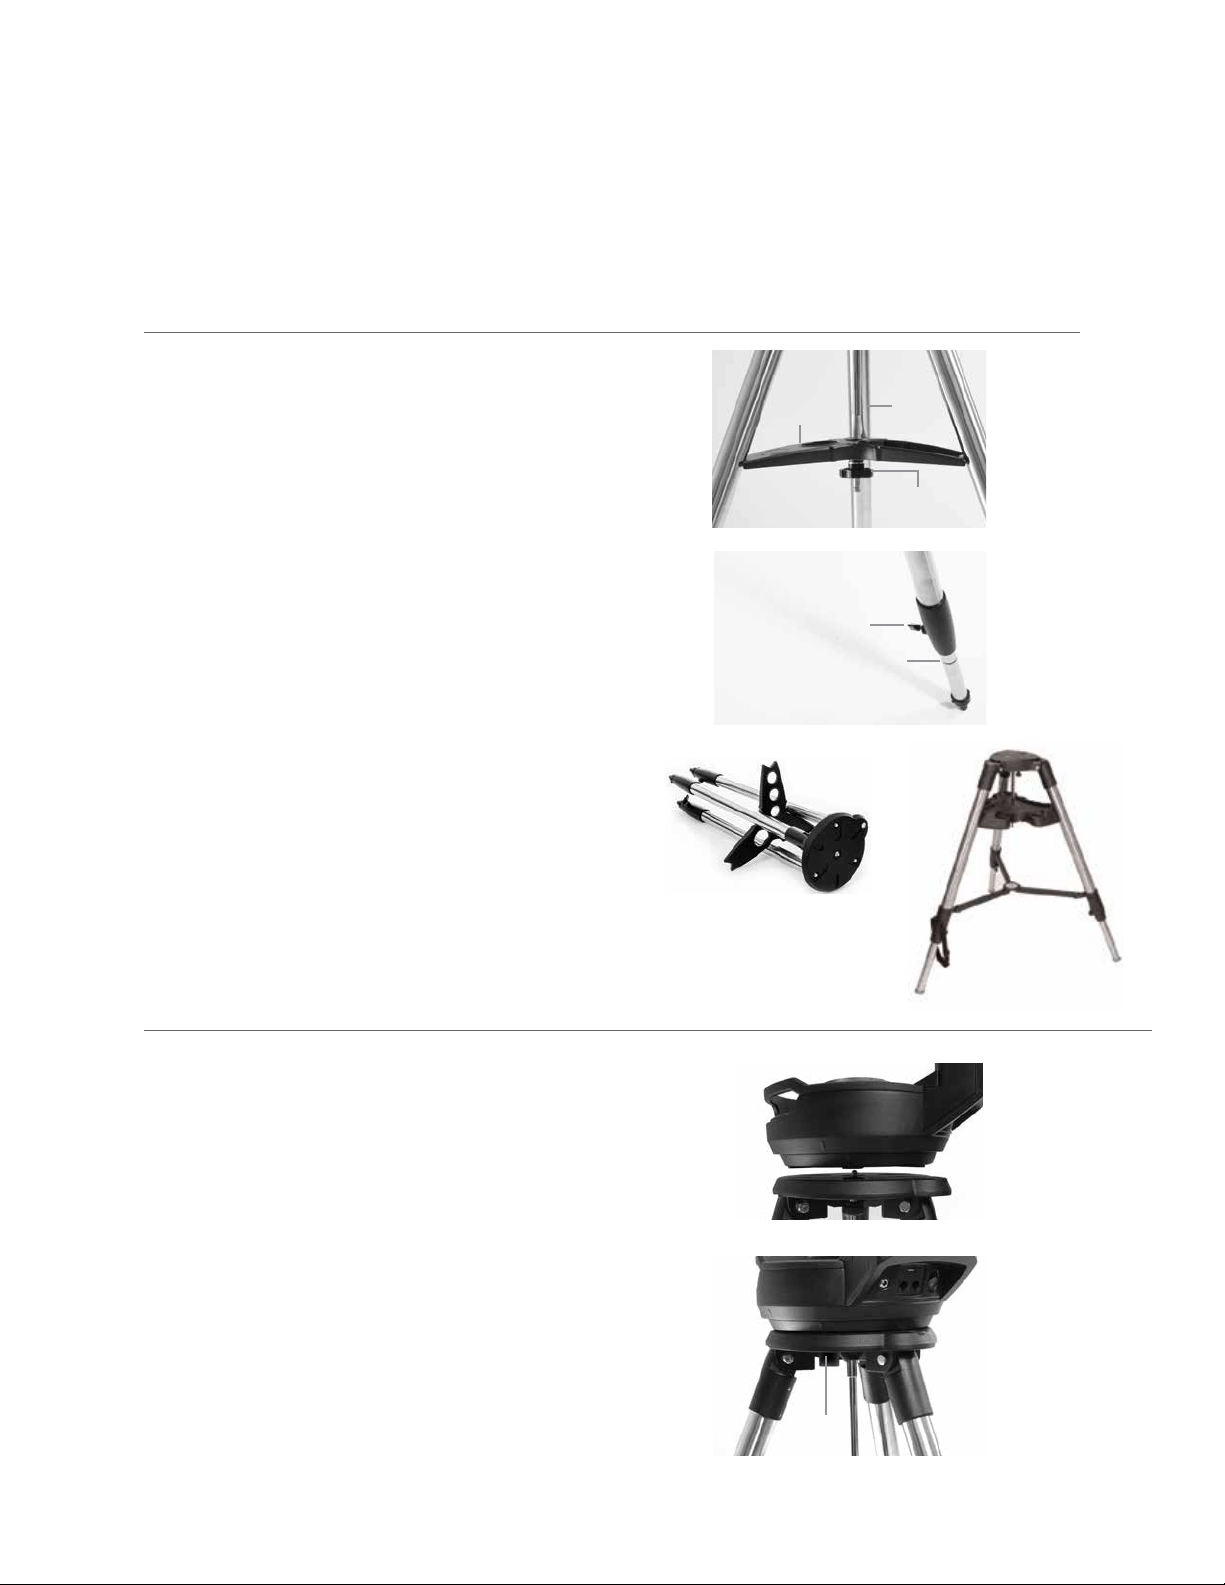
1. Spread the tripod legs and stand the tripod upright.
2. Remove the Tripod Support Nut and Washer from the
central column attached to the top of the tripod.
3. Place the accessory tray over the central column so that
each of the three arms of the tray is touching a tripod leg.
4. Thread the nut and washer back onto the threaded column
and firmly tighten into place. The accessory tray should not
be able to move against the tripod.
5. Adjust the height of the tripod by loosening the lock knobs on
the end of each tripod leg. Then adjust the leg height as need-
ed and retighten the lock knobs, one leg at a time. Note the leg
index marks can be used to easily level the tripod.
6. Confirm the tripod is level using the built-in bubble level on
the tripod base.
Note: The NexStar Evolution 9.25” model uses a larger
tripod but it is assembled in a similar manner.
Helpful Hint: When transporting the telescope, the tripod
can be folded with the accessory tray attached. Loosen the
Tripod Support Nut and Washer to allow the accessory tray
to drop, then rotate the accessory tray and fold the tripod legs
into the slots on the tray.
1. Place the fork arm mount on the tripod, carefully centering the
mount over the center post on the tripod head. Do not let go of
the mount until it has registered with the center post.
2. With the mount resting on the flat top surface of the tripod
head, rotate the mount until the three mounting sockets
align. The sockets will click into place, indicating they are
aligned.
Note: The NexStar Evolution 9.25” model, which uses the
larger tripod, does not click into place.
3. Thread the three attached mounting bolts from underneath
the tripod head into the bottom of the telescope base.
Tighten all three bolts.
ASSEMBLY AND SETUP
TRIPOD
Leg Height Index Marks
Leg Height Adjustment
Lock Knob
MOUNT
Acessory
Tray
Central
Column
Tripod Support
Nut and Washer
1 of 3
Mounting
Bolts
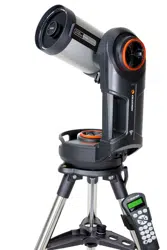
Remove the parts from their shipping cartons and go over all the items in the parts list. Keep all of the original packaging so
it can be used to transport the telescope safely. Set the fork arm mount on a sturdy flat surface. Remove all of the
accessories from their individual boxes.
9.25” model
6” and 8” models
Loading ...
Loading ...
Loading ...