Loading ...
Loading ...
Loading ...
15
Assembly, Operation & Maintenance Instructions
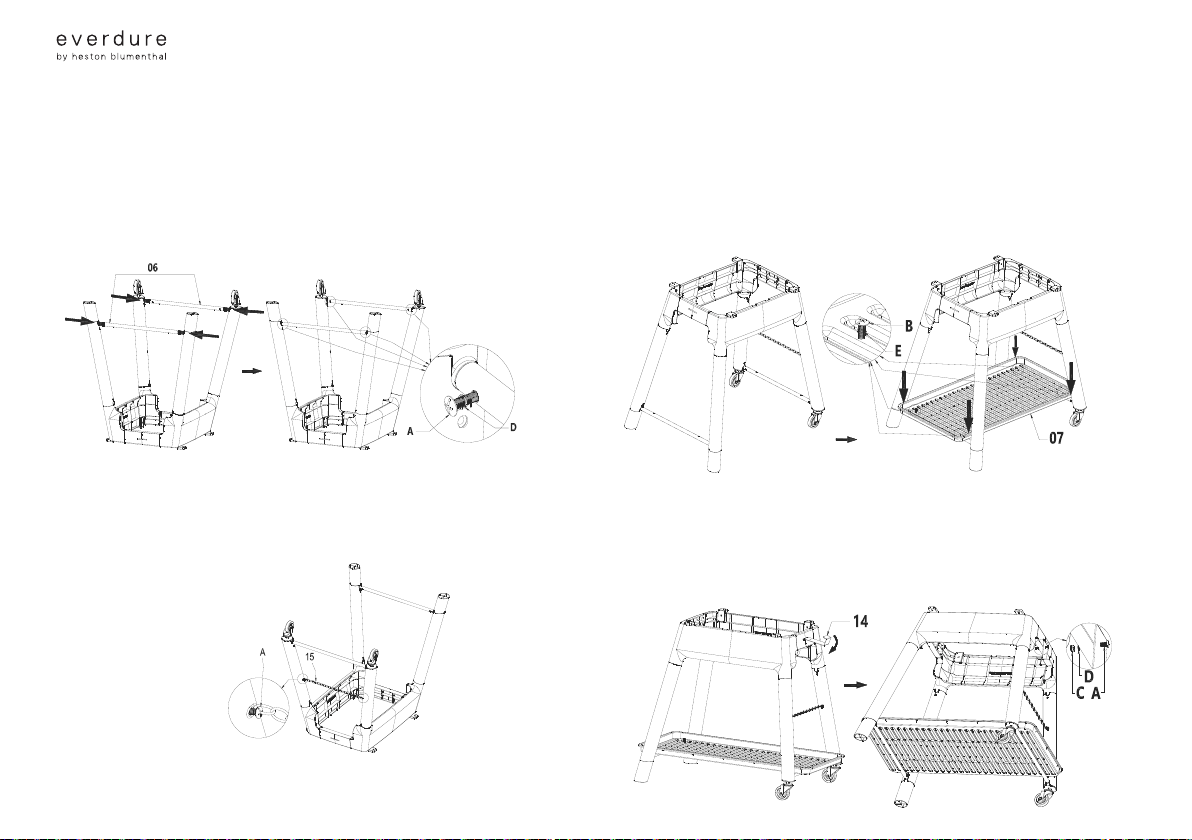
STEP 04
/ Take the two bottom shelf supports (06) and t them onto the cylindrical tabs at the
inside of each foot. Rotate each one so that the outmost screw holes are facing inwards
and the inner screw holes are facing the stand top (if not, pull out and t in the opposite
way). Fix in place with four M6x12mm screws (A) and spring washers (D). When all are
assembled, tighten up all four screws and the screws from step 02.
STEP 05
/ There are two threaded holes at the inside of the right hand legs. Take the support chain
(15) and x it to the two legs with two M6x12mm screws (A). Tighten fully.
STEP 06
/ Turn the stand onto its legs and check that all of the legs are stable. Take the plastic
bottom shelf (07) and place it on the two bottom shelf supports. Line the four holes in
the bottom shelf up with the threaded holes in the bottom tray supports and x into
position using four M5x12mm screws (B) and four spring washers (E). Tighten fully.
STEP 07
/ Push the at edge of the cylinder hook (14) into the slot of the stand top (above the
right hand side legs and castors) up until the dogleg, and then rotate down until the hook
is against the stand top side. Fix into place using a M6x12mm screw (A), M6 locking nut
(C) and spring washer (D). The stand is now complete.
Loading ...
Loading ...
Loading ...