Loading ...
Loading ...
Loading ...
8
3 Installation (cont'd)
3.3 Installing the Registers, Ductwork and Hoods
3.3.1 Registers
Refer to applicable building codes to plan where the stale air exhaust registers and fresh air distribution registers should be
installed. Below are some general recommendations.
Stale air exhaust registers:
• Install the stale air exhaust registers where the contaminants are produced: bathroom (up to 2), kitchen, living room, etc.
Position the registers as far from the stairway as possible and in such a way that the air circulates in all the lived-in spaces in
the house.
• If a register is installed in the kitchen, it must be located at least 4 feet away from the cooking applicances.
• Install the registers on an interior wall, 6 to 12 inches below the ceiling OR in the ceiling.
Fresh air distribution registers (Option 2 in 3.2.1):
• Install the fresh air distribution registers in bedrooms, dining rooms, living rooms and basement, if applicable.
• Keep in mind that the fresh air registers must be located as far as possible from the ERV stale air registers.
• Install the registers on an interior wall, 6 to 12 inches below the ceiling OR in the ceiling.
• If a register must be oor installed, direct the air ow up the wall.
WARNING
Never install a stale air exhaust register in a closed room where a combustion device operates, such as a gas
furnace, a gas water heater or a replace.
!
3.3.2 Ductwork
• All units ports should be connected to 6” ducts, but can be connected to larger ducts using an appropriate transition.
• If you have to connect rigid ducts to the unit, use a short length (approximately 6”) of exible duct to avoid transmission of
vibrations. Use a tie wrap and foil tape to connect the exible duct to the port and to the rigid duct.
• Never use screws to connect rigid ducting to the ports.
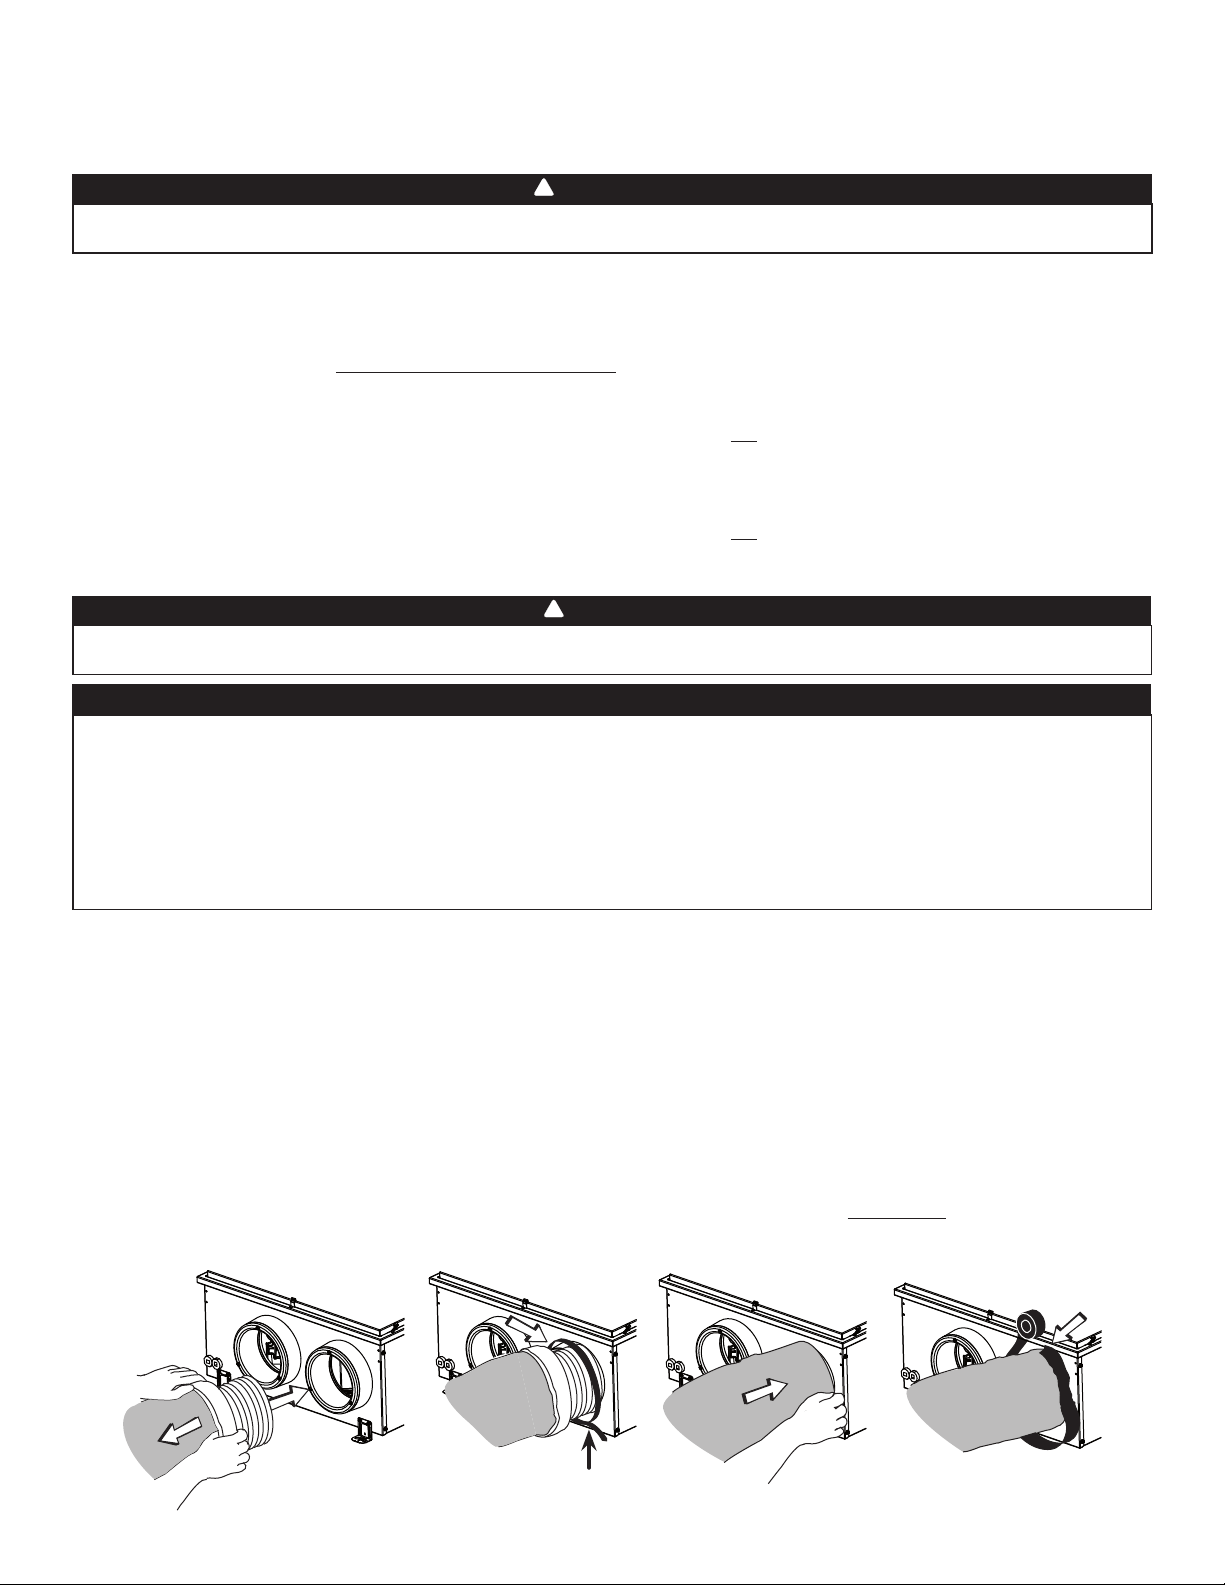
Connecting insulated exible ducts to the ports:
1. Pull back the insulation to expose the exible duct.
2. Attach the exible duct to the port using a tie wrap; ensure tie wrap is tighten to its maximum strength.
3. Pull the insulation over the joint, then pull the vapor barrier (shaded part in illustrations below) over the insulation. Make sure
that the vapor barrier does not tear due to manipulation to avoid condensation within the ducts.
4. Apply foil tape to the joint, making an airtight seal. Avoid compressing the insulation when pulling the tape tightly around
the joint. Compressed insulation loses its R value and causes water dripping in cold climates due to condensation on the
exterior surface of the duct.
NOTE: If sealant mastic has to be used over the foil tape as an extra sealing layer, use water based mastic to ensure material
compatibility with the port.
WARNING
When performing duct connections, always use approved tools and materials. Respect all corresponding laws and
safety regulations. Please refer to your local building code.
!
CAUTION
If ducts have to go through an unconditioned space (e.g.: attic), always use insulated ducts to prevent condensation
formation inside and outside ducts, which could cause material damage and/or mold growth. Moreover, in zone B, if
fresh air to building duct and/or stale air from building duct goes/go through an unconditioned space, these ducts must
be buried with a minimum of R20 insulation in order to prevent heat recovery performance reduction and cooling of
the distributed fresh air to the living areas during winter operation. Also, the unit must be set to operate continuously
in cold conditions (below 50°F) if these ducts have to go through an unconditioned space in zones A and B. Continuous
air movement inside ducts will prevent condensation formation. The unit can be stopped temporarily for maintenance
and/or repair purposes in such conditions.
VJ0134
TIGHTEN TIE WRAP TO ITS
MAXIMUM STRENGTH!
Loading ...
Loading ...
Loading ...