Loading ...
Loading ...
Loading ...

Although there are a variety of combinations of the decimal point and the unit key for data input, the instrument
always displays the input data in a fixed format.
3.1.4 Knob Adjustment
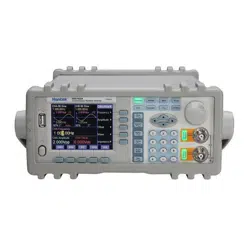
In some applications, it requires to adjust the output signal continuously. Using the rotary knob can complete this
task. When a parameter is selected, the color of this parameter changes to yellow. One digit in this parameter
which is located by cursor changes to anti-color. Press key [W] or [X] to move the cursor left or right. Rotate the
knob to the right to continuously increase the cursor-located digit by 1 and make the carry to a higher unit position.
Rotate the knob to the left to continuously decrease the cursor-located digit by 1 and make the carry to a lower
unit position. When you use the knob to modify a specified data, the modified data is validated instantaneously
without pressing the unit key. A coarse adjustment is made by moving the cursor to the left; and a fine adjustment
is made by moving the cursor to the right.
3.1.5 Frequency and Amplitude Step Input
In practices, a set of frequency or amplitude value with same interval is commonly used. It is complicated and
time consuming to input this kind of data by repeatedly pressing the numeric keypad and unit key. It is very
convenient to use the step input method. Set the frequency interval as the “step frequency” value, every press on
key [S] makes the frequency increase by a step value, every press on key [T] makes the frequency decrease by a
step value. The modified data is validated automatically without pressing the unit key.
For example, to generate a series of frequency with interval 12.5 kHz, press the keys sequentially as following:
select “Step Freq” by the corresponding soft key
Press keys [1] [2] [.] [5] and the soft key corresponding to [kHz];
Select “CHA Frequency” by the corresponding soft key
Press key [S] to increase the frequency by 12.5 kHz or press key [T] to decrease the frequency by 12.5
kHz. Repeat this operation, a series of waveform with equal interval frequency difference can be generated. The
same procedure can be used for the amplitude operation. This method is only used on the frequency and amplitude
of channel A.
3.1.6 Input Mode Selection
It is convenient to input the known data through the numeric keypad. It makes the input be set at only one step
without the intermediate transition data. For the partial modification of the input data or at the situation of
monitoring the variation process of the input data, the rotary knob is usually more useful. For a series of equal
interval data input, the step input method is the most efficient. Users can use the different data input methods
according to different situations.
3.2 Setup of Channel A
Press key [Channel] and select “CHA Alone” function.
3.2.1 Set the Frequency of Channel A
Select “Frequency” option by the corresponding soft key. The current frequency value changes to yellow. Input a
new frequency data here by numeric keypad or rotary dial. Press the key corresponding to the frequency units to
confirm the new data input. The function generator outputs the specified frequency at CHA Output.
- 11 -
Loading ...
Loading ...
Loading ...
