Loading ...
Loading ...
Loading ...
13
English
Follow the instructions provided by the RV coach
manufacturer for winterizing your water system.
Supplement the following important water heater instructions
when completing any winterizing steps:
Compressed Air:
● DO NOT exceed 30PSI into the water heater
● While completing the blow out process for the entire
water system, take time to isolate the water heater by
closing all drain plugs and faucets and only open the
water heater drain plug and filter cover. This ensures
maximum pressure and flow is isolated through the water
heater for complete evacuation.
Anti-freeze:
● Use a non-toxic antifreeze recommended by the RV
coach manufacturer.
● Anti-freeze can be used directly in the water heater, plan
for an additional 1L to fill the system.
Optional: A bypass valve can be installed/used to bypass
filling the water heater with antifreeze. The water heater
MUST be evacuated with compressed air (see steps
above) before bypassing.
Next Season:
● Thoroughly flush the water heater and system with clean
drinking water through the hot and cold side before using.
Drain water several times out of the water heater drain
plug. Sanitize the water system per the recommendations
of your coach manufacturer.
Routine Inspection
Routine inspection is critical for maintaining proper operation
of your appliance. Unless specified, review the following
items yearly or before each season:
1. Inspect the gas system and installation every two years,
or otherwise specified by your RV coach manufacturer, by
a qualified personnel.
2. Inspect for cracks, separation, peeling of seals to the RV
wall. Remove and re-seal as necessary (caulking or tape)
between the side wall and the door of the water heater
and ensure that the unit is solidly mounted to the vehicle.
3. Verify that the air inlet openings (louvers) are completely
open and clear of any debris including mud, leaves, twigs,
insects, etc... Remove all obstructions to allow full air flow.
4. Insects, including wasps and spiders, can build nests in
the exhaust tube outlet which will affect the performance
of the unit. Inspect the flue outlet tube to make sure that
it is unobstructed and that the screen is clean. If debris
or insects are present, clean and vacuum to remove any
remaining debris. The use of any type of after-market
screen to cover the vent is not permitted and will void the
warranty.
5. Open the door and verify that no debris or extraneous
combustible materials are present anywhere (especially in
the area of the burner and the gas controls). Remove any
item present and wipe clean the bottom of the housing.
6. Inspect the interior surface of the housing for any cracks
or corroded areas that could allow penetration of gases
into or out of the interior of the vehicle. Check especially
around the hot water, cold water, gas and electrical
connections.
NOTE: If damages found, please contact a technician to
repair or contact Furrion customer service.
7. Check that all wire connections are firmly in place and
there are no signs of chafing or cracks on the insulation.
Verify that the spark ignition cable between the Control
Board and the igniter is securely in place and not shorted
to any metal component.
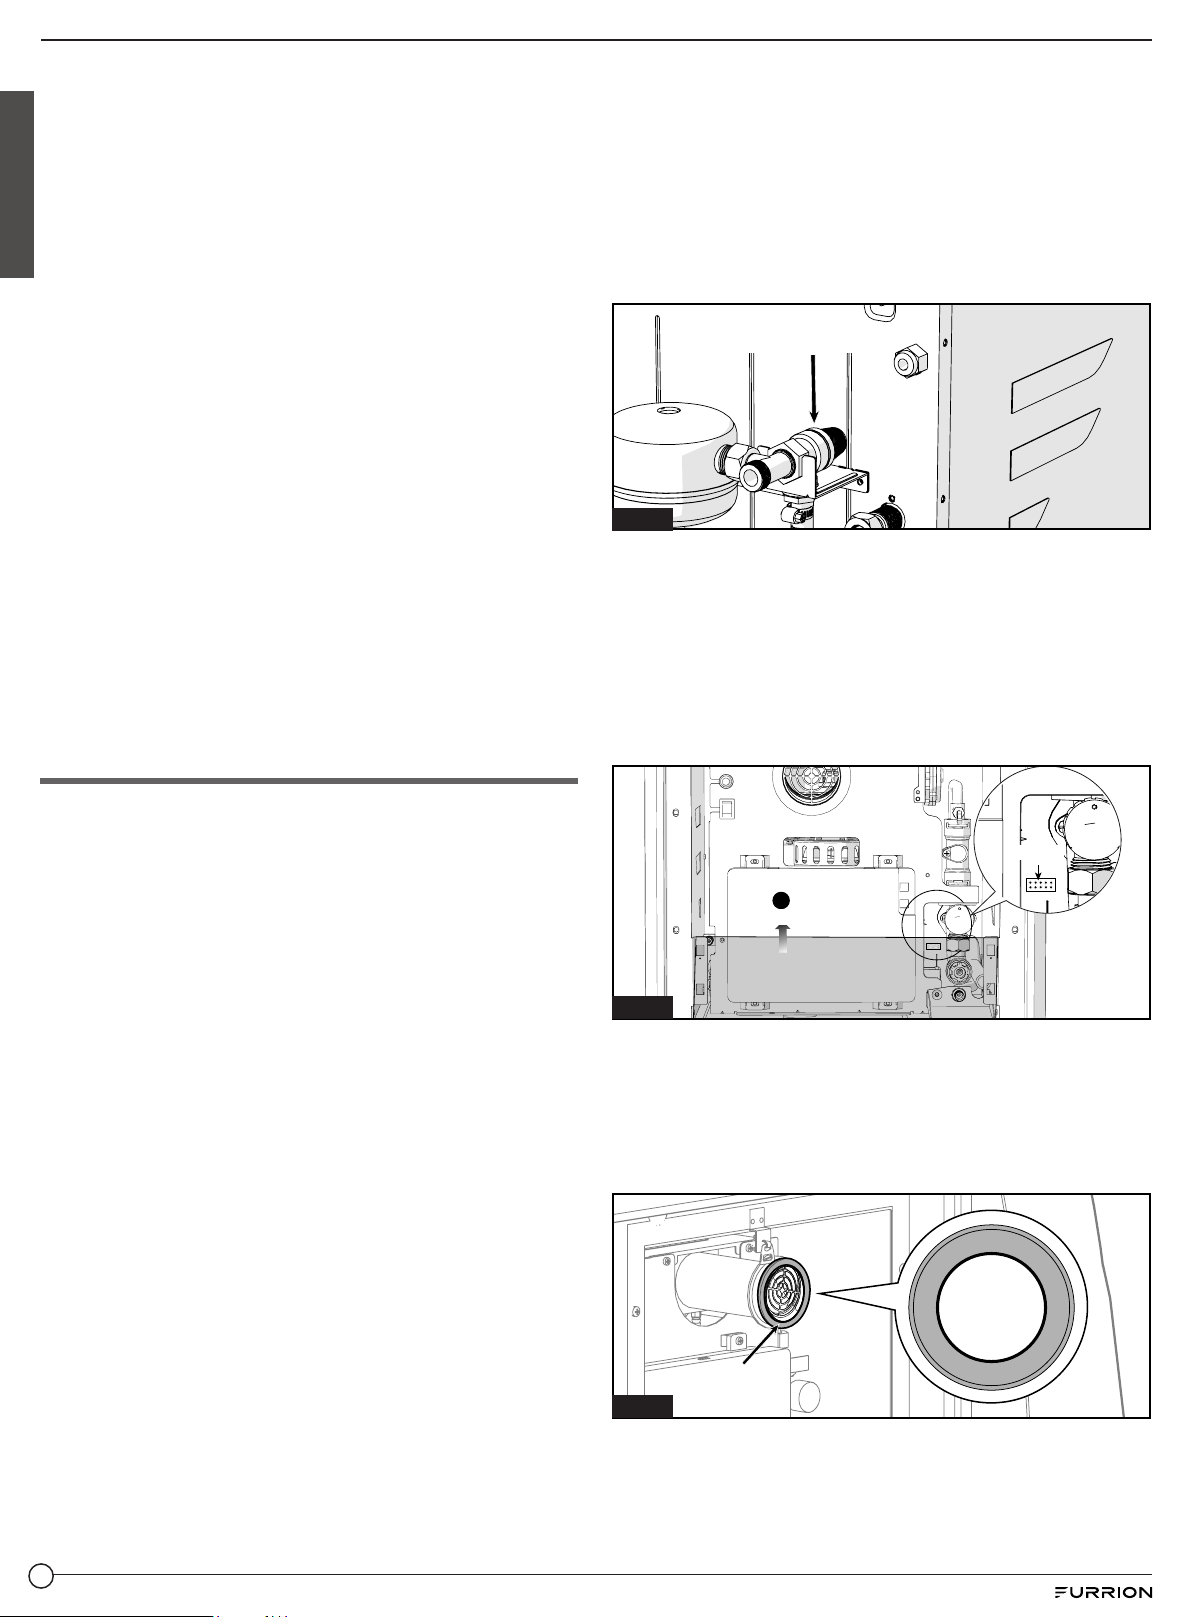
8. Inspect the pressure safety valve to ensure it has not been
leaking (no water residue). See "Pressure Safety Valve
Maintenance" for further inspection. (Fig. 32)
Pressure safety
valve handle (Red)
Fig. 32
9. Inspect/clean/replace water inlet filter as necessary, see
"Filter Cleaning" section.
10. Turn on the power to the water heater and open a hot
water faucet to inspect the flame of the burner. The flame
should be of the normal bluish appearance that indicates
proper combustion. This can be accomplished by
removing the water heater door and baffle to observe the
flames by looking at the burner under the edge of the heat
exchanger. (Fig. 33)
1
Flame
Baffle
Fig. 33
11. A sealing ring is assembled on the chimney. (Fig. 34)
Inspect to make sure the seal does not have any cracks or
breaks, and that it is in good condition. Contact Furrion for
replacement.
NOTE: When installing the seal, make sure the words
"INSIDE" are facing inward.
I
N
S
I
D
E
I
N
S
I
D
E
Fig. 34
Sealing Ring
Loading ...
Loading ...
Loading ...