Loading ...
Loading ...
Loading ...
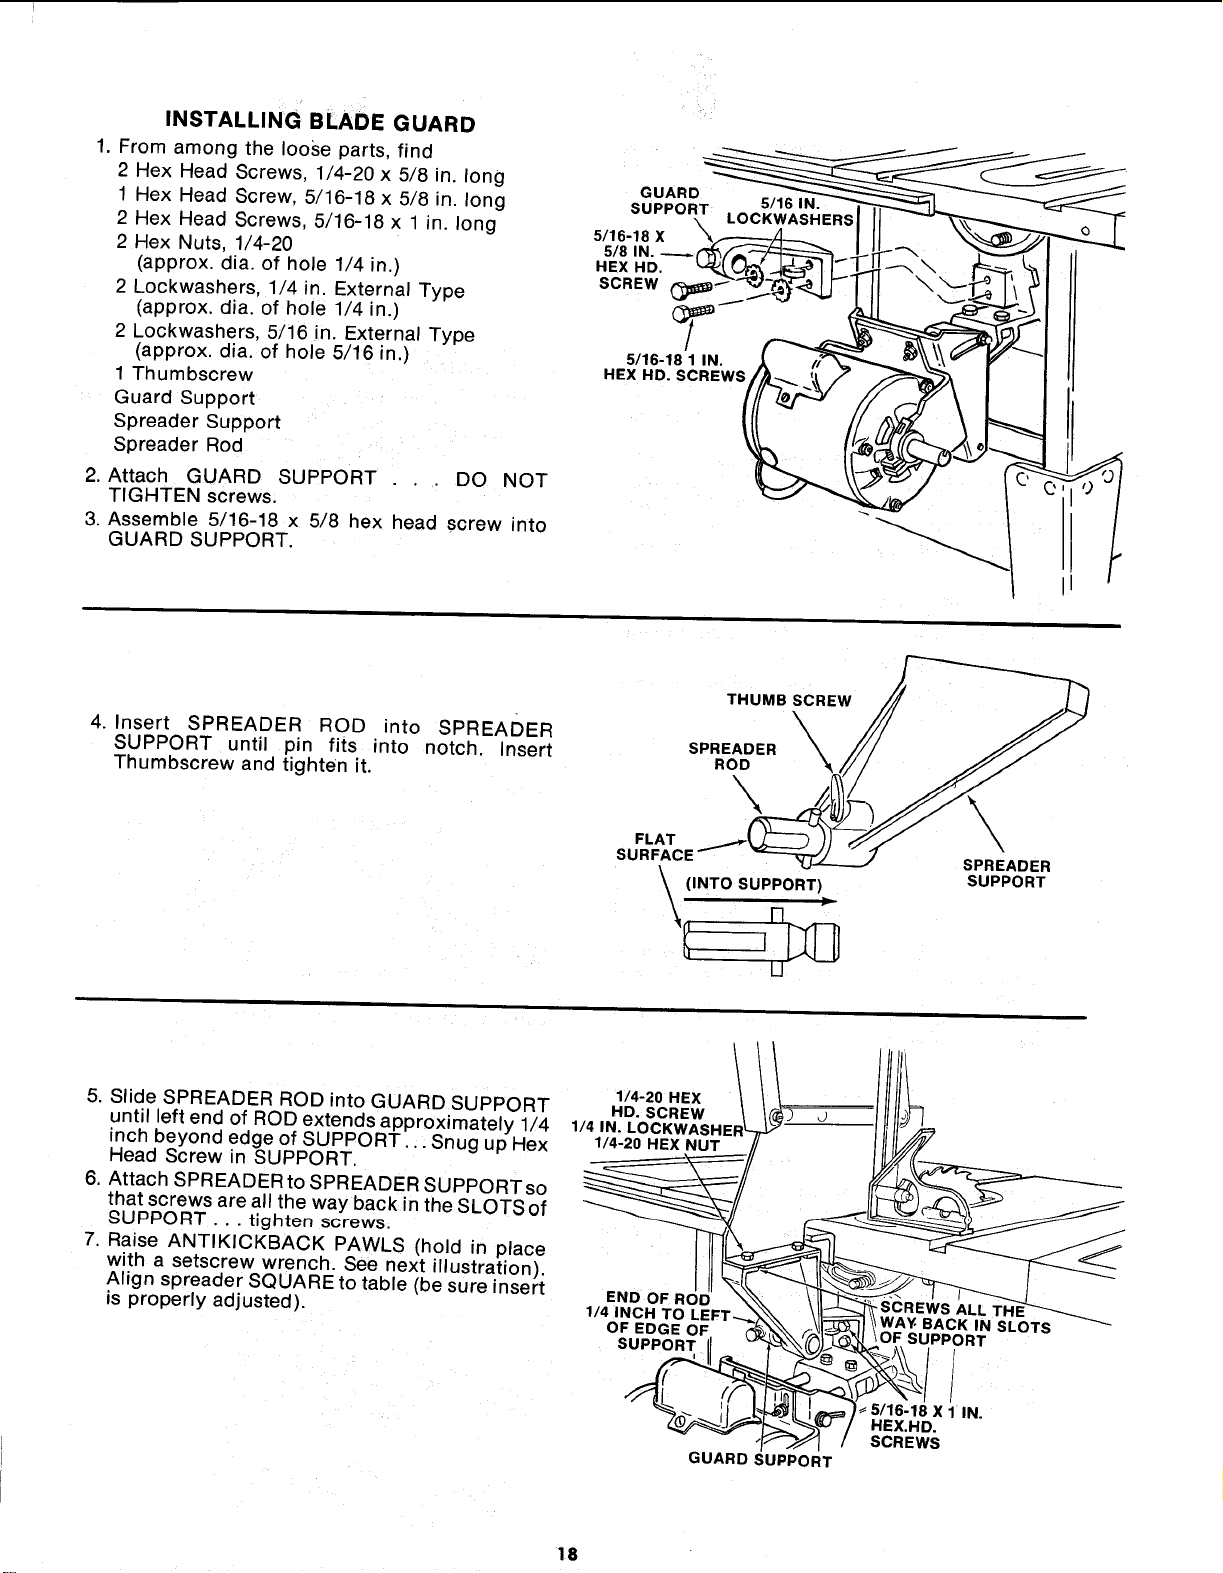
INSTALLINGBLADEGUARD
1. From among the loose parts, find
2 Hex Head Screws, 1/4-20 x 5/8 in. long
1 Hex Head Screw, 5/16-18 x 5/8 in. long
2 Hex Head Screws, 5/16-18 x 1 in. long
2 Hex Nuts, 1/4-20
(approx. dia. of hole 1/4 in.)
2 Lockwashers, 1/4 in. External Type
(approx. alia. of hole 1/4 in.)
2 Lockwashers. 5/16 in. External Type
(approx. dia. of hole 5/16 in.)
1 Thumbscrew
Guard Support
Spreader Support
Spreader Rod
2. Attach GUARD SUPPORT
TIGHTEN screws.
3. Assemble 5/16-18 x 5/8 hex head screw
GUARD SUPPORT.
DO NOT
into
G UARDT_L OC_(_/_S'_HERS "-
5/16-18 X
5/8 IN.
HEX HD. _" \
SCREW
/
5116-18 1 IN.
HEX HD. SCREWS/
-
4. Insert SPREADER ROD into SPREADER
SUPPORT until pin fits into notch. Insert
Thumbscrew and tighten it.
THUMB SCREW
\
SPREADER _
ROD
FLAT
SURFACE
(INTO SUPPORT)
\ n "
II
\
\,
SPREADER
SUPPORT
5. Slide SPREADER ROD into GUARD SUPPORT
until left end of ROD extends approximately 1/4
inch beyond edge of SUPPORT. ,: Snug up Hex
Head Screw in SUPPORT.
6. Attach SPREADER to SPREADER SUPPORT so
that screws are all the way back in the SLOTS of
,_qUPPORT . . . tighten screws.
7. Raise ANTIKICKBACK PAWLS (hold in place
with a setscrew wrench. See next illustration).
Align spreader SQUARE to table (be sure insert
is properly adjusted).
1/4-20 HEX J
114,"%'c%%. J
1/4 iNCH TO LEFT_ _, \1_ \\ WAY. BACK IN SLOTS
OF EDGE OF, (_ _ OF SUPPORT
_ _ / SCREWS
GUARD SUPPORT
18
Loading ...
Loading ...
Loading ...