Loading ...
Loading ...
Loading ...
C
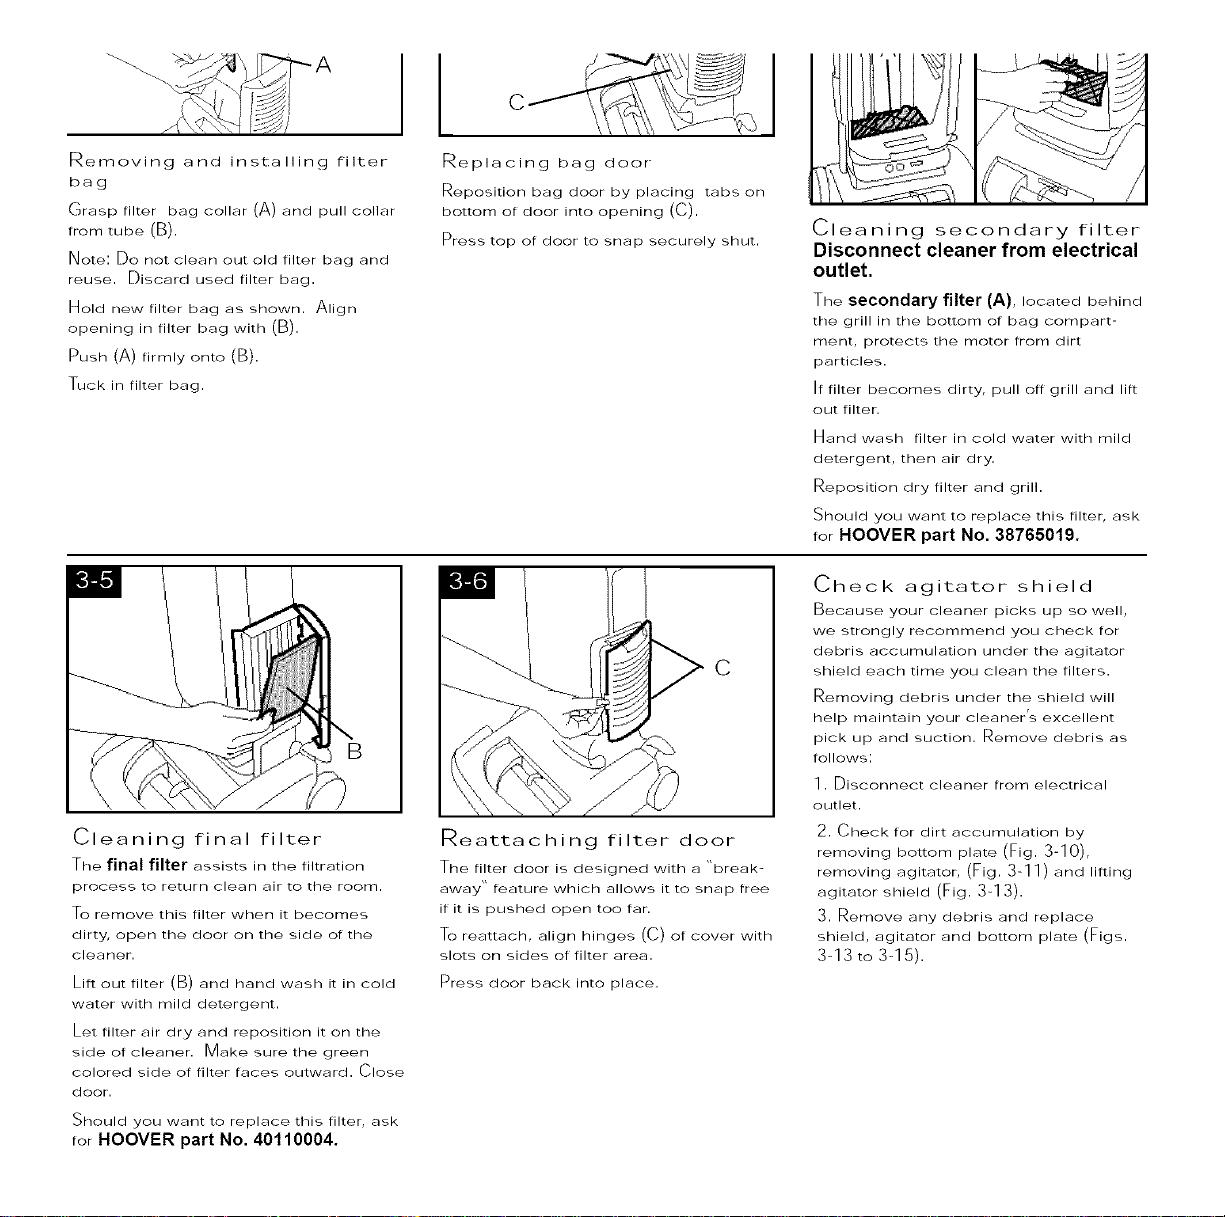
Removing and installing filter
bag
Grasp filter bag collar (A) and pull collar
from tube (B).
Note: Do not Glean out old filter bag and
reuse. Discard used filter bag.
Hold new filter bag as shown. Align
opening in filter bag with (B).
Push (A) firmly onto (B).
Tuck in filter bag.
Replacing bag door
Reposition bag door by placing tabs on
bottom of door into opening (C).
Press top of door to snap securely shut.
Cleaning secondary filter
Disconnect cleaner from electrical
outlet.
The secondary filter (A), located behind
the grill in the bottom of bag compart-
ment, protects the motor from dirt
particles.
If filter becomes dirty, pull off grill and lift
out filter.
Hand wash filter in Gold water with mild
detergent, then air dry.
Reposition dry filter and grill.
Should you want to replace this filter, ask
for HOOVER part No. 38765019.
Cleaning final filter
The final filter assists in the filtration
process to return clean _:]ir to the room.
To remove this filter when it becomes
dirty, open the door on the side of the
cleaner,
Lift out filter (B) and hand wash it in cold
water with mild detergent.
Let filter air dry and reposition it on the
side of Gleaner. Make sure the green
colored side of filter faces outward. Close
door.
Should you want to replace this filter, ask
for HOOVER part No. 40110004.
C
Reattaching filter door
The filter door is designed with a "break-
away" feature which allows it to snap free
if it is pushed open too far.
To reattach, align hinges (C) of cover with
slots on sides of filter area.
Press door back into place.
Check agitator shield
Because your cleaner picks up so well,
we strongly recommend you check for
debris accumulation under the agitator
shield each time you clean the filters.
Removing debris under the shield will
help maintain your cleaner's excellent
pick up and suction. Remove debris as
follows:
1. Disconnect cleaner from electrical
outlet.
2. Check for dirt accumulation by
removing bottom plate (Fig. 3-10),
removing agitator, (Fig. 3-11) and lifting
agitator shield (Fig. 3-13).
3. Remove any debris and replace
shield, agitator and bottom plate (Figs.
3-13 to 3-15).
Loading ...
Loading ...
Loading ...