Loading ...
Loading ...
Loading ...
3.Place the loaded Spit Rod Assembly in the “Rest” area just inside the
Rotisserie. Then slide it on back to the cooking position. Pull the Door up.
4. Set the 3-Position Switch to “Normal Rotation.” Set the Timer for 15
minutes per pound for a chicken. Example: 4 lbs. = 1 hour. Use total weight on
package – which includes giblets.
Normal
Rotation
No Heat
Rotation
Pause
to Sear
3-Position Switch
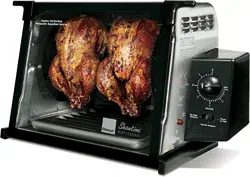
12 SIX EASY STEPS CHICKEN
1. Wash the chicken with warm
water (so the food is not cold when it
goes in the Rotisserie) and remove
any parts from the cavity (giblets,
etc). Cut away excess fat and skin so
hot air can get into the cavity.
Tie the wings and legs down. Use one
or two of the Elastic Food Ties (if
they are too big for your chicken,
knot them smaller and cut off the
excess).
2. Place the chicken on the Spit
Rods breast first - be sure it’s centered
and the weight is evenly distributed.
Be careful to keep your hands clear of
the sharp rod tips when loading food
vertically or horizontally.
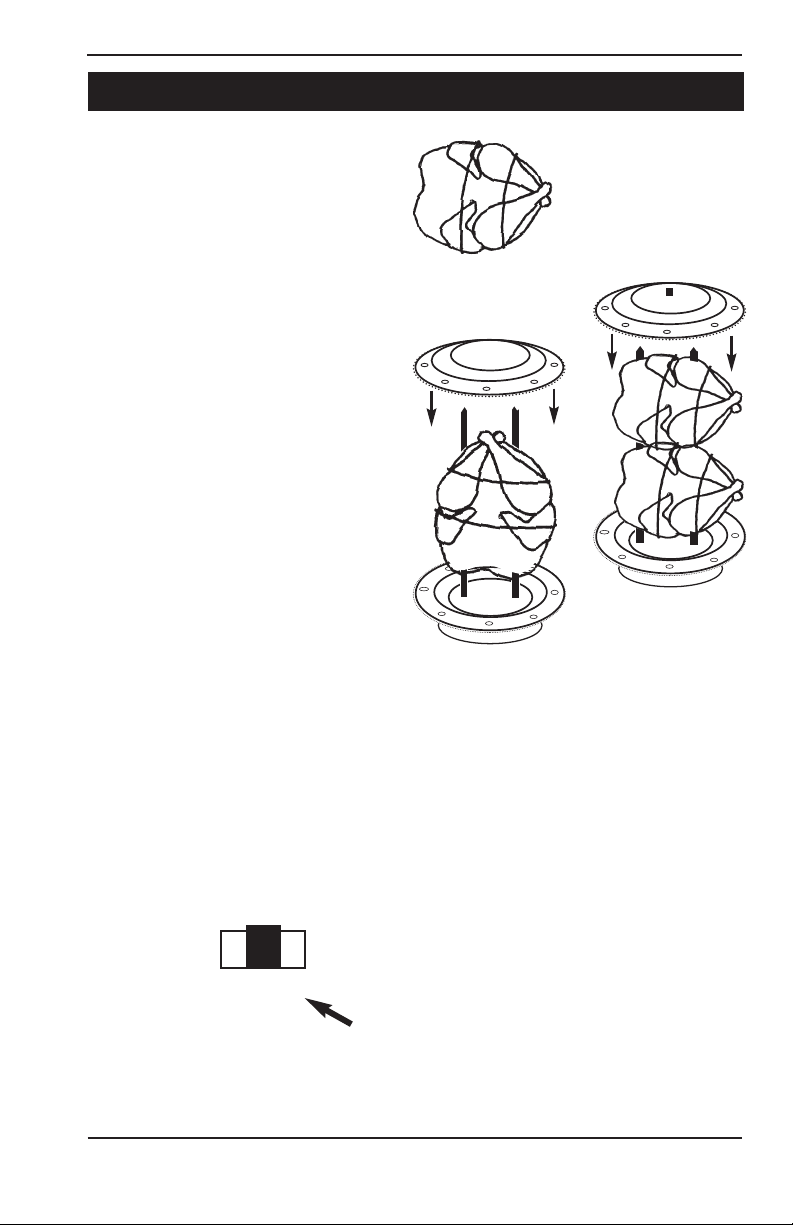
After loading the food on the Spit
Rods, put the other Gear Wheel on.
Removable
Gear Wheel
STANDARD TIMER
6 Easy Steps to Great Rotisserie Chicken
Note: Use the total weight that’s printed
on your chicken package. If your package
does not include giblets, etc., then add a
1/4 pound to the actual weight of your
chicken to figure the cooking time.
Use Position A when
cooking 2 chickens and
when cooking chickens
larger than 3 1/2 lbs.
Use Position B for
chickens 3 1/2 lbs or less
Or load 2 chick-
ens side by side.
Loading ...
Loading ...
Loading ...