Loading ...
Loading ...
Loading ...
11 12ninjakitchen . co.uk
ninjakitchen . co.uk
ENDING THE COOK TIME IN ONE
ZONE (WHILE USING BOTH ZONES)
1 Select the Zone you would like to
stop.
2 Then press the down right arrows to
set the time to zero.
3. Once you have set the time to zero, press
the START/STOP button.
COOKING IN YOUR AIR FRYER – CONT.
COOKING IN A SINGLE ZONE
To turn on the unit, plug the power cord into a
wall socket, then press the power button.
Max Crisp
1 Install crisper plate in the drawer, then
place ingredients in the drawer and insert
drawer in unit.
2 The unit will default to Zone 1 (to use
Zone 2 instead, select Zone 2). Select
MAX CRISP.
NOTE: There is no temperature adjustment
available or necessary when using the Max
Crisp function. The temperature is preset
to 240°C.
NOTE: This is not available when using
SYNC and the Probe.
4 The time in that zone is then cancelled
and “End” will appear on the display.
Cooking will continue in the other zone.
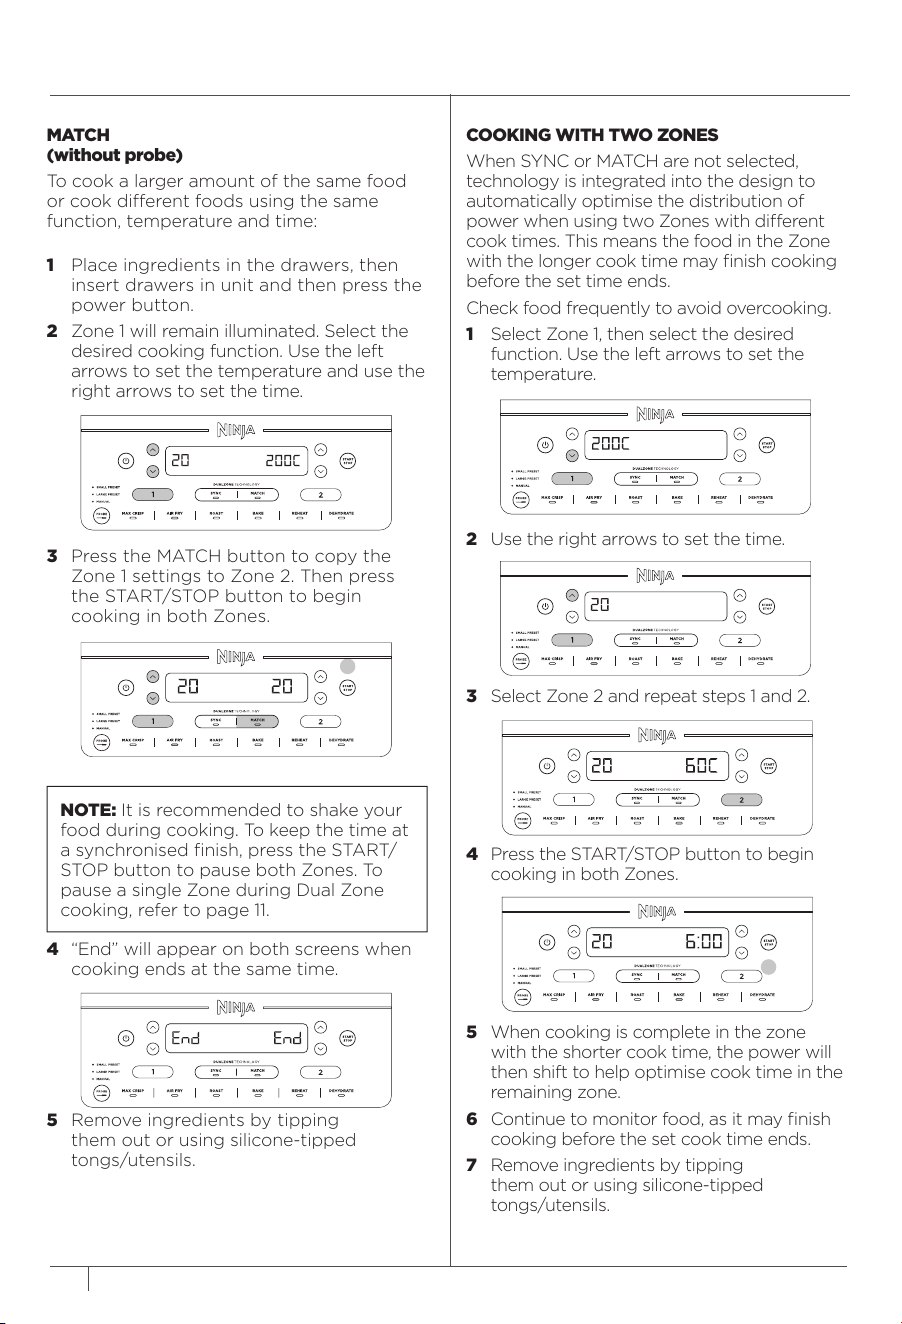
COOKING WITH TWO ZONES
When SYNC or MATCH are not selected,
technology is integrated into the design to
automatically optimise the distribution of
power when using two Zones with dierent
cook times. This means the food in the Zone
with the longer cook time may finish cooking
before the set time ends.
Check food frequently to avoid overcooking.
1 Select Zone 1, then select the desired
function. Use the left arrows to set the
temperature.
2 Use the right arrows to set the time.
3 Select Zone 2 and repeat steps 1 and 2.
4 Press the START/STOP button to begin
cooking in both Zones.
5 When cooking is complete in the zone
with the shorter cook time, the power will
then shift to help optimise cook time in the
remaining zone.
6 Continue to monitor food, as it may finish
cooking before the set cook time ends.
7 Remove ingredients by tipping
them out or using silicone-tipped
tongs/utensils.
MATCH
(without probe)
To cook a larger amount of the same food
or cook dierent foods using the same
function, temperature and time:
1 Place ingredients in the drawers, then
insert drawers in unit and then press the
power button.
2 Zone 1 will remain illuminated. Select the
desired cooking function. Use the left
arrows to set the temperature and use the
right arrows to set the time.
3 Press the MATCH button to copy the
Zone 1 settings to Zone 2. Then press
the START/STOP button to begin
cooking in both Zones.
4 “End” will appear on both screens when
cooking ends at the same time.
5 Remove ingredients by tipping
them out or using silicone-tipped
tongs/utensils.
NOTE: It is recommended to shake your
food during cooking. To keep the time at
a synchronised finish, press the START/
STOP button to pause both Zones. To
pause a single Zone during Dual Zone
cooking, refer to page 11.
PAUSING COOKING
Cooking will automatically pause when
a drawer is removed. Re-insert drawer to
resume cooking.
WHEN USING IN SYNC or MATCH MODE
If you open a drawer, the other drawer will
automatically pause so that cooking will still
finish at the same time. Reinsert drawer to
continue cooking in both zones.
3 Use the right arrows to set the time in
1-minute increments up to 30 minutes.
Press the START/STOP button to
begin cooking.
4 When cooking is complete, the unit will
beep and “End” will appear on the display.
5 Remove ingredients by tipping them out
or using silicone-tipped tongs/utensils.
Loading ...
Loading ...
Loading ...