Loading ...
Loading ...
Loading ...
9 10ninjakitchen.co.uk
ninjakitchen.co.uk
FOOD TYPE: PLACEMENT CORRECT INCORRECT
Steaks
Pork chops
Lamb chops
Chicken breasts
Burgers
Tenderloins
Fish fillets
• Insert probe
horizontally into the
centre of the thickest
part of the meat.
• Make sure the tip of
the probe is inserted
straight into the centre
of the meat, not angled
toward the bottom or
top of it.
• Make sure the probe
is close to (but not
touching) the bone and
away from any fat
or gristle.
NOTE: The thickest part
of the fillet may not be
the centre. It is important
that the end of the probe
hits the thickest part
so desired results are
achieved.
Whole chicken • Insert probe
horizontally into the
thickest part of the
breast, parallel to, but
not touching, the bone.
• Make sure the top
reaches the centre of
the thickest part of the
breast and doesn’t go
all the way through the
breast into the cavity.
HOW TO CORRECTLY INSERT THE PROBE
NOTE: DO NOT use the probe with frozen protein or for cuts of meat thinner than 1.5cm.
IMPORTANT: Reference Quick Start Guide for preset cooking chart when using
SYNC and MATCH with the Probe.
COOKING WITH DUAL ZONE
TECHNOLOGY
Dual Zone Technology utilises two cooking
Zones to increase versatility. The Sync
feature ensures that, regardless of dierent
cook settings, both Zones will finish ready
to serve at the same time.
For detailed instructions on using each
function, see pages 12-15.
SYNC
(without Probe)
To finish cooking at the same time
when foods have dierent cook times,
temperatures or even functions:
1 Place ingredients in the drawers, then
insert drawers in unit and the press the
power button.
2 Zone 1 will remain illuminated. Select the
desired cooking function. Use the left
arrows to set the temperature and use
the right arrows to set the time.
3 Select Zone 2, then select the desired
cooking function. Use the left arrows to
set the temperature and use the right
arrows to set the time.
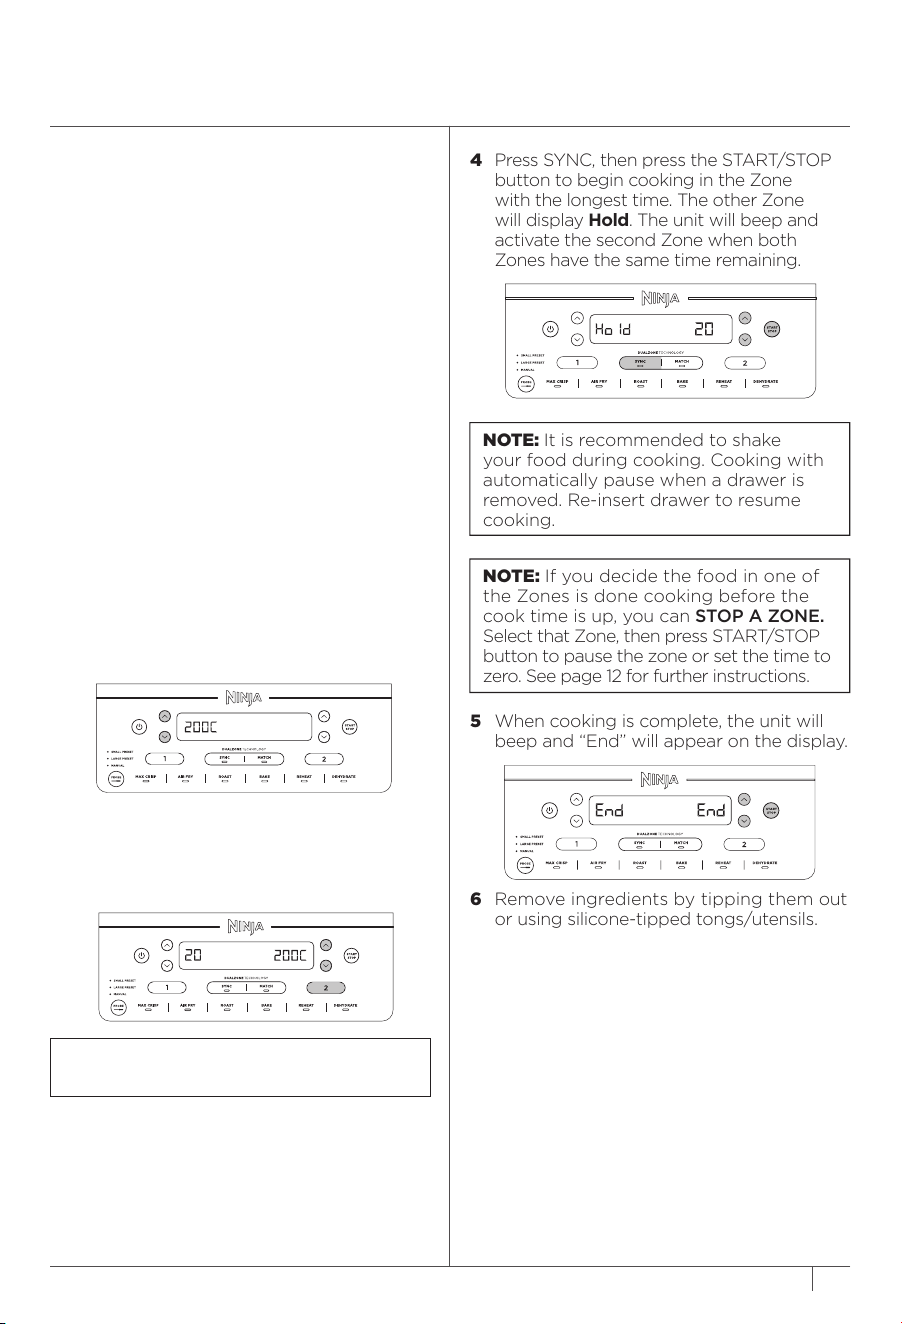
4 Press SYNC, then press the START/STOP
button to begin cooking in the Zone
with the longest time. The other Zone
will display Hold. The unit will beep and
activate the second Zone when both
Zones have the same time remaining.
5 When cooking is complete, the unit will
beep and “End” will appear on the display.
6 Remove ingredients by tipping them out
or using silicone-tipped tongs/utensils.
COOKING IN YOUR AIR FRYER
REFERENCE QUICK START GUIDE FOR RECIPES AND COOKING CHARTS
NOTE: If you decide the food in one of
the Zones is done cooking before the
cook time is up, you can STOP A ZONE.
Select that Zone, then press START/STOP
button to pause the zone or set the time to
zero. See page 12 for further instructions.
NOTE: It is recommended to shake
your food during cooking. Cooking with
automatically pause when a drawer is
removed. Re-insert drawer to resume
cooking.
NOTE: You can select a dierent function
for Zone 2.
USING THE NINJA® PROBE
Loading ...
Loading ...
Loading ...