
USER MANUAL
Before using the TV, please read this manual
thoroughly and retain it for future reference.
ENGLISH
FRANÇAIS
ESPAÑOL
ES-A21180Z

USER MANUAL
Before using the TV, please read this manual
thoroughly and retain it for future reference.
ENGLISH

Copyright Statement
© 2021 Hisense Company Ltd. All Rights Reserved.
All material in this User Manual is the property of Hisense Company Ltd. and its subsidiaries, and is protected under
US, CANADA, MEXICO and International copyright and/or other intellectual property laws. Reproduction or transmission
of the materials, in whole or in part, in any manner, electronic, print, or otherwise, without the prior written consent of
Hisense Company Ltd. is a violation of Hisense Company Ltd. rights under the aforementioned laws.
No part of this publication may be stored, reproduced, transmitted or distributed, in whole or in part, in any manner,
electronic or otherwise, whether or not for a charge or other or no consideration, without the prior written permission of
Hisense Company Ltd.
Requests for permission to store, reproduce, transmit or distribute materials may be made to one of the following
addresses:
USA: Hisense USA Corporation
7310 McGinnis Ferry Road
Suwanee, GA 30024
CANADA: Hisense Canada Co., Ltd
2283 Argentia Road, Unit 16
Mississauga, ON, Canada
L5N 5Z2
MEXICO: Hisense Mexico S. de R.L. de C.V.
Blvd. Miguel de Cervantes Saavedra No 301
Torre Norte Piso 2, Col. Ampliación Granada
Miguel Hidalgo, Ciudad de México, C.P. 11520
Hisense, and any and all other Hisense product names,
logo’s, slogans
or marks are registered trademarks of Hisense
Company Ltd. and its subsidiaries. All other trademarks are the property of their respective holders.
©2021. All rights reserved. Hisense and the Hisense logo are registered trademarks of Hisense. Other brand and
product names are registered trademarks of their respective owners.

Disclaimer Page
**Notwithstanding anything to the contrary, including in any or all descriptions, representations, statements or other
communications related to this Hisense device (hereinafter “Device”) made in any form whatsoever and at any time,
some or all of the pre-installed, or subsequently installed Application Services may not be available or capable of
functioning as intended by the provider of the Application Services in any or all usage areas for reasons outside of
Hisense’s control, including but not limited to, Internet access, local service limitations, etc. Any purchase or use
of the Device, including any Application Services, is purely at th
e user’s risk. Application Services are provided on
an as-available basis without warranties of any kind, either expressed or implied, that the Application Service will
be uninterrupted or error-free, including but not limited to vagaries of weather, disruption of Service, acts of God,
warranties of title, local or regional limitations, no infringement, NOR IMPLIED WARRANTIES OF MERCHANTABILITY
OR FITNESS FOR A PARTICULAR PURPOSE. No advice or information given by Hisense, providers, affiliates, or
contractors or their respective employees shall create such a warranty. Hisense specifically disclaims responsibility for
any or all Application Services from functioning at any time, and by purchasing the Device, you accept such
disclaimer
without any claim on Hisense. You are solely responsible for providing an active and working connection to the Internet,
along with any and all hardware and/or software necessary to use the Hisense Device as intended.
Disclaimer:
Images throughout this document are for illustrative purposes only and may differ from the actual product.

Contents
Live TV
Channel Scan..................................................................................................................................... 4
Channel List........................................................................................................................................4
Favorite............................................................................................................................................... 4
Connection
Wired LAN.......................................................................................................................................... 8
Wireless.............................................................................................................................................. 8
HDMI-CEC.......................................................................................................................................... 9
HDMI Device...................................................................................................................................... 9
USB Device...................................................................................................................................... 10
Multi-screen
Screen Sharing.................................................................................................................................11
Content Sharing................................................................................................................................11
Smart Functions
Media................................................................................................................................................ 13
Home................................................................................................................................................ 14
App Store..........................................................................................................................................14
Search...............................................................................................................................................15
VIDAA Voice.....................................................................................................................................15
Picture and Sound
Adjusting the Picture Quality............................................................................................................16
Adjusting the Sound Quality.............................................................................................................17
System and Support
Setting Time..................................................................................................................................... 19
Using the timer.................................................................................................................................19
Notification........................................................................................................................................ 19
Upgrade............................................................................................................................................ 20
Troubleshooting
Self Diagnosis...................................................................................................................................21
Picture Problem................................................................................................................................ 21
Sound Problem.................................................................................................................................21
Other Picture and Sound Problem...................................................................................................22
Internet Problem............................................................................................................................... 22
My File Won't Play........................................................................................................................... 23
Using the E-Manual


Live TV
Channel Scan
Auto Channel Scan
> Settings > Channel > Auto Channel Scan
Note:
•
Before you select Auto Channel Scan, you can press > Settings > Channel > Tuner
Mode to select Antenna or Cable.
Channel List
Display the channel list
In Live TV, press button on the remote control to display the channel list menu.
Favorite
Adding channels to your 'Favorites' list
4

Live TV
Press button to call out the channel list, the channel list appears on the right side of the
screen.
Press > to select your favorite channel.
Press and Choose Add to Favorite, a heart-shaped icon will appear next to your favorite
channel.
Viewing your 'Favorites' list
Press to call out the channel list, the channel list appears on the right side of the screen.
Press > Favorite, your favorite channel with a heart-shaped icon will appear on the favorite
list.
5

Live TV
Deleting channels from your 'Favorite' list
Press to call out the channel list, the channel list appears on the right side of the screen.
Press > Favorite, on the favorite list screen, press > to select the channel that
you want to delete.
Press and choose Delete Fav.channel, the selected channel will disappear on favorite
channel list.
6

Live TV
Note:
• These steps should be operated under TV inputs.
• Before you edit the fav lists, complete channel scan first.
7

Connection
Wired LAN
Connecting to the Internet
> Settings > Network > Network Configuration
You set the TV network by selecting Configuration and press the button to enter the
submenu.
Automatically obtain an IP address
1. If you connect to the wired network, the TV will automatically obtain an IP address and connect
to the network.
2. If the connection fails, disconnected message will display for the Ethernet status. Retry or enter
the IP settings, and select Manual to input the information again.
Manually enter the IP address
1. Enter the IP settings to select Manual.
2. Enter the IP Address, Netmask, Gateway, DNS Server 1 and DNS Server 2 in the menu.
Note:
• This section is only for 4K models.
• You get access to the Internet through your TV.
• The default option of IP Settings Mode is DHCP.
Wireless
Connecting to the Internet
Note:
• You get access to the Internet through your TV.
• Connect to an available wireless network.
• Make sure that you have the wireless router's SSID and password before attempting to connect.
Connecting to a Wireless Network
> Settings > Network > Network Configuration
8

Connection
You set the TV network by selecting Configuration and press the button to enter the
submenu.
• Connection Type
Choose a wireless network connection to access the Internet.
• Refresh
Refresh wireless network.
• Advanced Settings
Configure the advanced wireless network settings for the TV.
• Add
You can add wireless network.
Note:
• If no wireless router is found, select Add and enter the network name in the SSID.
• If no wireless router is found, select Refresh.
HDMI-CEC
You can use your TV remote to control the external devices that are connected to the TV by HDMI
cable. The external devices need to support HDMI & CEC Function (HDMI-CEC).
Connecting an external device through HDMI-CEC Function
> Settings > System > HDMI-CEC
1. Set HDMI-CEC to On.
2. Connect an HDMI-CEC-compliant device to the TV.
3. Turn on the connected external device. The device is automatically connected to the TV. After
connection is finished, you can access the menu of the connected device on your TV screen
using your TV remote and control the device.
Note:
• HDMI cables must be used to connect HDMI CEC-compatible devices to your TV.
• The HDMI CEC feature of the connected device must be turned on.
• If you connect an HDMI device that is not HDMI CEC-compatible, all the HDMI-CEC control
features do not work.
• Depending on the connected HDMI device, the HDMI-CEC Control feature may not work.
• The HDMI CEC feature are supported One Touch Play, Routing Control, System Standby,
Device OSD Name Transfer, Remote Control Pass Through, Give Device Power Status,
System Audio Control.
HDMI Device
Connect an HDMI cable from an external A/V equipment.
Some devices such as DVD player require HDMI signal to be set to output in the device's settings.
Please consult your device user manual for instructions.
Please note that the HDMI connector provides both video and audio signals, it's not necessary to
connect an audio cable.
9

Connection
USB Device
Connect the USB devices such as hard drives, USB sticks and digital cameras for browsing photos,
listening to music.
1. Support the U disk 4G, 8G, 16G, 32G, 64G, 128G and other common market sizes, 8T hard
drive is currently supported.
2. Support format: NTFS, FAT32.
10
Multi-screen
Screen Sharing
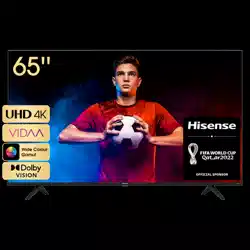
Mirror content from your device to the TV.
> Screen Sharing
• Turn on the casting function of your Android/Windows10 device.
• Find the TV name in the searching list of your device and select it. Wait for the connection
progress to complete and the content on your device will be displayed on the TV.
Note:
• Some Android devices may not support casting.
Content Sharing
Share media content, like videos, music or photos, from your Android/iOS/PC device to the TV
screen.
Before you use this function, turn on Content Sharing at > Settings > System > Application
Manager > Content Sharing.
• Establishing Content Sharing connection between the TV and your device
1. Turn on the content sharing function of your Android/iOS/PC device.
2. Find the TV name in the searching list of your device and select it.
3. Wait for the connection progress to complete, and select the content you want to share.
• Viewing media content of your device
Press button on your remote, and select a media content on the screen.
Note:
• Make sure your device and the TV are connected to the same network.
11

Multi-screen
• Some devices may not support content sharing. If your device doesn't support content sharing,
you can download an app that supports the function.
•
If you want to mirror content from your device, go to > Screen Sharing.
12

Smart Functions
Media
Playing Media contents
> My Apps > Media
By default, there are Content Sharing displayed on the Media screen. If your mobile device is
connected to the TV, its name also appears on the Media screen.
Note:
• For more information about Content Sharing, refer to its detailed introduction.
> My Apps > Media > connected device
Select the content you want to play on the screen, like pictures, videos and music.
1 Input the content name you want to play.
2 Arrange the content list by Grid, List.
3 Arrange the content list by Name, Date Modified, Size.
4 Filter the content list by All Media, Photo, Video, Music.
5 Create a photo, music, or video playlist.
Playing background music during viewing pictures
You need to:
• Choose a picture to playback.
•
Press / button to call out playbar.
• Select Background Music and choose your music to create a Music Playlist.
• Play the background music during viewing pictures.
Note:
• The TV may be support the following file formats:
Medium File Format
Video
.AVI, .WMV, .MP4, .MOV, .3GP, .MKV, .MPG, .MPEG, .VOB, .FLV, .OGM
13

Smart Functions
Medium File Format
Picture
.jpeg, .bmp, .PNG, .GIF
Music
.mp3, .aac, .wma, .wav
• For more information about connection to PC/mobile device, refer to the detailed introduction of
each part.
Home
Getting familiar with the Home screen
Run the TV more conveniently by selecting the corresponding sections.
Press button.
• You can always view the current time at the top of the Home screen.
•
If your TV is connected to the Internet through a wireless connection, then the icon will be
at the top right corner of the screen.
• Manage apps
Select the item you want to move, press button to manage.
Search
Search the app you want.
Inputs
Select the input you want.
Settings
Display the Settings menu.
Notifications
Allow pop-up notifications to appear for useful information and events that occur with your TV.
• Select Notifications on the Home screen, and select Settings then display Advertising, New
Arrivals, Warnings And Legal Statements, System Message, from which you can choose the
types of notifications you would like to receive.
VIDAA Account
Sign in your VIDAA account.
A VIDAA account gives you all the best feature of your smart TV and always keeps it up to date.
Voice Service Setup
Set up voice assistant to control your TV just by your voice.
Note:
• Voice Service feature may not be applicable in some models/countries/regions.
• To use this function, End User License Agreement and corresponding Smart feature privacy
policy/terms and conditions may be required to be agreed to.
App Store
> My Apps
14

Smart Functions
• Removing an app in My Apps
1. In My Apps select the app you want to remove, and then press button to select
Remove.
2. Select OK. The selected app is deleted.
• Adding an app in APP STORE to the Home screen
1. In APP STORE select the app you want to add and then select Install.
2. The selected app has been added to the My Apps.
• Sorting apps in My Apps
1. In My Apps select the app you want to sort, and then press button to select Sort.
2. Press / / / button to move it.
3. Press to store position.
Note:
• To use this function, TV must be connected to the Internet.
• Adding apps is free, but it might cost you money when using some apps.
• The default apps in My Apps cannot be removed.
Search
>
You can search for a title, app, person, genre and more by virtual keyboard.
VIDAA Voice
VIDAA Voice is a voice assistant to help you control the TV and search content, supporting several
languages.
Before using VIDAA Voice, please check the following:
• Network connected
• Voice remote paired
• End User License Agreement and voice feature privacy policy/terms agreed
To set voice assistant to VIDAA Voice, you can choose one of following options:
•
Press button on your remote control and select Voice icon in the navigation bar.
Choose VIDAA VOICE > Setting > VIDAA Voice Service.
•
Press button to select Settings icon and select System > Voice Service > VIDAA
Voice Service or System > VIDAA Voice Service.
Turn on VIDAA Voice Service to set VIDAA Voice as your voice assistant, and select a language
for VIDAA Voice. Then, press and hold the button on your remote control to interact with
VIDAA Voice.
Note:
• VIDAA Voice may not be applicable in some models/countries/regions.
• Shipment with remote control varies depending on TV models/countries/regions.
•
For remote control without the button, press > Settings > Support > Mobile App
Installation, you can scan the QR code to download and install the VIDAA mobile app. Press
the Microphone icon in the app to interact with VIDAA Voice using your phone.
15

Picture and Sound
Adjusting the Picture Quality
Adjust current picture mode to apply to all sources or just current source.
The menu is only for reference. The following modes may differ from the actual product.
Choosing a picture mode
> Picture Mode or > Settings > Picture > Picture Mode
You can select the Picture Mode that provides the best viewing experience.
• Vivid
• Standard
• Energy Saving
• Theater
• Game
• Sports
• Calibrated
• Auto
Low Blue Light
Theater and Calibrated are designed to reduce the level of blue light to protect your eyes.
You can go to > Picture Mode or > Settings > Picture > Picture Mode, then select
Theater or Calibrated.
To reduce the eye strain and protect eyes when you watch TV for a period of time, you are
suggested to:
• Take regular and frequent breaks to avoid watching TV for a long period of time. Long time of
watching may cause you eye fatigue. It is not recommended to watch TV for more than one
hour.
• Look away from the TV screen and look at distance objects during the breaks for at least 10
minutes for eye care.
• Relax yourself during a break by doing eye exercises or outdoor activities.
• The best recommended viewing distance is 3 times the vertical height of the TV screen.
Proper breaks and exercises are proved excellent help to relieve eye strain and fatigue.
Note:
• This feature may not be applicable in some models/countries/regions. Low blue light certification
may vary by model.
• Low Blue Light can only be supported when the Color Temperature is set to Low.
Changing the picture size
> Picture Size or > Settings > Picture > Picture Size
You can change the size of the picture displayed on the TV screen.
• Auto
• Normal
• Zoom
• Wide
• Direct
• Dot-By-Dot
• Panoramic
16

Picture and Sound
• Cinema
Configuring advanced picture settings
> Settings > Picture > Picture Mode Settings
Adjust display setting for each Picture Mode.
• Apply Picture Settings
• Backlight
• Contrast
• Brightness
• Color
• Tint
• Sharpness
• Overscan
• Color Temperature
• Motion Clearness
• Noise Reduction
• Digital Noise Reduction
• HDMI Format
• HDMI Dynamic Range
• Active Contrast
• Instant Game Response
• Expert Settings
• Reset Picture Settings
Adjusting the Sound Quality
Adjust current sound mode to apply to all sources or just current source.
The menu is only for reference. The following modes may differ from the actual product.
Choosing a sound mode
> Settings > Sound > Sound Mode
You can select a favourite sound mode suitable for the content type or the listening environment.
• Standard
• Theater
• Music
• Speech
• Sports
• Late Night
• Auto
Configuring advanced sound settings
> Settings > Sound > Sound Mode Settings
• Bass Boost
• Surround Sound
• Dialog Clarity
• TruVolume
17

Picture and Sound
• Auto Volume Control
18

System and Support
Setting Time
> Settings > System > Time Settings
Set the current time based on your location.
• Time Zone
Select your time zone.
• Time Format
Set the time to display in a 12 or 24-hour format.
• Date Format
Set the time to display in a mm-dd-yyyy, dd-mm-yyyy or yyyy-mm-dd format.
• Daylight Savings
Select whether to apply Daylight Savings Time to the TV.
• Date and Time
Set the Date and Time. You can set the date and time to automatically sync with Internet/broadcast
or manual setup by yourself.
Using the timer
> Settings > System > Timers
Adjust the timer settings to suit your preference.
• Sleep Timer
Set the sleep timer to automatically turn the TV Off within a specified time: Off, 10 Minutes,
20Minutes, 30 Minutes, 40 Minutes, 50 Minutes, 60 Minutes, 90 Minutes and 120 Minutes.
• Power On Timer
Set the clock for the time you want the TV to turn on automatically. You can set the time only once
or set the time in specified date weekly.
• Power Off Timer
Set the clock for the time you want the TV to turn off automatically. You can set the time only once
or set the time in specified date weekly.
• Menu Timeout
Set the amount of time that you would like for the menu to display: 10s, 20s, 30s, 60s, 90s, Off .
Notification
> Settings > System > Advanced Settings > Notifications Pop-ups
Allow pop-up notifications to appear for useful information and events that occur with your TV,
including: Advertising, New Arrivals, Warnings And Legal Statements and System message. You
can enable/disable each of these notifications.
> Notifications
You can view the list of event messages generated by the TV.
Note:
19

System and Support
• To delete all notifications, select Clear All.
Upgrade
> Settings > Support > System Update
Set your TV to receive the latest firmware.
• Auto Firmware Upgrade
Set your TV to automatically receive the latest firmware.
• Check Firmware Upgrade
Check if your TV needs Firmware upgrade.
Note:
• Please ensure your TV is connected to the Internet.
• System App Auto Upgrade
App auto upgrade will be done in the background. May need your confirmation on new Privacy
Notices to complete upgrade in the progress.
• Upgrade from USB
Upgrade TV software from USB device.
Note:
• Please ensure the USB flash drive insert to USB2.0 port of the TV.
• The updating files must be available in root directory.
• The format of the USB must be FAT32 and the partition table type must be MBR.
20
Troubleshooting
Self Diagnosis
Diagnose issues with your TV.
> Settings > Support > Self Diagnosis
Use the Picture Test to help diagnose picture issues and the Sound Test to diagnose sound
issues. Use the Network Test to test network connection and use the Input Connection Test to
show all related information with external connections.
Picture Problem
When the TV has trouble with the picture, these steps may help resolve the problem.
Picture Test
> Settings > Support > Self Diagnosis > Picture Test
Before you review the list of problems and solutions below, use Picture Test to determine if the
problem is caused by the TV. Picture Test displays a high definition picture that you can examine
for flaws or faults
The Problem Possible Solutions
No picture, or black and
white picture.
• Unplug TV from AC outlet and re-plug after 60 seconds.
• Check that the Color is set to 50 or higher.
• Try different TV channels.
The picture is distorted.
• The compression of video content may cause picture distortions,
especially in fast moving pictures from sports programmes and action
movies.
• If the signal reception is weak or poor, screen distortion may be visible but
it is not a malfunction.
• Mobile phones used close to the TV (within 1 m) may cause noise on
analogue and digital channels.
Note:
• If the test picture does not appear or there is noise or distortion, the TV may have a problem.
Contact the service company in your country.
• If the test picture is displayed properly, there may be a problem with an external device. Please
check the connections.
• If the problem persists, check the signal strength or refer to the external device's user manual.
Sound Problem
When the TV has difficulties with sound, these steps may help resolve the problem.
Sound Test
> Settings > Support > Self Diagnosis > Sound Test
If the TV plays the Sound Test melody without distortion, there may be a problem with an external
device or the broadcast signal's strength.
21
Troubleshooting
The Problem Possible Solutions
There is no sound or
the sound is too low at
maximum volume.
Check the volume control of the device (cable or satellite box, DVD, Blu-ray,
etc.) connected to your TV.
Picture is normal, but no
sound.
• Check the volume settings.
• Check if 'Mute' mode is set to on.
The speakers are making an
odd sound.
• Make sure that the audio cable is connected to the correct audio output
connector on the external device.
• For antenna or cable connections, check the signal information.
• A low signal level may cause sound distortions.
Note:
• This product does not support decoding of DTS CD bitstreams. Playback of this format may
produce undesirable noise.
Other Picture and Sound Problem
When the TV has difficulties with sound and picture, these steps may help resolve the problem.
Picture Test
> Settings > Support > Self Diagnosis > Picture Test
Sound Test
> Settings > Support > Self Diagnosis > Sound Test
If the Sound Test and Picture Test are normal, there may be a problem with an external device or
the broadcast signal's strength.
The Problem Possible Solutions
No sound and picture.
• Check if the power cord is plugged into a powered AC outlet.
•
Press the button in the remote control to activate the unit from
Standby.
• Check to see if the LED light is on or not. If it is, then the TV is receiving
power.
I have connected an
external source to my TV
but I get no picture and/or
sound.
• Check the correct connection on the external source and the input
connection on the TV.
• Make sure you have made the correct selection for the input mode for the
incoming signal.
Sound and picture distorted
or appear wavy.
• Some electrical appliances may affect TV set. If you turn off the appliance
and the interference goes away, then move it further away from TV.
• Insert the power plug of the TV set into another power outlet.
Sound and picture is blurry
or cuts out momentarily.
• If you use an external antenna, check the direction, position and
connection of the antenna.
• Adjust the direction of your antenna or reset or fine tune the channel.
Internet Problem
When the TV has difficulties connecting to the Internet, these steps may help resolve the problem.
22

Troubleshooting
Network Test
> Settings > Support > Self Diagnosis > Network Test
If the TV network is connected, the screen will display Connected successfully.
The Problem Possible Solutions
The TV cannot connect to
your network or apps.
Make sure the TV has a network connection.
•
Run Network Test ( > Settings > Support > Self Diagnosis >
Network Test).
• Contact your Internet service provider.
The wireless network
connection failed.
Make sure your wireless modem/router is on and connected to the Internet.
The wireless network signal
is too weak.
Position your wireless router, modem router, or access point in a central
location. Avoid putting it in a corner.
My File Won't Play
When files aren't playing, this may help resolve the problem.
The Problem Possible Solutions
Some files can't be played.
This problem may occur with high-bitrate files. Most files can be played back,
but you might experience problems with high-bitrate files.
23

Using the E-Manual
Launching the E-Manual
> Settings > Support > E-Manual or > My Apps > E-Manual
View the embedded E-Manual that contains information about your TV's key features.
• Words in blue (e.g., Picture Mode) indicate a menu item.
• The small black circle indicates the button on the remote control.
Disclaimer:
Instructions and images through this manual are only for reference and may differ from the actual
product.
Using the Buttons in the E-Manual
•
Search
Search for the product feature information, and the E-Manual will provide all the titles and
content that contains the search information.
• Link
Allows you to access the corresponding reference page.
24
