Loading ...
Loading ...
Loading ...
7
12. Replace refrigerator door handles.
Models with removable handle logo insert.
• Pry two button plugs from hinge side of door with a
putty knife, the blade covered with masking tape.
Mount handle to opposite side of door using
mounting screws removed in previous steps.
Models with automatic reversing logo.
• Pry 4 button plugs from hinge side of door with putty
knife, blade covered with masking tape. Mount
handle on opposite side of door using mounting
screws removed in previous step.
• Snap end caps into place. Replace 4 button plugs in
empty mounting holes.
Connect ice maker water supply line (some
models).
!
WARNING
To avoid electrical shock which can cause severe
personal injury or death. Disconnect power to
refrigerator before connecting water supply. After
replacing doors, connect power.
!
CAUTION
Observe the following to avoid property damage:
• Make sure water pressure to water valve is
between 20 and 100 pounds per square inch.
• Tighten adapter fitting and nuts with pliers and
wrenches. Do not overtighten.
• Check for water leaks and correct if necessary
before returning refrigerator to normal location.
After 24 hours check again for leaks.
Important
• Before connecting water supply, contact a plumber to
connect copper tubing to household plumbing in
compliance with local codes and ordinances.
• Amana does not recommend using a self-piercing, or
3
/16" saddle valves! Both reduce water flow, become
clogged with time and in addition may cause leaks if
repair is attempted. The correct type of shut-off valve
requires a
1
/4" hole to be drilled in the water supply
pipe prior to valve attachment. Amana is not
responsible for property damage caused by improper
water connection.
Materials Required
1
/4" O.D. (6 mm) flexible copper tubing is required. Length
of copper tubing must reach from water supply connection
to water valve inlet port on back of refrigerator, plus
additional 8 ft. (2 m) of tubing for a service loop. A service
loop will allow refrigerator to be pulled away from the wall
without disconnecting tubing.
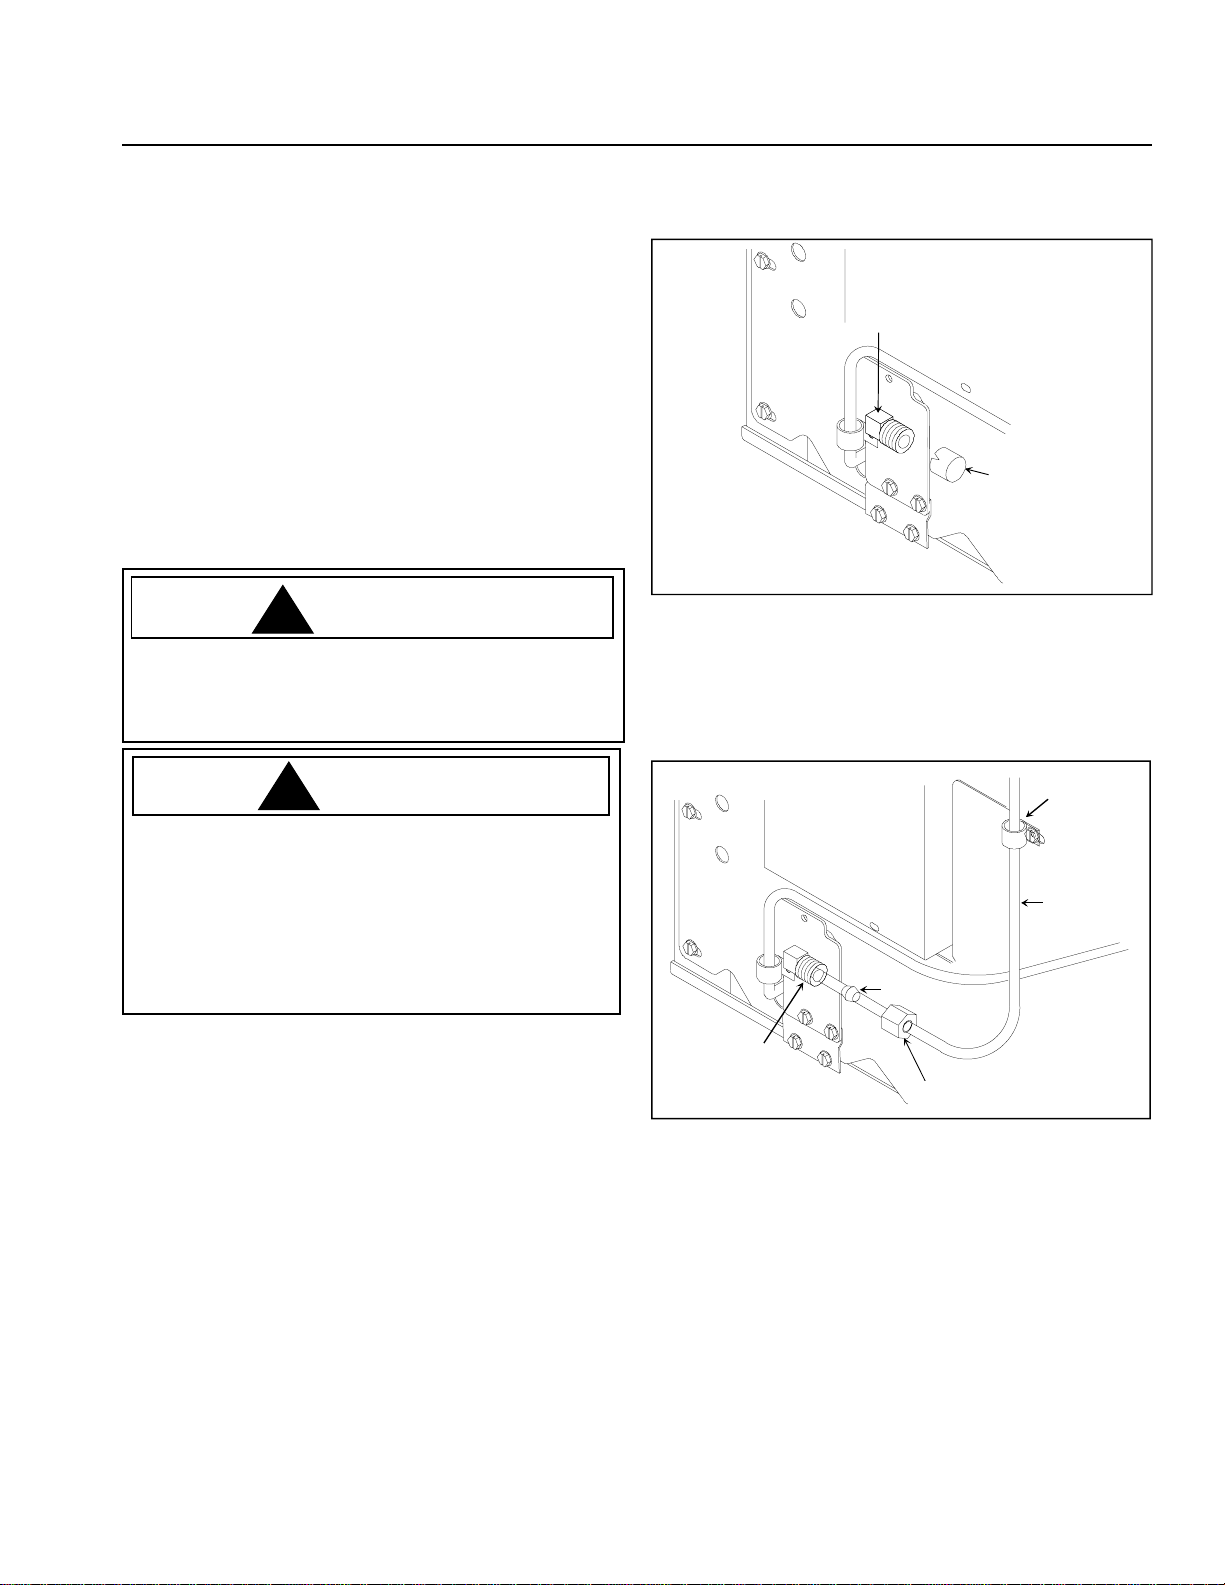
Procedure
1. Remove plastic cap from water valve inlet port.
Plastic
cap
Water valve
inlet port
2. Place brass nut and brass sleeve on copper tubing.
(Brass nut and sleeve are found in your literature
packet.) Insert copper tubing into water valve inlet
port. Connect brass nut on copper tubing to water
valve inlet port. Make sure copper tubing is secure by
pulling on copper tubing.
Brass nut
Brass sleeve
Water valve
inlet port
Copper
tubing
"P" clamp
3. Turn on water supply to refrigerator and check for
leaks. Correct any leaks at connection. Be careful not
to overtighten connection.
4. Create a service loop using extreme care to avoid
kinks. Secure copper tubing to refrigerator cabinet
with a "P" clamp.
Loading ...
Loading ...
Loading ...