Loading ...
Loading ...
Loading ...
5
Freezer
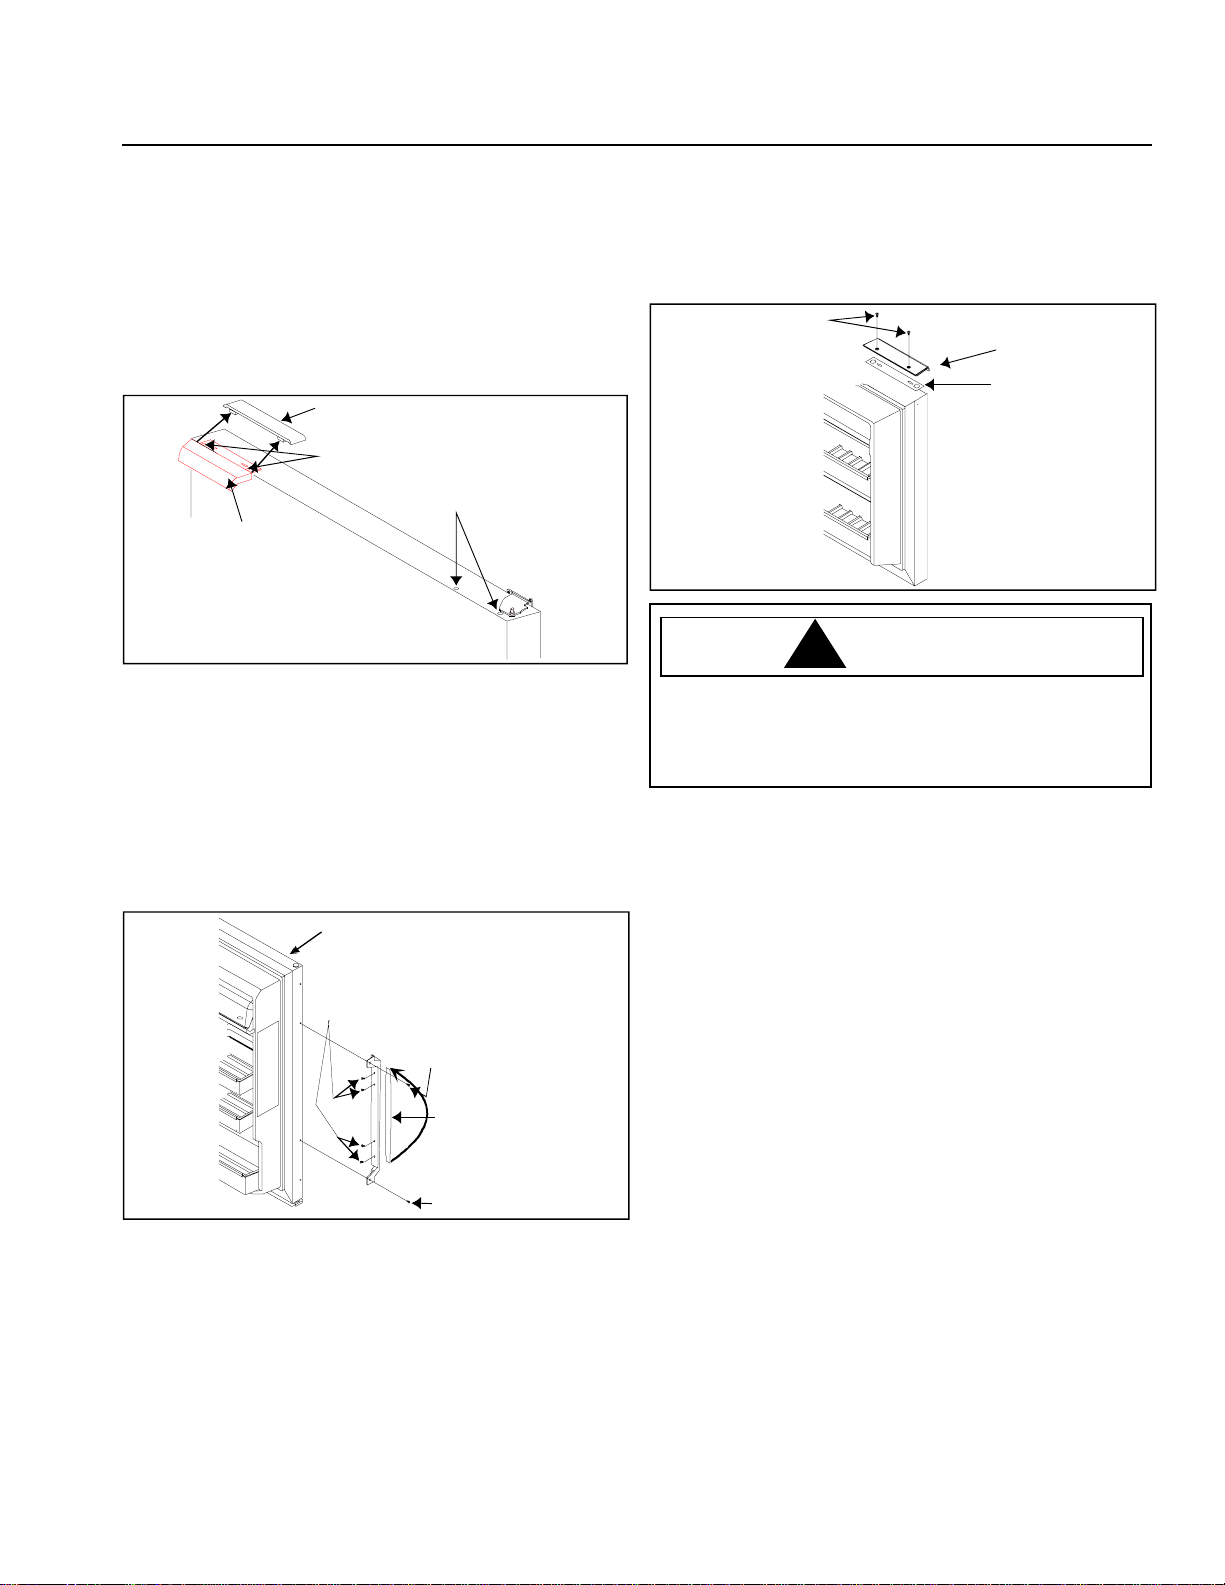
• Pry up back edge of handle cap using a putty knife
with the blade covered in masking tape. Remove
handle cap from handle. Remove handle from door
by removing mounting screw at each side of handle.
• Pry 2 button plugs from hinge side of door using a
putty knife with the blade covered in masking tape.
Save button plugs as they will be reused later.
Handle
cap
Freezer
handle
Screws
Button
plug
If you have handles with a full handle insert please remove
handle using the following instructions.
Refrigerator
• Remove 2 handle screws from top and bottom of
refrigerator handle.
• Remove handle insert by removing 4 phillips screws
in back of handle.
• If reversing doors, flip handle insert so logo is right
side up.
Handle insert
reverses
Handle
insert
screws
Handle screw
Handle screw
Refrigerator door
• Replace handle insert with 4 phillips screws
previously removed.
Freezer
• Remove freezer handle screws with a phillips
screwdriver. Remove freezer handle shim.
• Pry 2 button plugs from hinge side of door using a
putty knife, blade end covered with masking tape.
Freezer handle
shim
Freezer handle
Handle
screws
!
WARNING
Disconnect power to refrigerator before removing
doors to avoid electrical shock which can cause severe
personal injury or death. After replacing doors, connect
power.
2. Remove top hinge cover. Top hinge cover snaps off.
Remove top hinge and hinge shim using hex nut
driver.
3. Remove refrigerator door by lifting off of center hinge
pin.
4. Remove center hinge pin using hex nut driver.
5. Remove freezer door by lifting door off bottom hinge.
An internal support rod may slide out of hinge socket.
Replace rod on new hinge side before hanging door.
6. Remove center hinge bracket and hinge shim using
phillips screwdriver.
7. Remove toe grille and bottom hinge cover. Both snap
off.
8. Remove bottom hinge and hinge shim using hex nut
driver.
Loading ...
Loading ...
Loading ...