Loading ...
Loading ...
Loading ...
10
Garden Fresh™ Crispers
Garden Fresh™ crispers keep produce fresh longer.
Wrap produce tightly. Do not wash produce before
placing in crispers. Excess moisture could cause
produce to spoil prematurely. Do not line crispers with
paper towels. Paper towels retain moisture.
Garden Fresh™ crispers control is located below front
shelf trim. Control adjusts humidity in crisper drawers.
Slide control to
high
for produce with leaves such as
lettuce, spinach or cabbage. Slide control to
low
for
produce with skins such as cauliflower, corn or tomatoes.
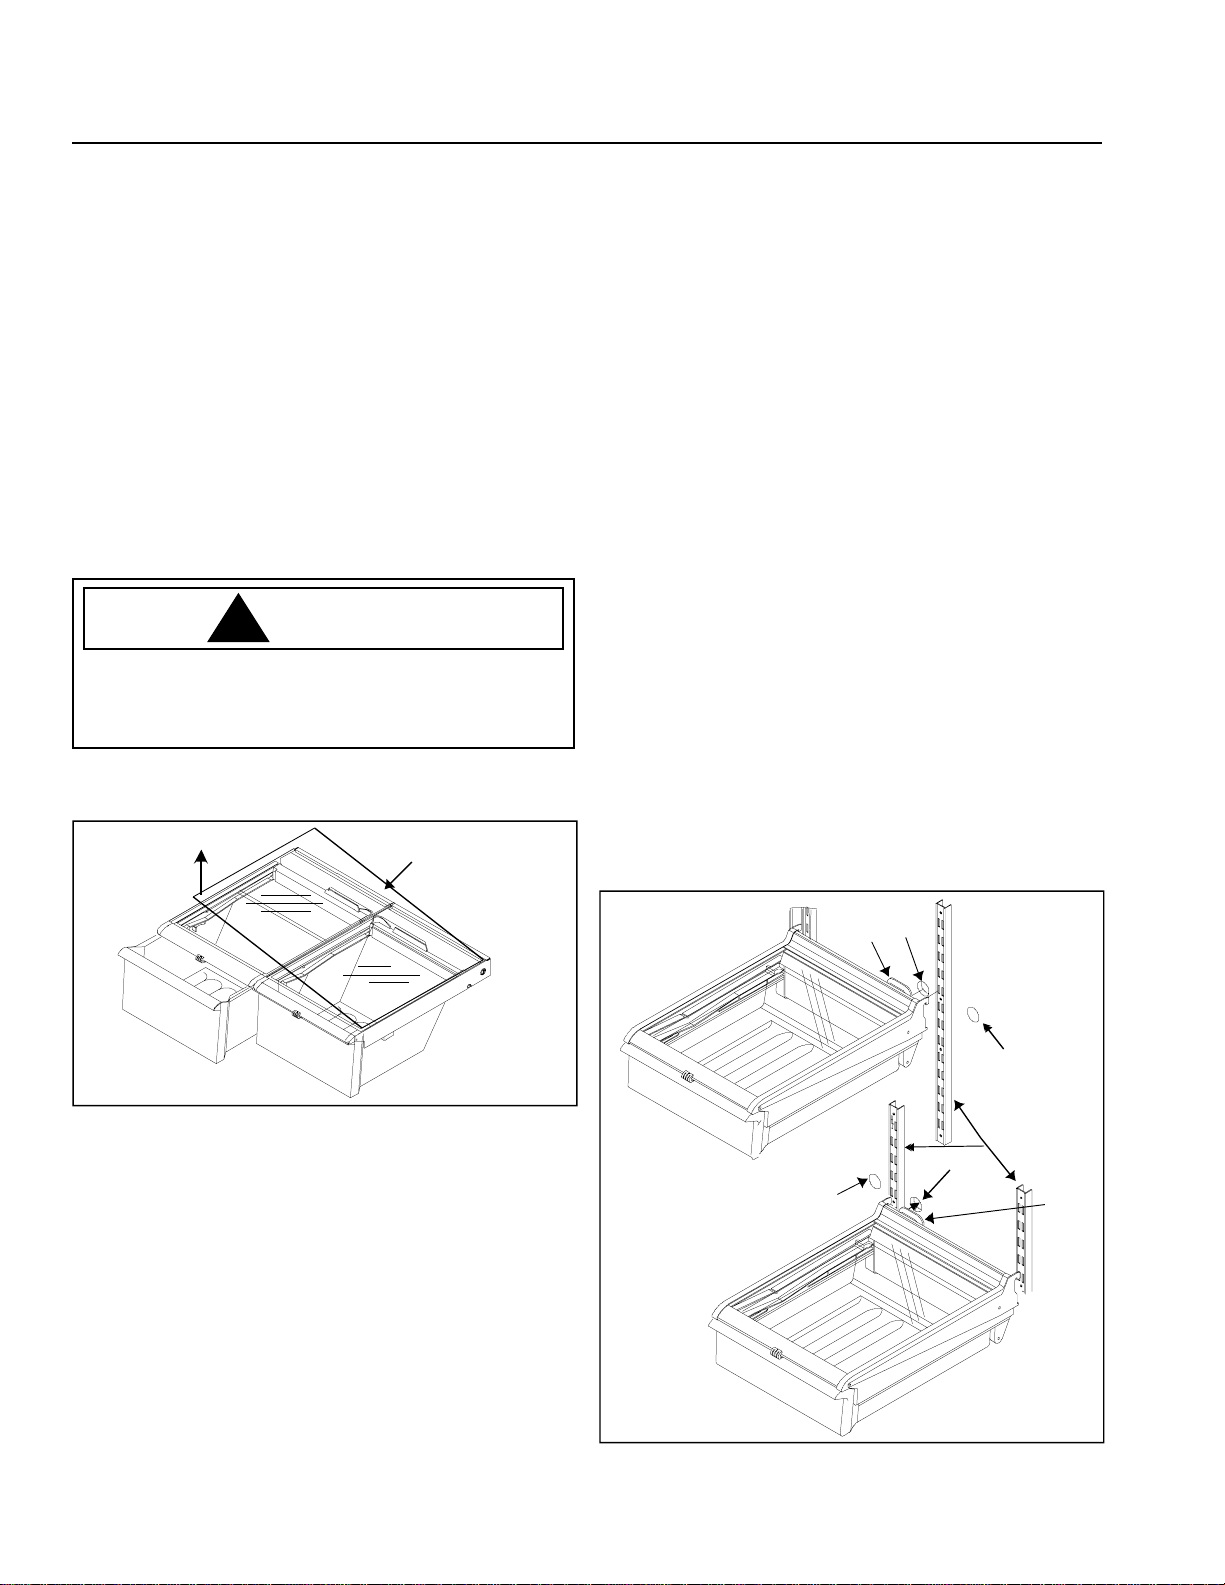
Remove shelf and crisper drawers by completing the
following steps:
1. Open left crisper.
• For doors hinged on left, open right crisper.
!
CAUTION
Handle tempered glass shelves carefully to avoid
personal injury or property damage. Shelves may break
suddenly if nicked, scratched, or exposed to sudden
temperature change.
2. Remove glass crisper top by gently pushing up from
underneath. Tilt one end up and pull out.
Glass crisper
top
3. Remove left crisper by lifting from front while
supporting underneath and pulling out. For doors
hinged on left, remove right crisper.
4. Remove support post at recess in bottom center of
Fresh Food section.
5. Remove other crisper by sliding to opposite wall. Lift
from front while supporting underneath and pull out.
6. Replace crispers and shelf by performing steps 2-5 in
reverse order.
Adjustable Deli Drawer
™
(some models)
• Remove drawer and sleeve by lifting and pulling out.
Refer to “Spillsaver
™
Shelves” for instructions on
removing and replacing shelf.
• Replace drawer in sliding in.
Chiller Fresh™ System (some models)
The Chiller Fresh System™ features a drawer inside a
sleeve. Freezer air circulates between drawer and
sleeve. This systems keeps food fresh longer and up to
5°F (3°C) colder than refrigerator temperature.
Chiller Fresh™ control is located below front shelf trim.
Control adjusts amount of air circulating around drawer.
Slide control to
COLD
for normal refrigerator temperature
and to
COLDER
for colder temperature. Ice crystals may
form on drawer or food on
COLDER
setting. Cold air
entering the Chiller Fresh™ drawer can decrease
refrigerator temperature. Refrigerator control may need to
be adjusted to a lower number to compensate for colder
air.
• Remove drawer by lifting and pulling out. Remove
shelf by lifting from front, releasing hooks from metal
track, then pulling out.
• Replace shelf by inserting hooks into metal track and
lowering the front. Use slots 4 though 6 only.
• Replace drawer by sliding in. Make sure boot fits
snugly over air inlet in back wall.
When moving Chiller Fresh™ drawer left or right,
complete the following steps after temperature controlled
meat drawer has been removed:
1. Remove plastic cap from back wall of refrigerator
section by placing a knife covered with masking tape
underneath cap and pulling forward.
Boot
Air
inlet
Boot
rotated
180°
Air
inlet
Metal
track
Plastic
cap
Chiller Fresh™
installed
on left side of
refrigerator
Chiller Fresh™
installed
on right side of
refrigerator
Plastic
cap
Loading ...
Loading ...
Loading ...