Loading ...
Loading ...
Loading ...
27
Operation & Installation Manual
Signature Series Beer Dispensers (HP15, HP24 and HP48 models)
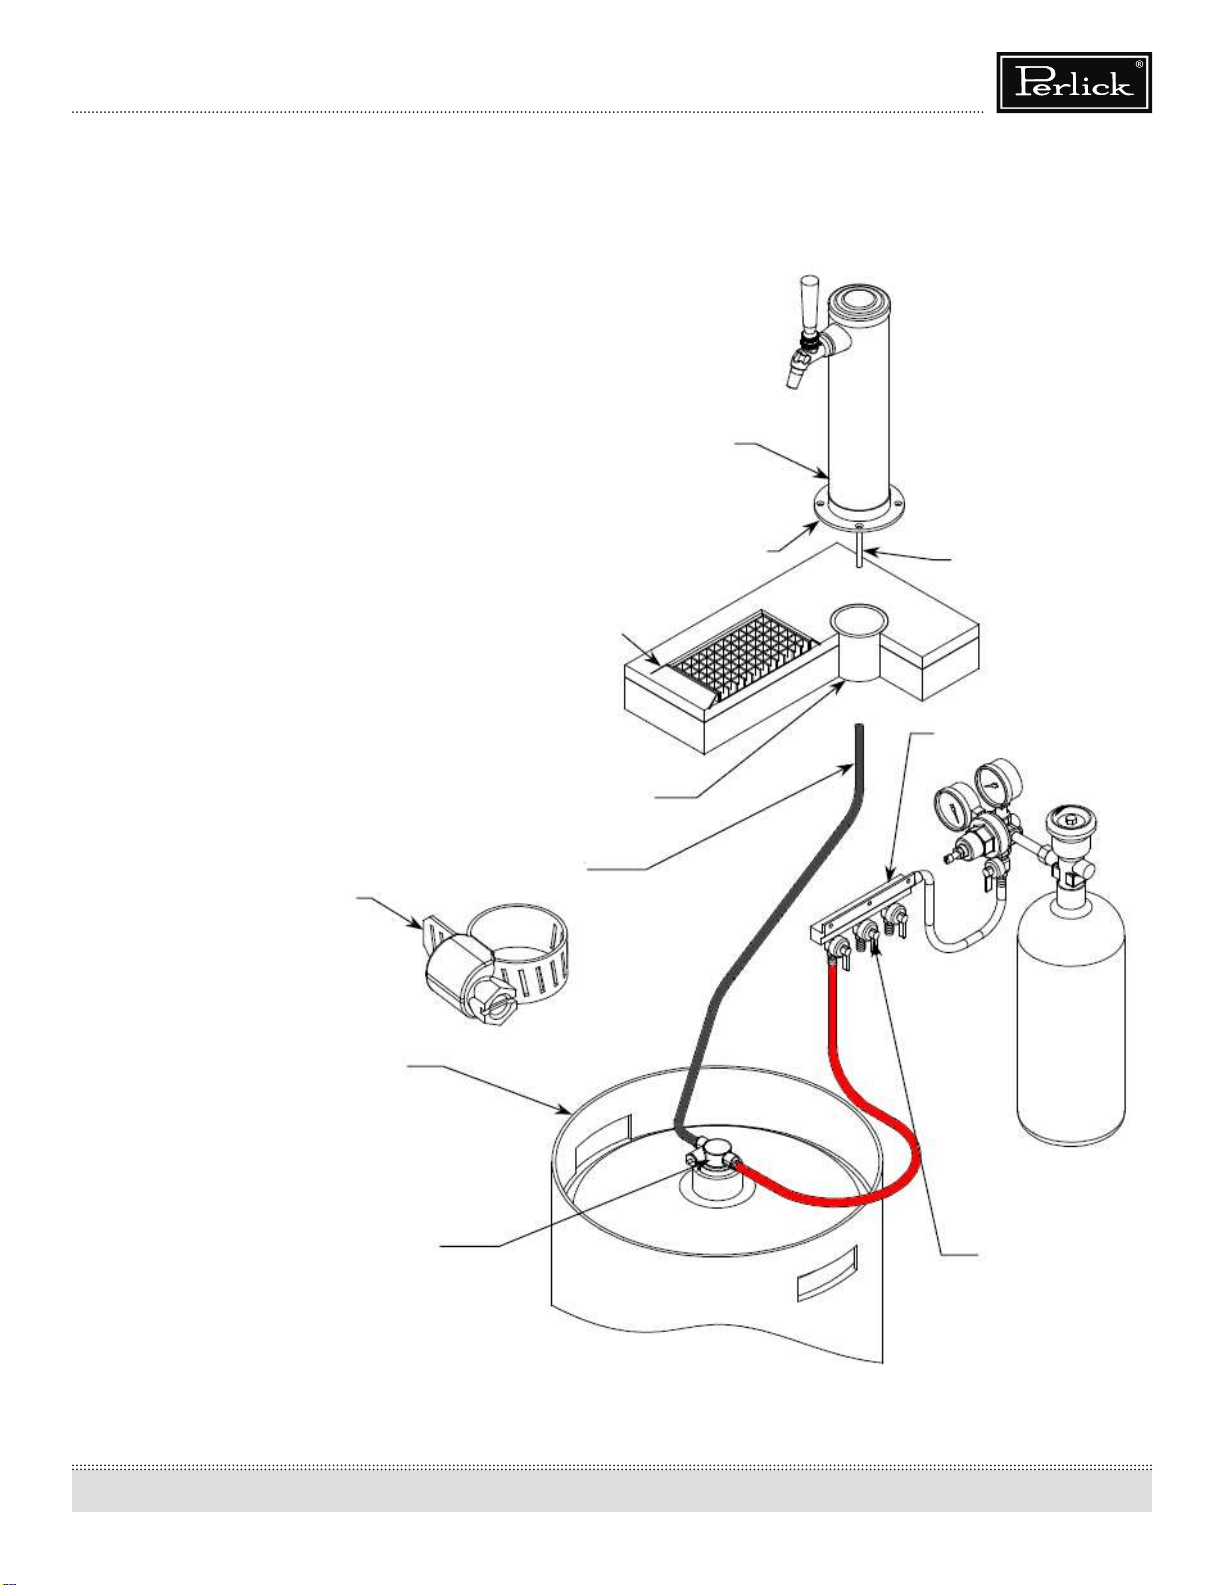
NOTE: Image does not accurately reflect positions of the different elements
within the unit. Positions and hose lengths showns are to clearly illustrate
proper connection methods only.
Dispensing head
Faucet lead
Apply silicone to
bottom perimeter
Drainer
Flange sleeve
Air distributor
Beer connection
Keg
All hose connections
use worm-drive
hose clamps (view
enlarged to verify)
Keg coupler
Distributor
is only on multiple
keg units, each keg
is connected to a
valve on the air
distributor. Single keg
is connected directly
to the regulator.
INSTALLING DISPENSING EQUIPMENT
Open tapping kit box and become familiar with its components.
If the dispensing head is going to be mounted on a counter top
directly above the refrigerated cabinet, have the countertop
predrilled using the supplied template or the template provided on
page 30. Make sure that the access hole in the refrigerated cabinet
is in line with the counter top holes. Remove any obstructions from
the access hole of the refrigerator. Follow instructions on pages 28
and 29 to properly install the tapping equipment on your Perlick
unit.
Loading ...
Loading ...
Loading ...