Loading ...
Loading ...
Loading ...
15
Operation & Installation Manual
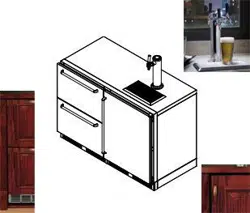
Signature Series Beer Dispensers (HP15, HP24 and HP48 models)
DOOR OPTIONS
Perlick residential units oer a variety of door panel design
alternatives; solid stainless steel, solid wood overlay, glass with
stainless steel trim and glass with wood overlay trim.
Solid stainless steel and stainless steel glass doors are shipped from
the factory with decorative stainless steel panels and handles in
place on the appliance.
Solid wood overlay and glass wood overlay doors are designed to
accept a decorative front panel to match surrounding cabinetry
and door handles. The panel and door handles are supplied by the
customer.
All Perlick units accept any of the above door congurations and
are fully interchangable.
IMPORTANT NOTE: Units with a beer dispenser only can utilize a
solid stainless steel door or solid wood overlay door.
IMPORTANT NOTE: Glass with stainless trim and glass with wood
trim may sweat in conditions with relative humidity over 75%.
WOOD OVERLAY INSTALLATION
Before beginning installation, check all components for proper t
and nish.
WARNING
• All overlay doors require a trim panel of at least 3/4” thick.
• The solid wood overlay panel should not weight more than
20 pounds.
• The glass wood overlay panel should not weight more than
10 pounds.
The following instructions cover installing a solid wood overlay or
glass wood overlay panel and handle to a door or drawer.
IMPORTANT NOTE: Contact the factory or visit www.
bringperlickhome.com for full size wood overlay panel layouts.
Once on the site, select ‘Service and Support’ from the top menu
bar and click on ‘Wood Overlay Templates’. Take care in chosing the
correct template for your specic model.
IMPORTANT NOTE: You must install optional lock and handle
PRIOR to mounting the wood overlay onto the door frame.
Panel drawings:
Refer to Figure 15 for 15” solid wood overlay panel (page 16).
Refer to Figure 17 for 24” solid wood overlay panel (page 18).
Refer to Figure 18 for 24” for glass wood overlay panel (page 19).
Refer to Figure 19 for 24” drawer wood overlay panel (page 20).
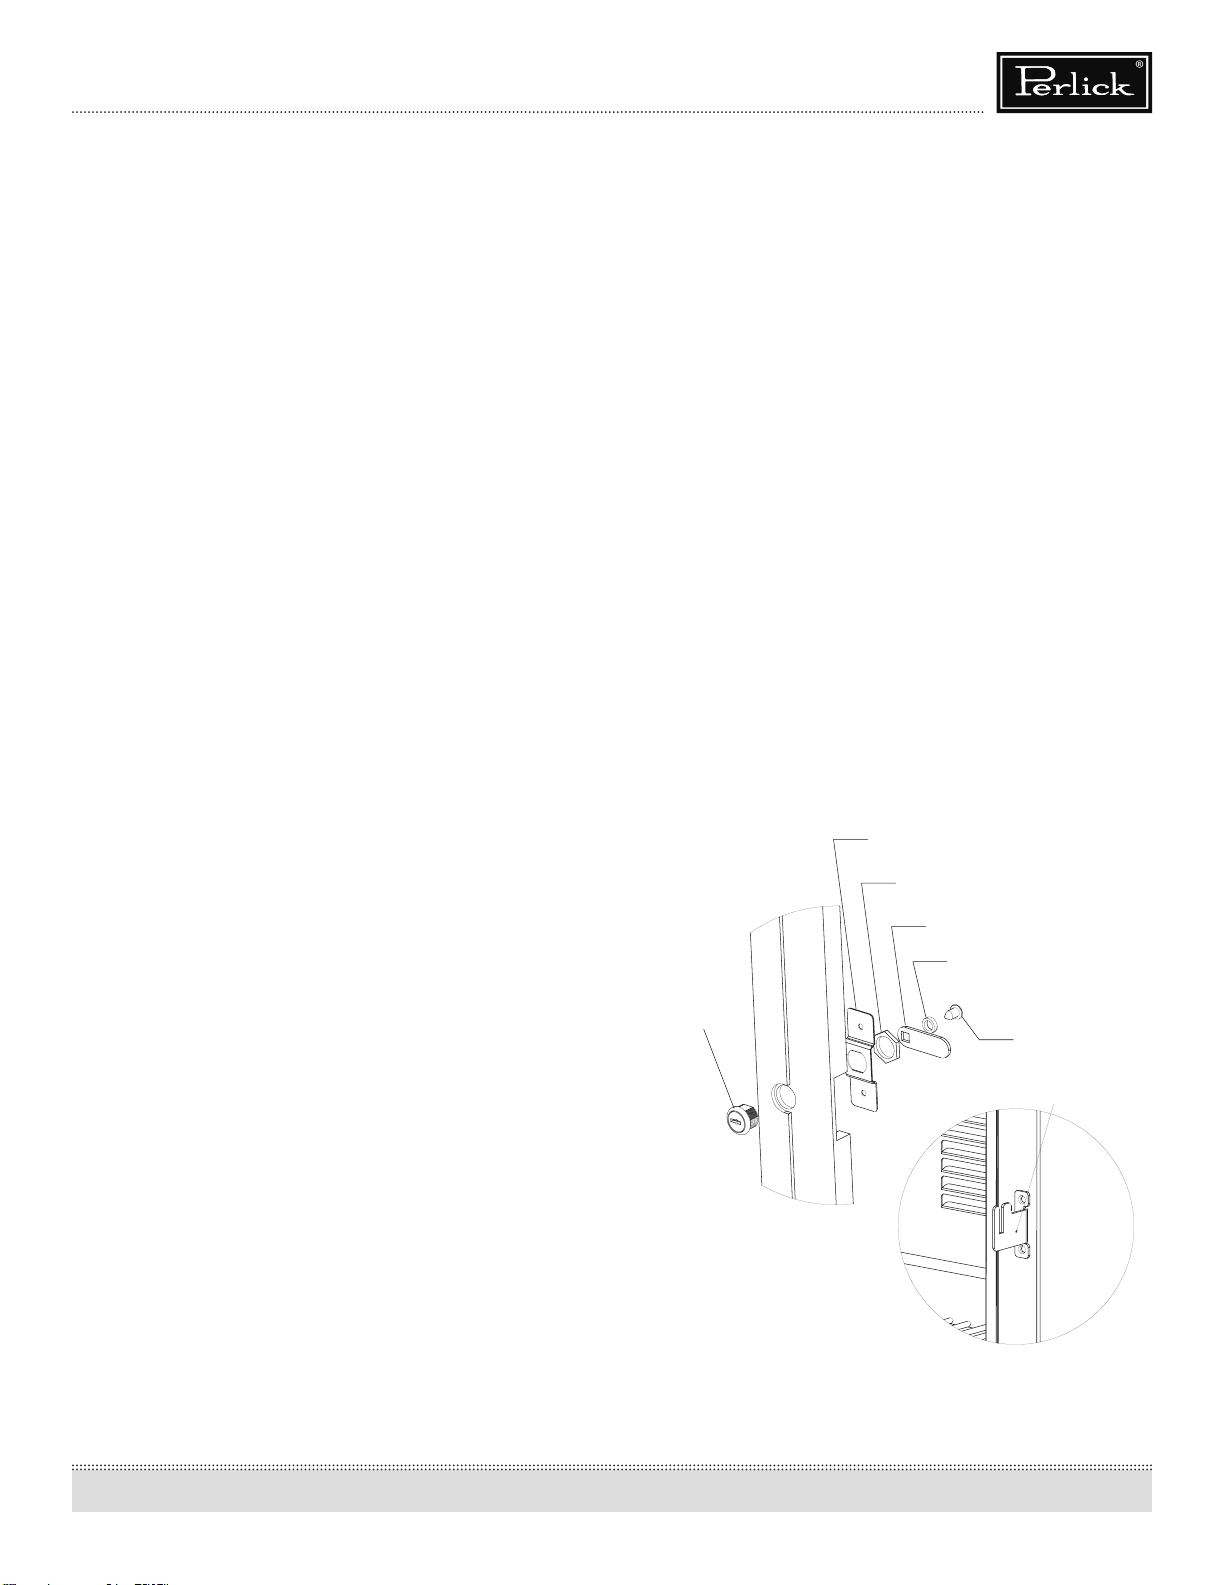
Door Lock Installation (optional)
When installing to wood overlay, perform lock installation before
mounting wood overlay to door.
1. See Figure 14 (below), attaching mounting bracket to wood
overlay.
2. Insert lock body and attach with nut.
Lock installation drawings:
Refer to Figure 16 for Lock Installation on 15” solid wood overlay
panel (page 17).
Refer to Figure 20 for Lock Installation on 24” solid wood overlay
panel (page 21).
Refer to Figure 21 for Lock Installation on 24” glass wood overlay
panel (page 22).
Refer to Figure 22 for Lock Installation on 24” drawer wood overlay
panel (page 23).
Mounting bracket
Screw
Lockwasher
Lock strike
Nut
Lock bracket
Lock body
Figure 14 - Lock installation
Loading ...
Loading ...
Loading ...