Rail — Header Segment
Rail — Middle Segments x2
Rail — End Segment with Trolley Stop Bolt
Master Link Set
(Including 1x spare set)
x 2
x 1
Extended Rail (39-2/5 inch) — Extended Middle Segment
Discard 1 Middle Segment (25-3/5 inch)
Extended Belt (approx. 249-4/5 inch)
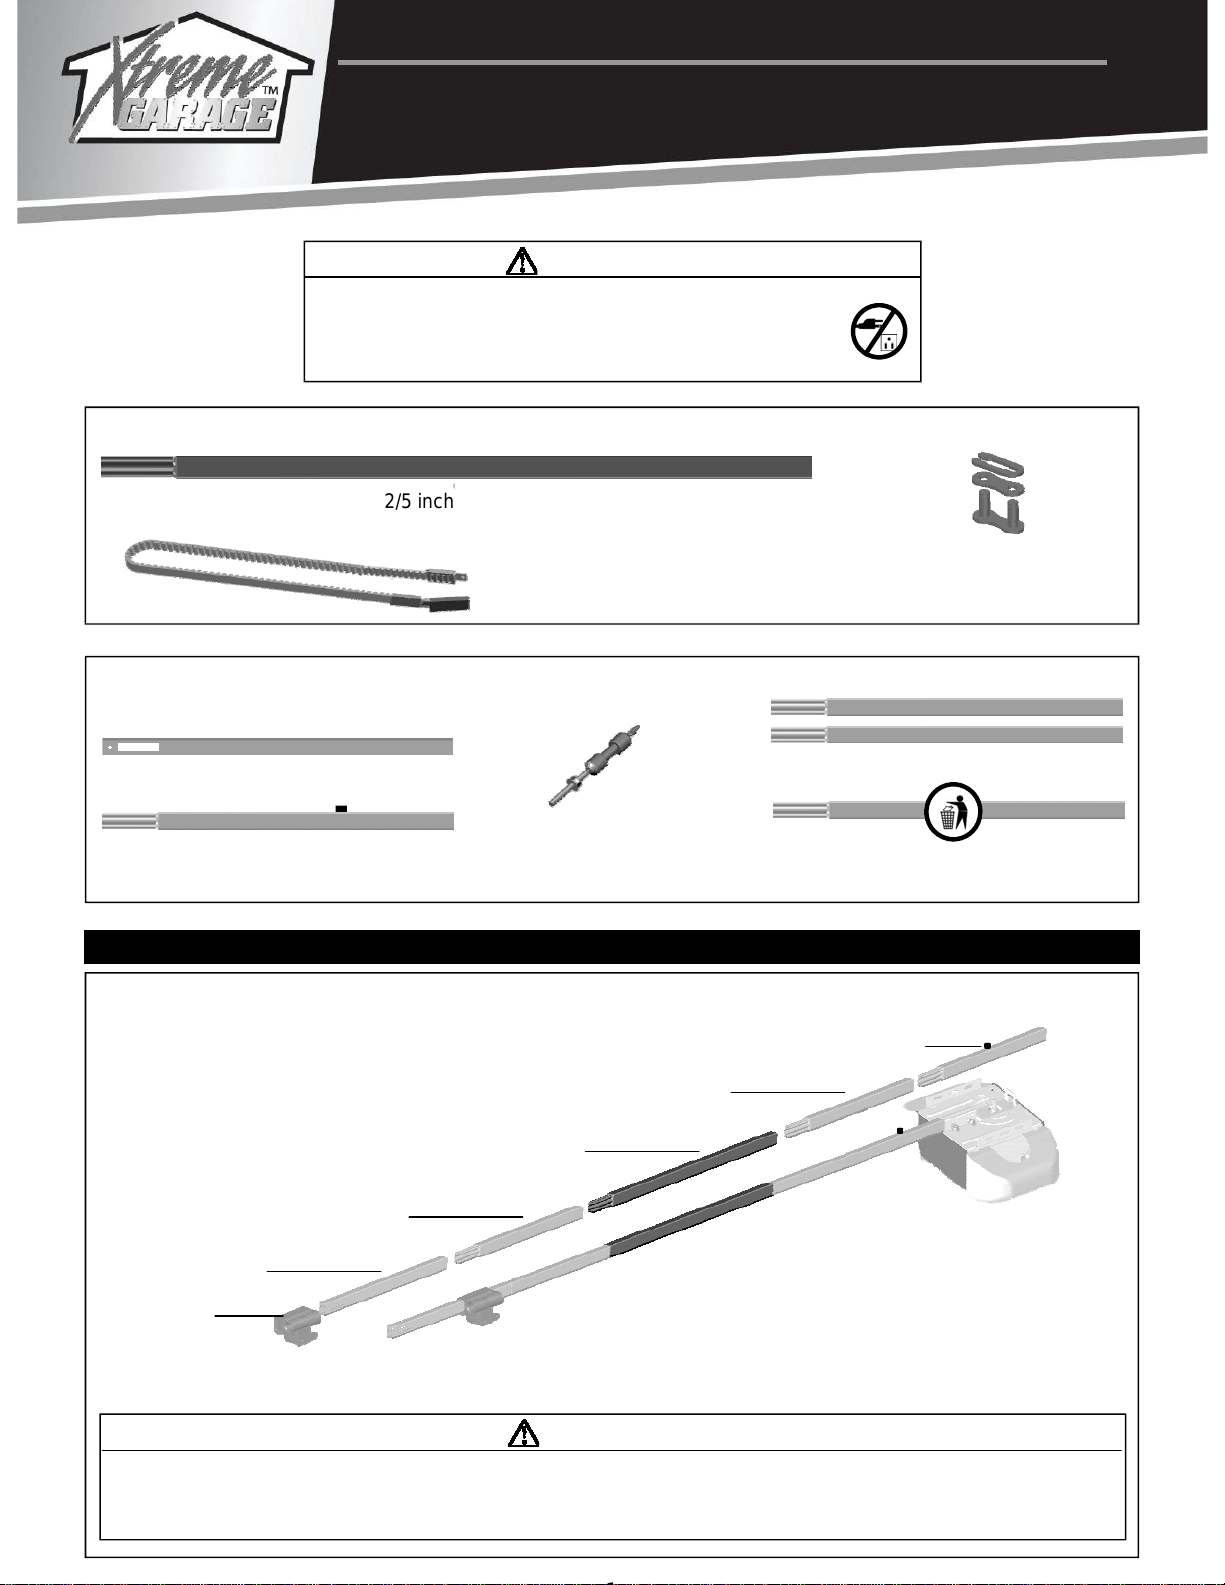
Kit Inventory
x 1
Components Required from Opener Inventory
End Segment with Trolley Stop Bolt
Extended Middle Segment (39-2/5 inch)
Original Middle Segment (25-3/5 inch)
Header Segment
WARNING
- Discard ONLY ONE of the original MIDDLE rail segment.
- ONLY 5 pieces of rail segment should be applied. NEVER connect extra rail segments.
- The opener only services door to max. of 8 FT. height. Door with other size please call service before installation.
Replace ONE of the original rail Middle Segment with the “Extended Rail Segment” in the middle of rail assembly.
STEP 1. To Assemble Rail with “Extended Middle Segment”
Original Middle Segment (25-3/5 inch)
GARAGE DOOR OPENER EXTENSION KIT
MODEL: 425-1600
WARNING
To prevent SERIOUS INJURY or DEATH:
- DO NOT connect power until instructed.
- CLOSE the door before installation.
Trolley Shaft
Please refer to “Rail and Trolley Assembly” in Owner’s Manual.
Trolley
1
2301 Traffic St. NE
Minneapolis, MN 55413
www.gdohelp.com
1-877-GDO-4402
1-877-436-4402
2
The Rail Assembly Extension with has now been finished.
Please proceed installation of opener starting with “Installing the Belt” in Owner’s Manual.
Step 3. Proceeding with Installation of Opener
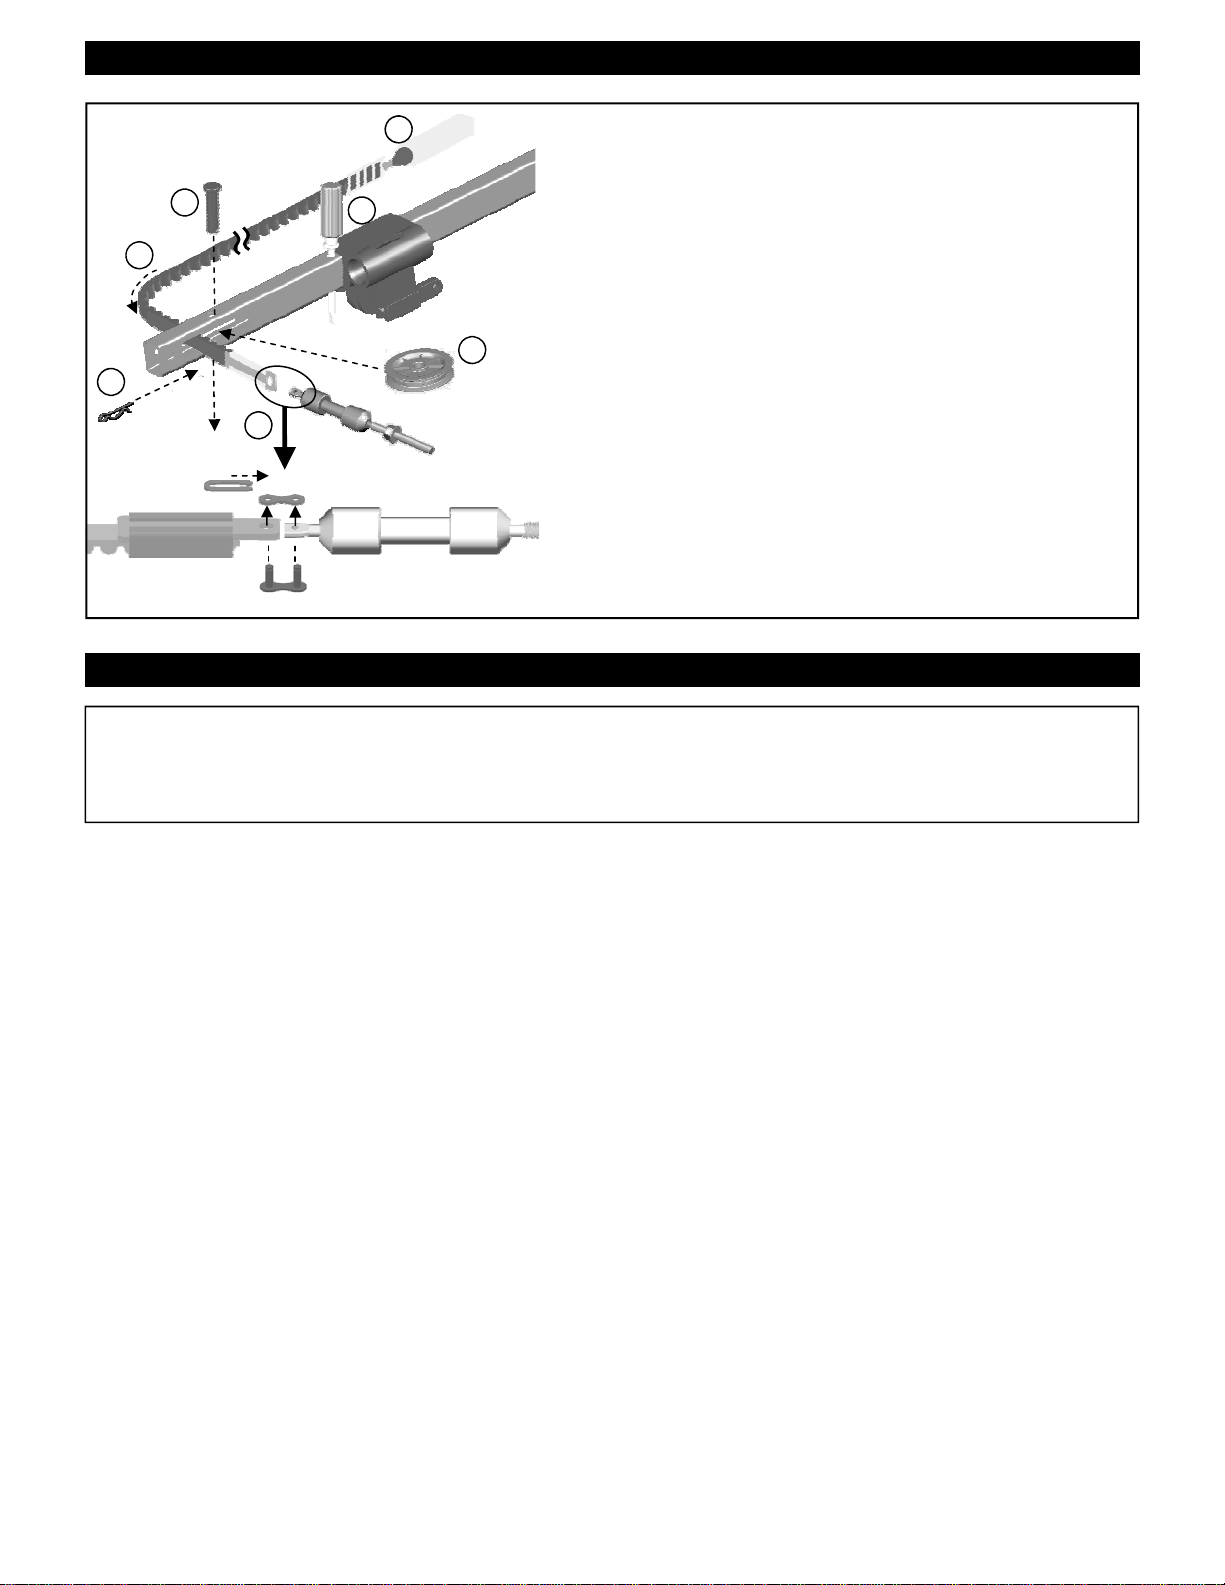
Step 2. Installing the Belt
Hitch Pin
1
2
Trolley Shaft
Clevis Pin
Pulley
3
4
6
5
7
2
Trolley Shaft Connector
Screwdriver
1. Place the belt beside the rail as shown
2. Temporary insert a screwdriver to the hole on the rail
apart from the slot, slide the trolley to the screw driver
and keep the position.
3. Grasp the end with Trolley-Shaft Connector and pass
through the slot on the Header Segment of the rail.
4. Insert the Pulley into the slot while the belt is hanging.
5. Secure the Pulley by inserting the 3/8” x 1-3/4” Clevis
Pin through the top of the rail.
6. Lock the Clevis Pin with a Hitch Pin. Rotate the Pulley
to ensure it spins smoothly.
7. Connect the Trolley Shaft to the Trolley Shaft Con-
nector on the belt, using the Master Link Set.
