Loading ...
Loading ...
Loading ...
3535
REPLACING THE OVEN LIGHTS
WARNING: Ensure the appliance is switched o before replacing the lamp/s to avoid
the possibility of electric shock.
■ NOTE: Oven bulb replacement is not covered by your guarantee.
■ Let the oven cavity and the heating elements to cool down.
■ Switch o the electrical supply.
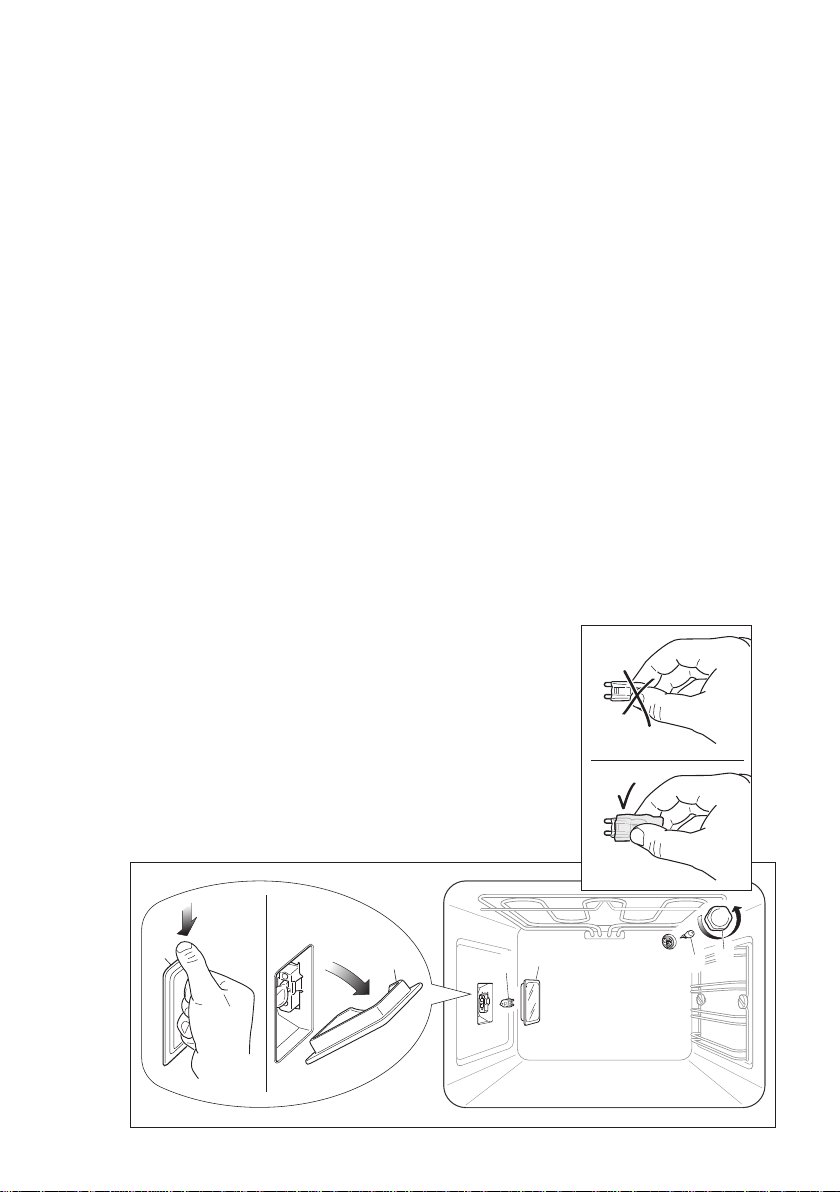
■ Left lamp (bottom main oven only):
– Remove the left wire rack and the side catalytic panel by unscrewing the xing
screws (see chapter USE AND CARE at page 14).
– Press down from the top the protective cover “A” (g. 28) and remove it by rotating
on the lower side.
IMPORTANT: never use screwdrivers or other utensils to remove the cover “A”. This
could damage the enamel of the oven or the lampholder. Operate only by hands.
■ Top right lamp (both ovens): Remove the protective cover “C” (g. 28).
■ Replace the halogen lamp “B” with a new one suitable for high temperatures having
the following specications: 220-240V or 230-240V, 50 Hz and same power (check
watt power as stamped in the bulb itself) of the replaced lamp.
IMPORTANT WARNING: Never replace the bulb with bare hands; contamination
from your ngers can cause premature failure. Always use a clean cloth or gloves.
■ Left lamp (bottom main oven only):
– Ret the protective cover “A” operating in reverse order.
ATTENTION: the notch in the inner edge of the cover must be oriented toward the lamp.
– Assemble the side catalytic panel and the left wire rack.
■ Top right lamp (both ovens): Ret the protective cover “C”.
The intended purpose of the lamps, tted on this appliance, is
to illuminate the oven cavity and thus help the user to better
monitor the food while cooking. These lamps are not suitable
for other usage (e.g. environments lighting).
This product contains more than one light source of energy
eciency class G.
A
B
B
C
1
2
A
A
WRONG
CORRECT
Figure 28
Loading ...
Loading ...
Loading ...