Loading ...
Loading ...
Loading ...

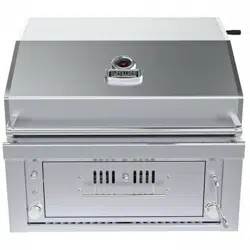
Rotisserie assembly can be purchased
individually either by individual item, or in a
complete set. The rotisserie assembly can also
be used with or without an infra-red back
burner.
Name
Qty.
Part No.
3 Burner Rotisserie set
1
P
-
RK
-
3B
Electrical Grounding Instructions:
The rotisserie motor is equipped with a three-prong grounding plug for your protection against electric shock. This
plug must be inserted directly into a properly grounded three-prong receptacle. Do not cut or remove the grounding
prong from this plug.
The rotisserie motor must be electrically grounded in accordance with local codes or, in the absence of local codes, in
accordance with the National Electrical Code, ANSI/NFPA 70-1990 or Canadian Electrical Code, CSA C22.1.
Do not use an extension cord to supply power to your grill. Such use may result in fire, electrical shock or other
personal injury. Do not install a fuse in the neutral or ground circuit. A fuse in the neutral or ground circuit may result
in an electrical shock hazard. Do not ground this appliance to a gas supply pipe or hot water pipe.
1.
Insert Rotisserie Motor into Motor Bracket Assembly.
2. Slide Prong Forks with the prongs facing away from the handle into Spit Rod. So that any food item
will be in the center between the two four prong forks.
3. Assemble Key Washer, Counter-balance and handle to Spit Rod. Slide Shaft Collar with long end
towards handle.
4. Insert motor extension cord three prong plug into an adjacent grounded GFCI receptacle outlet.
5. Before placing food item on forks when the rotisserie is being operated exclusively, it is strongly
recommended that a pan be placed on the grilling grids, beneath the food to catch the meat
drippings. This will prevent excessive buildup of drippings on the grids and facilitate cleaning.
When food item is placed on rotisserie, be sure that all Bolts are tightened securely.
6. Preheat the grill by setting all the burners on high, once hot, turn off all but the rear burner. The
spit hangs over the center, so that the meat is not directly over the heat. Place a drip pan on the
grill below the meat. Add about 1/2 inch of water to the drip pan.
7. Place the first pair of prongs onto the spit, then push the meat onto the spit and into the
prongs. Add the other set of prongs and push them into the meat securely anchoring it onto
the spit. Tighten the wing nut that holds the prongs in place and attach the spit to the brackets
on either side of the rotisserie.
8. The rotisseries rod comes with a counter balance weight, adjust it as needed. Start the motor
and make sure the meat is balanced on the spit so that it turns evenly. You may need to adjust
the grate and drip pan if your meat is large. Make sure the meat can turn with no obstructions.
9. Close the lid while the rotisserie does its job. The rotation evenly melts the fat in the meat and
naturally bastes the meat, but you may wish to baste with a mop sauce occasionally during
grilling. Check the meat with a meat thermometer for doneness before turning off the heat.
When done, remove the spit using insulated oven mitts. Place the meat on a clean platter and
cover it with foil while it rests.
GRILL START
-
UP
–
ROTISSERIE SETUP
PAGE 17
Loading ...
Loading ...
Loading ...